World of Warcraft TWW: The One-Armed Bandit Boss Guide
Welcome to this deep dive into the One-Armed Bandit fight in WoW TWW’s Liberation of Undermine raid. The War Within has brought new raid mechanics and the One-Armed Bandit is a big slot machine boss with a two-phase design. Liberation of Undermine has many great fights but the One-Armed Bandit’s adds, spinning coins and lightning pools is something special.
This guide will help raiders of all kinds understand what’s inside this fight’s dynamic phases, how the tokens work and how to handle the mythic difficulty changes that will push your group to the limit.
Core Concepts and Preparations for the One-Armed Bandit
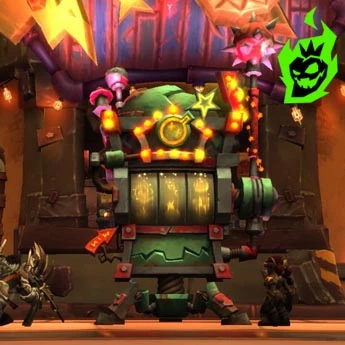
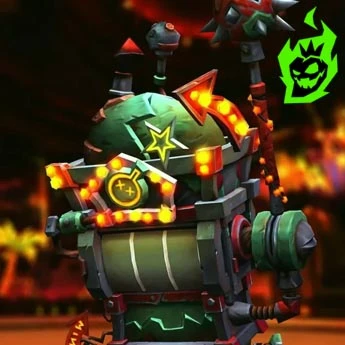
The One-Armed Bandit is a giant mechanical slot machine that takes up the whole room. It has a lever on the side and summons Reel Assistants with tokens of Flame, Shock, Bomb or Coin. Each token links to a powerful mechanic once inserted into the boss. The main goal is to insert the correct pairs of tokens within a tight timer while avoiding an immediate wipe. Positioning, target prioritization and group communication is key to keeping control of the chaos.
Raids will tell you that the boss’s full energy triggers Spin to Win cast, during which three Reel Assistants will spawn. Each add’s Overload cast can be interrupted and a debuff that needs to be dispelled ASAP is applied to random players. The whole group needs to keep track of add positioning, switch focus to kill them and then deliver the tokens to the boss through the extra action button. Failing to insert two unique tokens in 30 seconds will enrage the boss. Here is the table of the tokens and their combos:
| Token | Icon | Mechanic Triggered | Recommended Timing |
|---|---|---|---|
| Flame | Fire Symbol | Introduces moving fire zones or applies a large raid-wide DoT | Early combos or controlled waves |
| Shock | Lightning | Summons persistent coils that repeat dangerous mechanics | Later usage to avoid overcrowding |
| Bomb | Explosive | Spawns bomb adds that fixate players, leading to potential explosions | Spread out for AoE and CC |
| Coin | Gold Coin | Rolls across the arena, grants short buffs, offsets boss damage | Use coin re-roll to stun adds |
Managing these tokens is the lifeblood of the fight. Understand the differences between Flame, Shock, Bomb and Coin combos and it becomes more manageable to survive each phase. These tokens lead to the six possible combinations you need to complete to progress the fight. Each combination gives a new mechanic, either one time or recurring for the rest of the fight. Here is the table of the combinations and what they do:
| Combination | Repeat or One-Time? | Key Threat |
|---|---|---|
| Shock + Flame | Repeats | Moving fire swirlies that overlap later |
| Shock + Bomb | Repeats | Bomb adds fixating players, requiring CC and focused AoE |
| Shock + Coin | Repeats | Pulls players inward, dealing raid damage |
| Flame + Coin | One-Time | Intense raid-wide damage over time (requires cooldowns) |
| Bomb + Coin | One-Time | High-health fixating bomb adds, cannot be CC’d |
| Bomb + Flame | One-Time | CC-able bomb adds that explode in a 15-yard radius |
The repeated mechanics will be active every time the One-Armed Bandit’s energy bar fills. Raid teams that plan which combos to do first can reduce lethal overlaps later, especially with multiple coil mechanics happening at the same time.
Intermissions and Additional Considerations
During each Spin to Win, there is a mad rush to collect tokens. Adds will spawn in predictable locations and if a group member gets the dispellable flame debuff, it needs to be dispelled away from others. The explosion of fire swirlies upon dispel requires quick reactions. Healers also manage a strong slow and heal-absorb effect from Foul Exhaust which usually hits the whole raid. Here is the table of secondary mechanics outside of the tokens:
| Mechanic | Effect | Player Response |
|---|---|---|
| Pay-Line | Boss sends rolling casino chips in straight paths, dealing big damage and a stun on contact | Dodge lines, possibly stand near for a buff |
| Foul Exhaust | Heal-absorb debuff on the entire raid, includes a movement slow | Healers focus dispelling and topping up HP |
| The Big Hit | Heavy tank nuke leaving a lightning pool, plus a tank debuff making repeated hits devastating | Defensive cooldown usage; position pools away from adds |
In a typical run, tank players will face multiple The Big Hit casts, leaving behind swirling static fields. If left unchecked, the room will fill up with hazards. Once the group gets the Shock coil mechanics, a tank can interact with a coil to absorb two lightning pools, but that will trigger more danger from the coil’s effect.
Clearing the first phase requires a coordinated approach to the reel adds, chip rolling and lightning pool positioning. Then, once the boss goes into phase two, the whole raid group faces more coil spawns, beams and raid-wide damage. The synergy between well-prepared tanks, well-timed healing cooldowns and DPS focusing the right targets will win the fight.
Normal and Heroic Variations of the One-Armed Bandit Encounter

Normal in WoW TWW’s Liberation of Undermine is a more straightforward scenario but still a good learning ground for the basics. The One-Armed Bandit’s main mechanics—token insertion, coil summoning and chip rolling—appear in a simpler form. Add health is lower, Overload timers are longer and the room is more forgiving with fewer swirlies.
Here is the table of the normal changes:
| Aspect | Normal Feature | Key Adjustment |
|---|---|---|
| Add Health | Lower overall health | Faster kills, less chance of raid-overwhelm |
| Overload Timers | Increased intervals | Easier interrupts for groups with fewer stuns |
| Chip Rolling Speed | Reduced chip movement velocity | More time to aim coins at walls or adds |
| Heal Absorb Amount | Lower values from Foul Exhaust | Healers face fewer major spikes in group damage |
These changes give new or returning players a chance to get familiar with the base design of the fight. Each token combo can still punish mistakes but the lower numbers give some room to adjust strategies mid-fight.
Elements in Heroic Mode
Heroic increases damage output and add spawns. Boss timers leave less room for error, Overload casts happen more frequently. Pay-Line chips roll faster towards the edges and there are fewer safe zones in each cycle. Tanks take more damage from The Big Hit and need to use defensive cooldowns more often or get external help from healers. Here is the table of heroic changes:
| Aspect | Heroic Change | Raid Impact |
|---|---|---|
| Boss Health | Significantly increased | Longer engagements, higher DPS requirements |
| Overload Frequency | Faster cast times | Must rotate interrupts more precisely |
| Pay-Line Chip Speed | Chips roll with higher velocity | Quicker reaction time to avoid stuns |
| The Big Hit Damage | Tank nuke scales up | Tanks require additional healing or cooldowns |
Teams ready for heroic action should already be familiar with normal-level strategies. Same combos apply—Shock with Flame, Bomb, or Coin, and the one-time combos of Bomb + Flame, Bomb + Coin, or Flame + Coin. Each requires more coordination and movement due to the boss’s empowered kit.
Mythic Difficulty Adjustments and Challenges

Mythic in WoW TWW’s Liberation of Undermine amplifies everything about the One-Armed Bandit. It adds two main mechanics that require more movement, coin rolling and shock field management. Those who face this version will see bigger add bursts, faster Pay-Line chips and more need to clear lightning pools without losing the boss or tokens. Here is the mythic-only changes table:
| New Element | Description | Player Response |
|---|---|---|
| Enhanced Shock Fields | Two extra players receive the electric circle effect from The Big Hit | Spread out and place fields along the edges, possibly stacking with tank fields carefully |
| Real Attendant Shield (Dark Line) | At 25% HP, attendants gain a buff that prevents further damage | Coin re-roll aimed directly at the affected add to remove its shield |
A mythic kill requires top-tier coordination between those rolling coins and those focusing Reel Assistants. The Dark Line shield at low HP will prevent you from killing an add unless a coin re-roll hits it. Groups that call out the exact moment to re-roll the coin are much more likely to avoid the “Fraud Detected” enrage for not inserting tokens in time.
Mythic Coil and Shock Field Management
Mythic requires shock field placement. Every time The Big Hit hits the tank, two random players also get an electric circle, adding more lightning pools on the ground. Overusing coil absorption will trigger more flame swirlies or bomb fixate phases, so you must weigh the options carefully. Here is the mythic shock field management table:
| Field Element | Placement Advice | Risk Factor |
|---|---|---|
| Tank’s Primary Field | Keep it near the wall or corner, away from add spawns | Overlapping with raid paths causes constant damage |
| Additional Player Fields | Spread or stack if a defensive cooldown is available | Overlapping fields become a zone with lethal synergy |
| Coil Absorption Option | Allows clearing 2 fields at once | Triggers coil mechanic again, possibly mid-overlap |
| Overuse of Coil Absorption | Consecutive coil triggers lead to bomb or flame combos | More raid-wide stress from repeated spawns |
Deciding how many fields to clear at a time is a tough balancing act. Some groups prefer minimal coil usage to avoid repeated swirlies or bombs. Others prefer frequent usage to keep the ground clear of lethal puddles. Raid leaders need to weigh group mobility, healing and bomb control when making these decisions.
Mythic Attendants and Coin Re-Roll Tactics
The second mythic change is the Dark Line buff on Reel Assistants that appears below 25% HP. This buff prevents damage unless the add is stunned by a coin rolling through it. Your group’s coin management is key to not timing out on tokens. Here is the coin re-roll table:
| Coin Re-Roll Step | Description | Outcome |
|---|---|---|
| Low HP Attendant Call | DPS pause at ~30% HP and alert coin roller | Ensures the add is not accidentally killed before the shield appears |
| Shield Activation | Attendant hits 25% HP, gains Dark Line | DPS hold back a moment while coin is lined up |
| Coin Roll | A ranged or mobile player reactivates a fallen chip and directs it at the shielded add | Shield is removed, add is stunned, damage phase resumes |
| Token Insertion | Once the add dies, quickly retrieve its token and insert it | Maintains the momentum toward the next combo |
Groups that call out each step clearly do better at maintaining high DPS on other attendants while waiting for coin to land on the right target. One misstep or mis-aim and the group loses precious seconds for token insertion. Here are some survival tips:
- Position Fields Carefully: Each pool stacks electrical vulnerability if stepped in, so place them along the edges.
- Interrupt Overloads: Let no Overload cast go through or the raid will die too fast.
- Coordinate Coin Rolls: Work in pairs or trios to ensure a stable re-roll path for shielded adds.
- Save Heroism for Phase Two: The final burn phase is short with frequent coil beams.
Mythic success relies on field management, add stuns and group communication. Practicing each phase’s details ensures readiness for the final push to 0% boss health. Mythic One-Armed Bandit is one of the most synergy heavy fights in Liberation of Undermine. The extra shock fields reduce safe zones and the shielded Reel Assistants require creative coin usage. Victory gives the raid a sense of accomplishment and often access to The War Within endgame content.
Phase Two, Tanks, and Raid-Wide Coordination

After all 6 combos are inserted or the boss is at 30% HP, the One-Armed Bandit enters a second phase that removes the Reel Assistants. This phase has a set sequence of coils and beams that culminates in an all-out burn before the boss enrages. The room fills with leftover lightning fields, bombs if any remain and new coils that form beams to the boss. Here is the phase two table:
| Phase Two Cast | Timing | Mechanic Added |
|---|---|---|
| First Coil Spawn | Immediately in phase two | Beam that knocks players back; beam contact is near-fatal |
| Second Coil and Beam Volley | After ~15 seconds | Multiple target beams that players must spread for |
| Third Coil | After ~35 seconds | Continuous raid-wide pulsing damage until the boss is down |
| Final Enrage | ~60 seconds into phase 2 | Absolute one-shot effect if the boss remains alive |
Best approach is to group up for healing, avoid beams by watching marked players and save Heroism or similar if not used in phase one. Healers take raid-wide damage and each player’s positioning matters because any accidental coil beam contact will kill.
Tank Responsibilities and Damage Mitigation
Tanks are under pressure from The Big Hit and stacking vulnerability. Lightning pools placed wrong become a major obstacle in the final 30% burn. Good tank synergy is rotating defensive cooldowns with The Big Hit, moving the boss away from coil beams and minimizing tank movement to avoid pushing fields into the safe zones. Here is the tank rotation table:
| Boss Cast | Tank Action | Group Benefit |
|---|---|---|
| The Big Hit (1) | Main tank uses a personal defensive; off-tank stands ready | Reduced chance of immediate tank downing, stable boss positioning |
| The Big Hit (2) | Off-tank taunts, uses an external from a healer if possible | Spreads out vulnerability stacks and lightning pool coverage |
| The Big Hit (3+) | Consider using coil absorption if the field layout is too large | Clears up key areas, though reactivates coil mechanics if any exist |
| Enrage Timer | Maximize personal survivability while the raid finishes the boss | Ensures minimal tank deaths, extends time for last DPS push |
Group coordination list:
- Save Healing Cooldowns: Stagger them for continuous damage pulses from the third coil.
- Dodge Beam Connections: Marked players stand still for easy avoidance by others, or they move in a predictable pattern.
- Conserve Movement Abilities: Save gap closers or teleports for coil beams or powerful knockbacks.
- Push Final DPS: Once the boss hits the last coil sequence, rally the group to finish before the enrage.
Every second counts in phase two. The synergy between tanks, healers and DPS puts your raid in position to capitalize on the small windows of safety. Timely defensive cooldown calls keep the group alive for the final moments.
Phase Two Race
This final stretch requires focus on personal survival. Each coil beam or swirlie collision might cost a battle res or cause a chain of deaths. Overlapping mechanics from earlier shock combos add stress to an already stressful environment.
Once the boss hits 0%, your group gets a sweet victory and one of the most iconic fights in The War Within. Phase two is a thrilling test of skill and awareness that makes the One-Armed Bandit a highlight of Liberation of Undermine. Coordinated players who track coil beams and manage tokens throughout the fight win and often move on to the deeper challenges of WoW TWW with confidence.
Final Thoughts on the One-Armed Bandit Encounter in WoW TWW

The One-Armed Bandit is one of the boldest raid bosses in World of Warcraft TWW. Its slot machine inspiration brings unique mechanics, from rolling chips and re-roll coin stuns to shock coil persistence. Each of the six combos shapes the battlefield with swirlies, bombs or coin pulls. With phase two ending in a burn, raiders are on their toes the entire fight. Here is the overall progression table for this encounter:
| Stage | Key Moment | Raider Task |
|---|---|---|
| Energy Fill to 100% | Spin to Win triggered | Kill Reel Assistants, gather tokens, insert them fast |
| Combo Activation | Boss gains new mechanic or coil | Manage repeated swirlies or bombs, handle coil usage |
| Foul Exhaust & Pay-Line | High-pressure raid damage phases | Heal absorb removal, chip rolling, buff usage |
| Final 30% or 6th Combo | Phase two commences | Dodge beams, handle final coil spawns, burn the boss |
This progression table helps players quickly reference how the fight evolves so each role knows the constant pressure of meeting token deadlines, preventing Overload casts and mitigating big hits.
Group Composition and Raid Setup
Teams coming into this fight often have a mix of ranged and melee DPS, heavy healer coverage for raid-wide damage and tanks who can control and position. Clear communication from the raid leader or designated shot-caller is key for coin re-roll timings and shock field placement. Miss any detail and you’ll create unfixable hazards in the last minute. Here is a 20-person composition many groups find reliable:
| Role | Number of Players | Purpose |
|---|---|---|
| Tanks | 2 | Alternate boss aggro for The Big Hit, coordinate coil usage |
| Healers | 4 | Manage heavy raid-wide damage, provide external cooldowns |
| Melee DPS | 6 | Fast add kills, coin re-roll stuns when in range |
| Ranged DPS | 8 | Aerial coverage for bomb adds, flexible re-roll potential |
Flexibility in group makeup is possible, but remember that some combos are simpler when ranged classes help kite bombs or quickly re-roll coins at shielded adds. Healers need to track dispels on flame swirlies and keep up with Foul Exhaust slow + heal-absorb stacks. Here are some things to avoid:
- Late Token Insertion: Missing the 30-second window enrages the boss immediately.
- Uncoordinated Coin Rolling: Rolling chips too early or too late wastes stuns or risks hitting the raid.
- Excessive Coil Activation: Clearing lightning fields too often spawns a swarm of swirlies or bombs.
- Careless Beam Collisions: Letting coil beams hit random players kills the raid instantly.
Avoiding these mistakes requires constant attention, especially on mythic. Each raider has a part to play in inserting tokens correctly, stopping Overload casts and keeping the terrain as safe as possible.


