Mastering the Rik Reverb Encounter in The War Within
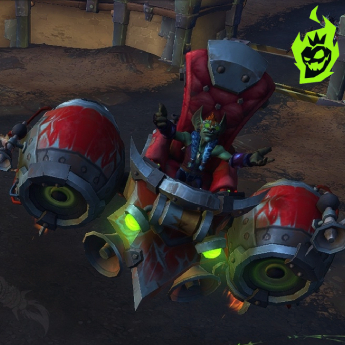
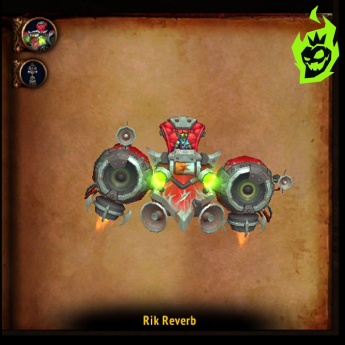
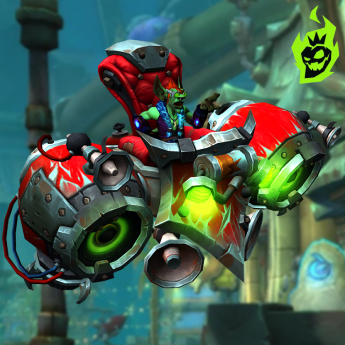
Rik Reverb is one of the best bosses in World of Warcraft The War Within (TWW) and in Liberation of Undermine raid. Players looking for a single-target encounter with layered mechanics focus on his two-phase rotation with amplifiers, raid-wide damage and heroic/mythic twists. This guide covers everything, from positioning and group compositions to mythic changes and recommended strategies. Normal and heroic strategies are also included so everyone can defeat Rik Reverb and adapt to his changing challenges.
Rik Reverb’s Key Abilities in TWW
Rik Reverb has several sound-based attacks, energy management and precise positioning. Make sure to read everything about each mechanic before entering the fight because raid synergy is key to survival. The table below summarizes his main abilities, triggers, damage and targets in The War Within.
Additional Details on Rik Reverb’s Key Abilities
Rik Reverb casts Amplification to create amplifiers that gain energy over 25 seconds. These devices deal raid damage if left alone, so they’re top priority for certain raid roles. The Sound Cannon beam is another big threat since it marks a random player and fires a deadly projectile that others need to avoid.
Positioning is key throughout the fight. Amplifiers spawn near the boss and near a random ranged player so players need to stay in specific spots for predictable spawns. Healers need to handle intense damage-over-time (DoT) on players draining amplifiers, especially on heroic/mythic.
| Ability | Trigger | Effect | Damage Range | Target |
|---|---|---|---|---|
| Amplification | Cast roughly every 20–30s | Summons two amplifiers that gain energy; overflow leads to heavy raid damage | 30,000 per pulse | Raid-wide if uncontrolled |
| Sound Cannon | Targets random player | Fires a delayed beam; direct impact leaves a severe explosion zone | 120,000 on impact | Single-target hit + AoE |
| Echoing Chant | Cast periodically | Forces each amplifier to emit multiple circling waves that inflict DoT | 50,000 per wave | Random players |
| Blaring Drop | Entering Phase Two | Expanding ring that one-shots anyone outside safe zones around amplifiers | Over 300,000 | Entire raid area |
| Feedback Nullifier (Mythic) | Passive on Amplifiers (Mythic) | Creates a shield preventing draining; removed by Faulty Zap collision | No direct damage | Amplifiers in Mythic |
Rik Reverb’s damage patterns revolve around a cycle of amplifiers to drain, Sound Cannon beams on random players and AoE bursts on the raid. Understanding each mechanic before entering the fight increases the group’s success rate since synergy is key. Practice in early attempts helps raiders learn how to stack, how far to move the boss and which times to drain amplifiers.
Phase One Strategy in World of Warcraft TWW

Phase One of the Rik Reverb fight features main tasks around amplifiers, tank swaps and dodging frontal attacks from the boss. The group needs to work together to drain amplifiers as they get full energy because one overflow can wipe the raid. The introduction of multiple mechanics in this phase—Echoing Chant, blue circle DoTs, and movement restrictions—keeps everyone on their toes.
Amplifier Management and Tank Coordination
Positioning helps control the spawn of amplifiers so they’re easier to drain. Tanks also swap roles around 4-5 stacks of the boss’s frontal debuff which increases damage taken on subsequent hits. Bloodlust is often used on pull to maximize burst and manage mechanics especially on heroic/mythic.
| Phase One Tasks | Approx. Timing | Role/Responsibility | Notes |
|---|---|---|---|
| Tank Boss on Spawn | 0s | Tank | Move boss ~20 yards to control amplifier spawn |
| Amplification Spawn | ~10–15s | Raid | Two amplifiers appear: near boss and random ranged |
| Drain Amplifiers | ~25s after spawn | Assigned players / third tank on heroic | Step in amplifier’s circle to drain, watch for heavy DoT |
| Echoing Chant | ~20–30s | Entire raid | Dodge repeated waves from each amplifier |
| Sound Cannon | Random intervals | Marked player | Stand still to let others dodge the incoming blast |
Though the initial part might seem simple, repeated and overlapping casts make players juggle multiple tasks. When an amplifier reaches max energy someone steps in to drain it, getting a big DoT in the process. Healers focus on keeping the “drainers” alive while also responding to Sound Cannon blasts and blue circle pulses.
Phase One introduces the main mechanics to beat Rik Reverb. Attention to detail is key, like moving the boss away from newly created amplifiers and spreading out to avoid overlapping AoE circles. Good communication ensures no amplifier reaches full energy and no one gets one-shotted. Tank swap rhythm around 4-5 debuff stacks keeps tanks stable, saves healer mana and resources for later phases.
Phase Two and Immunity Mechanics

Phase Two happens when Rik Reverb reaches full energy and goes into his immunity phase, creating lethal rings that expand around the arena. Everyone moves into safe zones around specific amplifiers that have a blue circle, gets knocked up and avoids immediate death from the incoming rings. Fast movement prevents casualties but Echoing Chant waves during this phase makes positioning even more complicated.
Challenges During Phase Two and Immunity
Phase Two has overlapping hazards that require quick movement. Raid members watch the randomly chosen amplifier that gets the blue safe zone, then move to that direction to avoid the expanding ring. Additional waves from the amplifiers require sidestepping to stay alive. Good amplifier stacking in Phase One pays off here since the group moves shorter distances between safe zones.
- Identifying Safe Amplifier
Look for the amplifier with the bright blue circle.
Prepare to run to that direction when the ring expands. - Dodging Continuous Circles
Be aware that Echoing Chant waves still happen.
Strafe around to avoid large ground circles that do heavy DoT. - Transitioning Back to Phase One
Boss leaves immunity after multiple ring expansions.
Expect leftover amplifiers from Phase One to remain, to be drained as soon as the boss is targetable again.
Executions in Phase Two make a big difference between the raid thriving or dying. Having a plan to move as a group with the blue safe zone ensures less people get caught outside the ring. Phase Two repeats if the boss lives long enough, but the third time it’s infinite ring casting and enrage, and the fight becomes a race.
Phase Two is all about movement, positioning and personal awareness. Identifying the safe amplifier fast protects the raid from lethal rings. Meanwhile Echoing Chant waves make everyone keep spatial discipline. Overcoming these mechanics allows for a smooth re-entry into Phase One and more damage on Rik Reverb while managing leftover amplifiers.
Mythic Mode Adjustments for Rik Reverb

Mythic mode adds Feedback Nullifiers and upgraded Sound Cannon soaking mechanics that require more coordination. Blue shields on amplifiers prevent them from being drained unless certain conditions are met, adding a layer of strategy around Faulty Zap collisions. Boss has more health and each major ability deals more damage, putting healers under pressure.
Details on Mythic-Specific Mechanics
Players with Faulty Zap must collide with another player with Faulty Zap to release a jolt that removes the blue shield from one amplifier within 80 yards. This requires group positioning and deciding which amplifier to free for draining at any given time. Sound Cannon requires a group soak that splits the damage, but if anyone’s health drops below 75% during that soak they become entranced and lose control for a short time.
| Mythic Mechanic | Effect on Encounter | Recommended Strategy |
|---|---|---|
| Feedback Nullifier | Blue shield on each amplifier preventing drains | Arrange Faulty Zap collisions to remove shields in a planned order |
| Faulty Zap | Marked players with large blue circles; collision unleashes a jolt | Group up pairs away from the raid, aiming the jolt at the chosen amplifier |
| Enthralled by Sound (entranced) | Occurs when anyone in the Sound Cannon soak drops below 75% HP | Use a dedicated group at full health to absorb the beam safely |
| High Raid Damage | Overall damage increased by ~35% compared to heroic | Assign extra healing cooldowns and track DoTs with caution |
| Amplifier Spawn Timing | Amplifiers spawn on a tighter schedule | Maintain consistent positioning to keep amplifiers close together |
Mythic mode turns the entire fight into a dance of grouping, soaking, draining and not going below certain health thresholds. Communication about which amplifiers need to be drained ASAP is key and each Faulty Zap collision must be planned. Tanks, healers and damage-dealers are under intense pressure but every raid role has a part to play in solving the puzzle efficiently.
Mythic makes Rik Reverb a challenging fight that rewards execution. Failing to remove Feedback Nullifiers in time leaves amplifiers at full energy and the raid gets overwhelmed with AoE pulses. Poorly handling the Sound Cannon soak results in multiple entranced players and the group’s damage output is crippled. Practice, defined roles and assignments are the key to success in World of Warcraft TWW mythic raids.
Tips for Amplifiers and Debuffs
There are various debuffs throughout the fight, including from draining amplifiers and standing in overlapping blue circles. Raiders usually assign 1-2 ranged players to drain most amplifiers on normal but heroic strategies can include a dedicated third tank. The blue circle DoT causes significant nature damage and players affected should not drain any amplifier.
Careful Distribution of Roles
Groups that want minimal chaos usually pick a few people to step into amplifiers. This limits the chaos of multiple people having partial knowledge. However those specialists get extra damage on heroic due to a stacking debuff so some lineups recruit a spare tank or rotate among multiple people. The table below is a guideline for amplifier draining and circle debuffs.
| Draining Tactic | No. of Assigned Players | Difficulty Setting | Pros | Cons |
|---|---|---|---|---|
| Solo Ranged Drainer | 1–2 players | Normal | Easy to coordinate, fewer potential mistakes | Drainer health spikes can overwhelm healers |
| Rotation Among DPS | 3–4 players | Heroic | Spreads out DoT damage, lowers risk for any single drainer | Potential confusion if assignments overlap |
| Dedicated Third Tank | 1 specialized tank | Heroic/Mythic | Manageable due to tank’s defensive cooldowns | High damage intake on that tank if healers are overstretched |
In heroic or mythic, repeated draining triggers a stacking debuff that increases damage taken from subsequent drains. Raid compositions weigh the benefits of a specialized tank approach against the added healing load that arises. Groups without a third tank often cycle in multiple DPS with personal cooldowns to distribute the burden. Blue circle carriers focus on avoiding amplifier drains since the extra nature damage can push them to lethal thresholds.
Amplifier draining is a core mechanic that splits the fight’s success between role assignments and communication. The presence of blue circle debuffs adds an extra layer of caution so players watch their health before stepping into the draining circle. Coordinating rotations for heroic or mythic makes sure no one gets too many stacks and keeps the raid stable in World of Warcraft TWW.
Raid Composition and Final Thoughts on Rik Reverb

Composition planning is key when facing Rik Reverb. Most groups bring 2 tanks on normal, heroic lineups often bring a third tank if drainer damage becomes too much. Typical setups are 4-5 healers for a 20man group so no single healer is overwhelmed with heavy spikes.
Important Roles and Their Purpose
Defining each role’s priority is important especially in higher difficulties. Tanks handle the boss’s frontals and keep him away from amplifiers, healers balance single target triage with raid wide coverage and DPS focus on minimizing downtime by killing extra adds or soaking beams. Rehearsing these before the pull reduces confusion.
- Tanks: Swap 4 or 5 stacks of the frontal debuff. In heroic, a third tank might drain amplifiers.
- Healers: Watch out for those amplifiers being drained, especially if the draining phase overlaps with raid wide damage. Cover group soaks for Sound Cannon on mythic.
- DPS: Spread out for blue circles. Track your position for quick movement during Phase Two’s immunity rings.
A well oiled machine happens when all these roles work together. Tanks keep the boss in the right spot, DPS do their assigned task without stepping on each other’s toes and healers react to heavy hits. The whole team reacts to Echoing Chant, Sound Cannon and amplifier draining cues.
Rik Reverb is a highlight of The War Within, single target focus with raid coordination mechanics that scale from normal to mythic. His phases require disciplined spacing, efficient draining and movement to safe zones. The enrage in the third Phase Two adds a timer, groups that manage amplifiers well in earlier phases will be rewarded. Every role matters and precise coordination turns a chaotic fight into a structured encounter with a good loot.
Overall, Rik Reverb offers a memorable fight in World of Warcraft The War Within, especially with mechanics like Amplification, Sound Cannon, and Feedback Nullifiers. This combination of damage management, tank swaps, and quick movement ensures a dynamic raid experience that tests every aspect of group execution. By reviewing each phase, planning roles in advance, and sticking to consistent positions for amplifiers, groups are well prepared to triumph over Rik Reverb and progress further in Liberation of Undermine.
