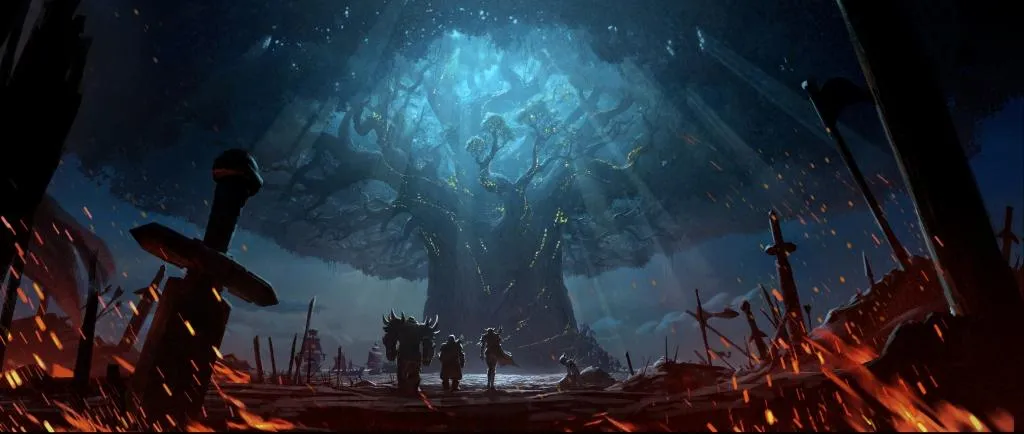
The War Within Cauldron of Carnage Boss Guide
The Cauldron of Carnage in World of Warcraft The War Within is a 2 boss fight where you have to split the raid, manage dots and plan movement across a big arena. The arena is split in a middle zone where both bosses meet to do some crazy stuff. Gathering information on bomb placements, beam dodging and synergy between the two groups is key to success throughout the whole fight.
Raiders who like single target power will feel at home here as almost all damage requirements are single target at a time before switching to the other. Each side has their own mechanics that add depth and fun to the fight. Certain phases including the middle clash create raid wide damage spikes that require precise movement and resource management.
Below are the sections that will cover the structure of the Cauldron of Carnage fight, including an overview of both bosses, their abilities, heroic and mythic strategies and important synergy concepts for your group. Expect references to yard ranges, movement bars, toy mini-bosses and big raid damage events that keep this fight dynamic from start to finish.
Overview of Cauldron of Carnage
The Cauldron of Carnage in WoW TWW is a 2 boss fight that requires positioning, dot management and consistent DPS. The main goal is to have both bosses drop at the same time. This is due to a shared enrage that ramps up fast if one boss outlives the other for too long. Raiders split into 2 groups, one for Flarendo and one for Torq, fighting on opposite sides of the arena.
Having a good layout during the fight requires awareness of several numbers, health pools, yard distances and the fight’s damage potential. Not spreading out can result in overlapping dots, not soaking or interrupting critical abilities will result in one shots. The War Within design ensures that even small mistakes add up over time. Below is a quick summary of the most important numbers to keep in mind:
| Element | Number/Range | Significance |
|---|---|---|
| Boss Separation | Over 40 yards | Prevents them from going immune and keeps players safe |
| Opposite Boss Distance | Over 60 yards | Avoids double dot stacks from both bosses at once |
| Middle Clash Duration | 20 seconds | Intense burst period where both bosses meet in the center |
| Bomb Soak Radius | Large circle | Requires grouping up to reduce raid-wide damage |
| Voltaic Images Range | 10 yards AoE on contact | Explodes if they reach a player or expire, leaving lightning |
Stick to these points and you’ll reduce chaos throughout the fight. When planning your strategy assign at least one tank, a few damage dealers and a healer or two to each boss side. The rest of the raid can be balanced based on DPS and healing output. After each central clash switch sides to reset dot stacks to prevent the raid from getting overwhelmed especially later in the fight.
Raiders who want to dominate in Cauldron of Carnage should practice movement patterns and memorize spawn timers. Being ready to adjust positions ensures your group keeps up with bomb soaks, adds spawns and big boss abilities. Once you’re comfortable with the basics Flarendo and Torq’s mechanics become easier to handle.
Mechanics for Flarendo
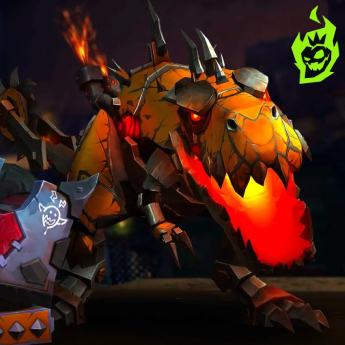
Flarendo is on the left side of the arena and has a variety of lethal abilities that revolve around fire, bomb soaking and beam control. The T-Rex spawns big explosive devices, hurls molten beams at random players and does a stomp that threatens the tank. Recognize these abilities and respond quickly to keep the team on Flarendo’s side. Below is a table of Flarendo’s main mechanics:
| Ability | Description | Raid Response |
|---|---|---|
| Flaming Bomb | Drops a big bomb on a random spot; if unsoaked, deals severe raid-wide damage | Group inside the bomb’s circle to soak; on Heroic, leaves a fire pool |
| Roar Cannon | Launches a beam toward a random player, dealing high damage in a line | Aim the beam away from the other side; everyone else dodges the line |
| Eruption Stomp | Heavy tank damage plus an upward knock; creates lava waves from stomp location | Tank uses defensive; group avoids lava waves that spread outward |
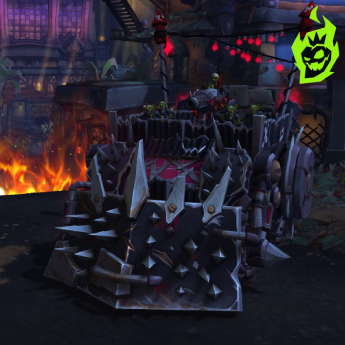
React quickly to Flaming Bomb is crucial. That bomb deals raid wide damage that grows if fewer players are in the soak zone. Coordinate with your group to group up near the bomb just before it explodes. On Heroic the remaining fire pool will be an obstacle for the rest of the fight so placing bombs wisely around the perimeter is important.
![]()
![]()
Flarendo’s beam attack is random but often happens just before or after a bomb spawns. Mark a corner for beam baiting if possible. That way your raid can keep the center area clear and spare the other group from having to watch for beams crossing into Torq’s side. Flarendo also does the Eruption Stomp which requires direct tank survival and group wide awareness so players can dodge the waves that spread outward.
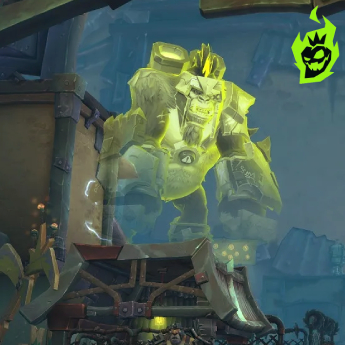
Mechanics for Torq
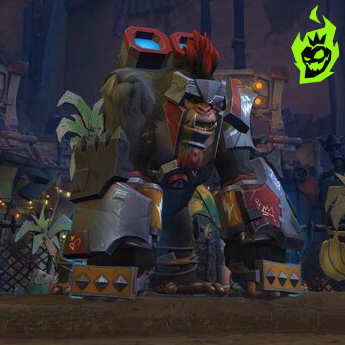
Torq is on the right side of the Cauldron of Carnage and requires players to handle lightning hazards, movement bars and adds. Each of Torq’s mechanics rewards positional awareness. The gorilla’s resource system which fills when players move and empties when standing still creates a constant pressure for DPS and healers. To understand Torq’s demands check the list below:
- Static Overload Bar
Each player on Torq’s side has a bar that fills with movement.
If the bar fills the player is stunned for a few seconds. - Lightning Bash
A big single target attack on the tank.
Defensive cooldown usage is recommended for the tank. - Voltaic Images
Lightning adds spawn and fixate on random players.
They explode within 10 yards on contact leaving a lightning pool on the ground.
Players watch their movement meter closely to make sure it doesn’t fill up during heavy movement phases. Minimize unnecessary repositioning to avoid being stunned at a critical moment. The tank should anticipate every Lightning Bash while the rest of the group is aware of Voltaic Images. If the adds spawn root or snare them so they don’t wander into the group.
Voltaic Images are sometimes timed to coincide with heavier parts of Torq’s cycle. Some groups stack near the wall, wait for the images to spawn then move away in a neat formation. This keeps the lightning pools contained in one zone and saves space for future phases. Torq’s side can feel more intense if the group’s damage or healing is not balanced. With practice though the gorilla’s patterns become second nature.
Shared Boss Abilities and Dot Management
Both Flarendo and Torq have a unique dot mechanic that punishes players within range of either beast. Standing within 60 yards of a boss periodically applies a stacking debuff. Absorbing multiple versions of that debuff from both bosses at once is catastrophic. The standard approach is to stay on your side and never go near the other boss unless transitioning after the middle clash.
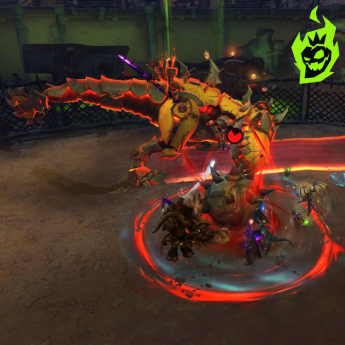
The fight also has a special moment where both bosses charge to the center and clash for 20 seconds. During that time the side based mechanics stop but players are bombarded with extra waves and swirling hazards that require movement. Healers need to be ready for heavy raid wide hits while DPS push out as much damage as possible on the boss they are focusing.
- Avoid Overlapping Dot
Stay on your assigned side to avoid doubling up on dot stacks.
Switch bosses when they clash ends to reset your current boss’s dot. - Central Clash
Lasts 20 seconds.
Both bosses deal extra raid wide damage, plus multiple waves and circles to dodge. - Positioning Coordination
Keep each boss at least 40 yards apart so they don’t go immune.
Stand at least 60 yards from the other boss so only one dot is applied at a time.
Spreading out around each boss’s side solves most of the raid’s problems. When the middle clash ends, switch to the other side. This resets the dot stacks. Managing these transitions is key to minimizing stress for your healers and maximizing damage uptime. Groups that coordinate these aspects generally do well in the Cauldron of Carnage without getting overwhelmed by the dot scaling.
Heroic Mode Adjustments

The Heroic version of the Cauldron of Carnage adds permanent fire pools for Flarendo’s bombs and a new layer of danger from Torq’s Voltaic Images. These additions force players to be more precise with their spacing and crowd control. Positioning mistakes are more punishing on Heroic especially if bombs spawn off the edges of the arena and fill up valuable space with fire. Here is a table of the Heroic changes:
| Heroic Feature | Effect | Handling Approach |
|---|---|---|
| Permanent Fire Pools (Flarendo) | Each bomb leaves a large fire patch indefinitely | Spawn bombs close to walls and keep track of safe zones |
| Extra Voltaic Image Behavior | Adds spawn more frequently and drop a lingering lightning patch on expiration | Kiting paths must be well-defined and images should be crowd-controlled fast |
These changes scale up the fight without changing the underlying mechanics. Flarendo’s side will see more spatial management, as repeated bomb detonations fill the arena with fire. Torq’s side will see more add waves, so stuns, slows and targeted burst on Voltaic Images.
A tight Heroic strategy might revolve around assigning roles for each side. Some groups have a single “toy herder” for Mythic (though that’s explained elsewhere), but on Heroic it’s more about general bomb soaks and add crowd control. Coordination between the two sides is key, especially during the central clash. Once you master the normal and refine your movement patterns, Heroic is within reach as long as you stay calm and adapt to the new hazards.
Mythic Mode Strategy
Mythic mode for Cauldron of Carnage cranks up every mechanic and adds a whole new layer to the fight. The fundamentals from Heroic are still important but the upgraded abilities and extra overhead from the global “Toy Tussle” mechanic will test your raid’s endurance. Flarendo’s Roar Cannon splits into three beams instead of one and Torq’s Voltaic Images always leave a silencing field on expiration, making space control even more critical.
In Mythic, voice chat or raid signals might be helpful. Tanks need to coordinate cooldowns for every big hit, DPS need to confirm who’s handling each set of toys and healers need to map out their cooldowns for the middle clash which gets more destructive as the fight goes on. The ultimate approach in Mythic is to keep the sides stable, handle every new wave of Flarendo bombs or Torq images systematically and manage the toy mechanic below.
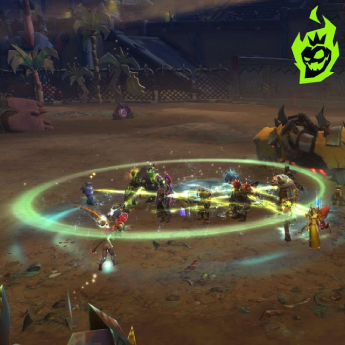
Toy Tussle in Mythic Mode
At the start of every new phase segment in Mythic, small toy versions of Flarendo and Torq will spawn in the arena. These toys will bounce around each side and any player who gets close to them will punt them away. If a T-Rex toy collides with a gorilla toy they will explode and apply a stacking debuff to the entire raid. Leaving too many toys alive until the intermission will invite a massive chain explosion that can wipe the raid.
- T-Rex Toys and Gorilla Toys
Spawn in each section near the boss’s side.
Bounce away from the direction of any player who gets close. - Toy Explosion
Any T-Rex toy that collides with a gorilla toy will explode and apply a raid wide debuff.
More stacks = more ticking damage over time. - Intermission Toy Surge
At the central clash any remaining toys will rush together and explode simultaneously.
High chance of a wipe if too many remain.
Players will usually designate one or two members to punt the T-Rex toys across the arena, pushing them towards Torq’s side where they will collide with gorilla toys. A well timed collision will result in a single explosion that the healers can absorb. Try to manage collisions in small increments so the entire raid isn’t burdened with 10 or more dot stacks at once.
Managing the toy tussle is the difference between a clean Mythic kill and a chaotic meltdown. Everything else from the Heroic version is still present so fire pools, additional Voltaic Images and triple beams from Roar Cannon are still active. The synergy between bomb soaks, add management and toy punting is what defines the Mythic challenge in the Cauldron of Carnage.
Preparation and Tips
Raids entering this fight in World of Warcraft The War Within will have a better chance of completing it if they plan ahead. Tanks, healers and DPS all have roles to play in the success of the fight. The bombs, beams, waves, adds and toys stack on top of each other until both Flarendo and Torq die. Here is a table with preparation tips:
| Role | Recommended Stats & Actions | Key Focus |
|---|---|---|
| Tank | High stamina and mitigation; practice defensive timing | Handle Eruption Stomp or Lightning Bash with cooldown usage |
| Healer | Strong raid-wide healing throughput; coordinate big CDs for clashes | Prepare for heavy damage spikes when the bosses meet |
| DPS | Balanced single-target output; quick bursts for adds | Aid bomb soaks, help CC Voltaic Images, and focus boss HP evenly |
If players get short instructions on voice or text chat: which side they start on, how to move during the clash and how to rotate after each segment. Tanks must be mindful of positioning the bosses far enough apart so no immunity triggers. Healers track big damage spikes especially from bombs and central collisions. Meanwhile, DPS make sure neither boss is left with a significantly higher health pool when one is about to die.
In summary, your raid’s synergy matters more than your gear levels. Study bomb timers, practice add control and do smooth side switches and you’ll get there. World of Warcraft TWW encourages creativity so try different approaches if the standard positioning doesn’t fit your team’s style. Once the Cauldron of Carnage is on farm, all that’s left is to min-max your kills.
Final Thoughts on Cauldron of Carnage
The Cauldron of Carnage is a unique challenge that rewards teamwork and positional awareness. Flarendo will punish you if you don’t soak bombs or stand in fire pools, Torq will punish you if you’re not coordinated. The new mechanics in Heroic mode (permanent fire patches and frequent Voltaic Images) will keep you on your toes, and Mythic mode’s toy tussle adds even more complexity to the fight.
Groups that refine their strategy in Normal and Heroic will usually transition smoothly to higher difficulties. Mythic mode amplifies every core mechanic from lower modes, so your group will have to manage area denial and movement even more. Watching yard distances, soaking bombs, monitoring bar resources and controlling add spawns are the keys to success.
Fighting Flarendo and Torq in World of Warcraft The War Within feels awesome. Standing tall after defeating both behemoths is a high point for any raid team. Whether you’re perfecting bomb soaks on the left side or chaining CC on the right side, each phase of this fight requires coordination and skill. If you can handle the mechanics maelstrom you’ll have a fight to remember in the Cauldron of Carnage.