Sprocketmonger Lockenstock Boss Guide – World of Warcraft: The War Within
Sprocketmonger Lockenstock is the 5th boss in World of Warcraft: The War Within (WoW TWW) and this fight is all about spatial awareness, invention mechanics and phase management. Many raid groups say the Sprocketmonger Lockenstock fight is around 6-8 minutes long depending on group composition and average item level. You need to be coordinated at all times to overcome the conveyor belts, electrified floors and deadly bombs. This guide covers Heroic and Mythic modes and provides tips on stats, roles and positioning.
Encounter Location and Basic Overview
The arena for Sprocketmonger Lockenstock in The War Within has a unique layout with 3 parallel conveyor belts and 2 smaller ones in the middle. The boss starts in the middle but moves around a lot once the electrified zones appear The encounter location affects a lot of group positioning and survival. Wide conveyor belts give you freedom of movement, the smaller ones in the middle have instant death holes and trap placements. Each belt pushes you in a certain direction which can interrupt your casting if not planned around. The Wire Transfer sections of the floor change location at predictable intervals.
Positioning near the conveyor belt edges helps to avoid forced movement. Tanks usually keep the boss near the safe zones and ranged attackers spread out to dodge rockets or beams. Understanding these hazards is key because they get worse with each new phase transition.
| Conveyor Belt Type | Movement Direction | Notable Hazards | Safe Zone Status |
|---|---|---|---|
| Long Belts (3 total) | Forward/Backward | Minimal traps in Normal mode | Often remain unelectrified |
| Short Belts (2 total) | Sideways | Holes and spike traps | Rarely fully safe |
| Electrified Sections | Static Floor Zones | Rotating arcs of lightning | Belts remain unaffected |
Frequent checks on these belts help with planning movement and spacing for damaging abilities. Groups that quickly adapt to shifting belt speeds usually find it easier to maintain optimal damage uptime on Sprocketmonger Lockenstock. Preparation for random conveyor belt hazards starts by assigning players to safe zones on the floor. Healers watch out for players who step into death holes or traps in the middle belts. DPS roles focus on maximizing hits while avoiding belt pushes or electrified arcs. A steady and informed approach to the battlefield layout is the foundation for the rest of the fight.
Phase One: Mechanics and Strategy
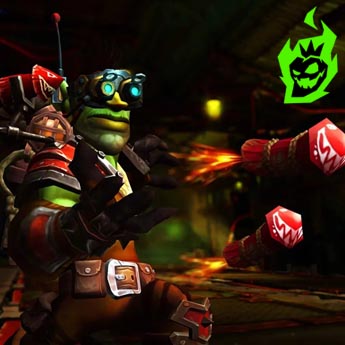
Phase One of Sprocketmonger Lockenstock has simple mechanics around Wire Transfer, Sonic Ba-Boom and debuffs on the tanks. The boss stays in this phase until around 100 energy then the next phase triggers. During this phase the whole fight is single target damage with minor raid wide threats. During Phase One players see recurring casts that require positional movement and situational awareness. Standing in the wrong spot during Wire Transfer will cause unnecessary health loss. Tanks have a stacking slow debuff from each of the boss’s melee swings. A few seconds after the slow stacks Pyro Party Pack arrives and the tank needs to move out of the group to minimize explosions.
Healers see Sonic Ba-Boom applying a group wide DoT that stacks if not healed quickly. Ranged players get Screw Up marks and drills will spawn beneath them for a few seconds. Proper spacing avoids stuns and keeps raid members free to do maximum damage. These are the core of Phase One and are repeated until the boss changes phases.
| Mechanic | Description | Counter-Strategy |
|---|---|---|
| Wire Transfer | Randomly electrifies floor sections | Move to safe zones or belts |
| Sonic Ba-Boom | Raid-wide damage + DoT | Healers prepare burst healing |
| Screw Up | Drills spawn beneath marked players | Spread to avoid stuns |
| Pyro Party Pack | Tank bomb with falloff damage | Tank moves out to a far edge |
| Debuff Slow | Stacking slow from boss melee | Tank swap and mobility cooldowns |
DPS priority remains straightforward: maintain single-target damage on Sprocketmonger Lockenstock, avoid personal mistakes, and handle each new hazard promptly. Mastering Phase One requires refined movement to dodge electricity, quick healing response to Sonic Ba-Boom, and proper tank awareness of bombs. The mild nature of these early threats allows the raid to focus on maximizing damage. Surviving these initial steps smoothly positions the group for success once the next phase triggers.
Phase Two: Surviving the Full Energy Onslaught
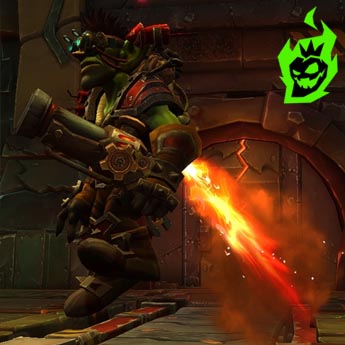
Sprocketmonger Lockenstock goes into Phase Two at 100 energy. This phase lasts around 20 seconds where the boss floats to the far side of the room and channels a big raid wide damage. All belts speed up and the floor gets more hazardous with more circles spawning rapidly.
During this short but intense period players start at the entrance of the arena. The boss hovers opposite the entrance and blasts the raid with pulses of damage and heal-absorption effects. Each belt now moves faster and small traps appear at irregular intervals in the middle sections. Ranged players find vantage points from safe edges to do damage on the boss. Tanks who choose to stay mobile might be able to do partial threat or intercept smaller adds if they spawn on specific difficulties. Melee players have a real challenge to navigate belts to get to Sprocketmonger Lockenstock to do damage. Proper group coordination is key to recover from knockbacks and avoid lethal holes on the shorter belts.
| Factor | Effect on Raid | Mitigation Tools |
|---|---|---|
| Conveyor Acceleration | Increases belt movement speed | Use mobility cooldowns |
| Boss Channel Damage | Pulse AoE + possible heal-absorb | Healers coordinate big cooldowns |
| Trap Placement | Random traps on smaller belts | Assign spotters to call out traps |
| Circles to Dodge | Spawn frequently across the floor | Keep eyes on ground indicators |
| Positioning | Long distance from boss for ranged | Move up edges for DPS output |
Coming out of Phase Two relatively healthy is key to surviving subsequent upgraded abilities. Boss damage also rises after each transition, adding further stress on the group. Surviving the Full Energy OnslaughtIf you stay calm during the 20 seconds of Phase Two it’s easier to stabilize once Phase One mechanics resume. Communication about trap locations, belt hazards and cooldowns is key. Phase Two repeats multiple times and the boss gets cumulative damage buffs until Sprocketmonger Lockenstock is defeated.
Inventions and Their Upgrades
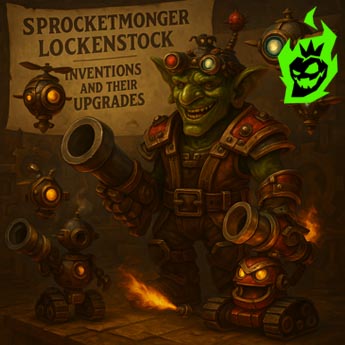
Sprocketmonger Lockenstock deploys three types of Inventions throughout the fight. Each invention has different mechanics and complexity. After each Phase Two one invention becomes more dangerous and combines with other inventions for more overlap. In Phase One the first wave of inventions includes pylons that shoot fire beams, cannons that fire rockets and magnets that pull everyone in. These spawn on conveyor belts, visible a few seconds before they activate. When multiple inventions activate at the same time overlapping effects create more hazards. Upgraded versions of these inventions appear after each Phase Two. The first upgrade increases the size and intensity of the fire beams (becomes void beams). The second upgrade turns the rockets into void orbs that deal more raid wide damage if they hit players. The third upgrade has not been fully documented but early tests imply it merges magnets with an even stronger pulling force.
Common Upgraded Inventions
Void Beams (Pylon Upgrade): Widened beams that occupy more floor space.
Void Orbs (Rocket Upgrade): Harder-to-see orbs dealing higher damage on impact.
Enhanced Magnets: Potential for stronger pulling force or stuns.
Coordinating movement to avoid stacked mechanics becomes more important when inventions overlap. The group keeps track of belt positions for each upgrade to know where to be safe. By looking at the upcoming belt cycle and invention spawns raiders can reduce the chance of getting hit by multiple hazards at the same time.
Heroic Mode: Mines and Timing Details
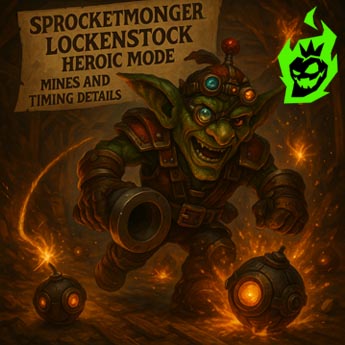
Heroic mode introduces a new mechanic with mines. These spawn in a set pattern three times per Phase One and require precise timing to detonate to avoid big explosions.
On Heroic four mines spawn in fixed locations after a short warning. If left alone for too long they detonate together and deal raid wide damage. Stepping on a mine also triggers an explosion that affects the whole raid and leaves everyone with a short debuff that increases damage taken from subsequent mine blasts.
Each mine detonation also deals personal damage to the player who triggered it and applies a separate debuff that makes it unsafe for that player to trigger another mine soon after. This means four different players need to step on each mine in a specific order, usually with around 2 seconds between each detonation to allow the raid wide debuff to fall off.
| Mine Number | Activation Time Window | Debuff Applied to Stepper | Raid-Wide Debuff Duration |
|---|---|---|---|
| 1 | ~5 seconds after spawn | 1-minute personal debuff | 2 seconds per mine |
| 2 | ~7 seconds after spawn | 1-minute personal debuff | 2 seconds per mine |
| 3 | ~9 seconds after spawn | 1-minute personal debuff | 2 seconds per mine |
| 4 | ~11 seconds after spawn | 1-minute personal debuff | 2 seconds per mine |
Timing these detonations requires attention to electrified zones. Raid leaders often assign specific players to each mine to avoid confusion and make sure no two mines are stepped on too closely together.
This adds more raid coordination since each explosion can be lethal if not handled properly. Groups often assign backups for each mine in case of movement-impairing debuffs or inconvenient belt pushes. By planning a strict sequence and rotating who triggers the mines, raids adapt to the added complexity of Heroic.
Mythic Mode: Polarity and Foot Blasters
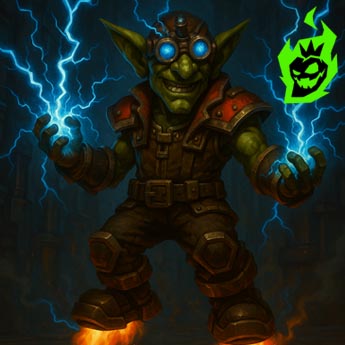
The Mythic version of Sprocketmonger Lockenstock has a polarity system similar to older multi-target fights and a twist on Foot Blasters that requires group coordination.
Upon pull half the raid gets a Positive buff and the other half gets a Negative buff. These polarities shift periodically during the fight, usually after an Activate Inventions cast. Players of opposite polarity who touch each other generate a burst of damage and a knockback that throws them around the arena. Foot Blasters also have polarity. A Foot Blaster with Positive polarity must be triggered by a player with the same polarity. Triggering a Foot Blaster with the wrong polarity triggers raid wide damage (8 million in many tests) and a severe DoT. The combination of shifting polarities and Foot Blaster locations is a high stakes puzzle.
Mythic Polarity Survival List
- Maintain Polarity Separation: Position the group in two clusters based on polarity.
- Identify Foot Blaster Polarity: Only a matching polarity steps on the device.
- Watch for Periodic Polarity Swap: Use Warlock Gates or quick movement to regroup.
- Staying separated by polarity reduces accidental overlaps that cause raid wide damage and knockbacks.
Staying separated by polarity reduces accidental overlaps that cause raid wide damage and knockbacks. Marking Foot Blasters ahead of time and calling out their polarity ensures the correct players take action. This synchronizes the group and limits the risk of instant wipes, preserving stability for the last phases of the boss.
Positioning Tactics and Warlock Gate Usage
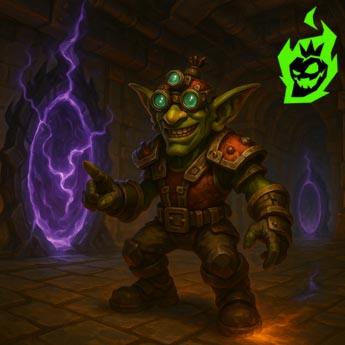
Positioning in The War Within raid is very different during the Sprocketmonger Lockenstock fight. Warlock Gates help with consistency and speed when crossing belts, especially during polarity shifts or running bombs out of the group.
Smooth transitions between electrified floor sections and safe belt strips require planning. Melee players often stand along the edges of belts to reduce displacement, while ranged clusters stay further back where possible. Tanks manage the boss near the center or slightly off to the side, based on upcoming Wire Transfer zones. Warlock Gates are a valuable tool to cross dangerous belts without falling into holes or stepping on traps. In Mythic mode many teams place two Warlock Gates for each polarity group. This allows quicker regrouping when a polarity swap occurs or when someone needs to travel from one corner of the arena to the other.
Warlock Gate Placements Table
| Gate Placement | Purpose | Recommended Classes for Setup |
|---|---|---|
| Center to Entrance | Rapid evacuation or push into Phase Two | Warlock + Additional Mobility |
| Diagonal Over Belts | Swift crossing if belts move sideways | Warlock + Possibly Hunter Feign Spots |
| Positive/Negative | Separate gates for each polarity group | Warlock with Polarity Macro |
Teams that refine their gate usage limit the confusion of conveyor belts and respond faster when bombs appear on tanks. Each Warlock Gate location is often tested in practice runs to confirm reliability.
Good gate placement and group movement creates a smoother flow to the whole fight. This is especially important in later phases where multiple inventions activate in quick succession. Using clear positioning markers and practicing Warlock Gate usage minimizes downtime and safer transitions.
Best Classes, Roles, and Stats for the Fight
Choosing the right mix of classes and specs helps reduce kill times in the Sprocketmonger Lockenstock fight. Tanks with mobility, healers with AoE healing and DPS with burst do well in this encounter. Specific stats also help, especially during movement phases. Raid leaders often include tanks with gap-closing abilities to handle the Pyro Party Pack bomb. Healers who can top raid members quickly after Sonic Ba-Boom DoTs or polarity collisions improve overall survivability. DPS classes with single-target damage and personal defensive cooldowns add security when belts isolate them temporarily. The group’s average item level is around 445–455 for Heroic and 460+ for Mythic progress. Some teams push higher to handle the enrage timers seen in advanced kills. Stat preferences vary by class, but Haste and Mastery are often recommended for faster reactions and more healing or damage during chaotic phases.
Recommended Roles and Stats Table
| Role | Recommended Classes | Key Secondary Stats | Reasoning |
|---|---|---|---|
| Tank | Vengeance DH, Prot Warrior | Haste, Versatility | Mobility, damage reduction, better bomb handling |
| Healer | Resto Druid, Holy Paladin, Preservation Evoker | Mastery, Crit | Strong raid-wide heals and good recovery from burst |
| Melee DPS | Rogue, Havoc DH, Retribution Paladin | Haste, Mastery | High burst, mobility, personal defensives |
| Ranged DPS | Shadow Priest, Marksmanship Hunter, Mage | Crit, Haste | Quick movement, flexible targeting, sustainable output |
Haste often allows players to cast spells rapidly and weave in defensive responses on short notice. Versatility and Mastery offer valuable damage mitigation and consistent throughput for classes that rely on stable damage or healing.
Groups that balance movement, strong heals and burst damage see smoother progression against Sprocketmonger Lockenstock. Choosing classes that excel under conveyor belt movement and quick reaction times reduces the risk of falling behind on mechanics. Equipping gear that emphasizes secondary stats maximizes performance during high-pressure moments.
Sprocketmonger Lockenstock Final Thoughts
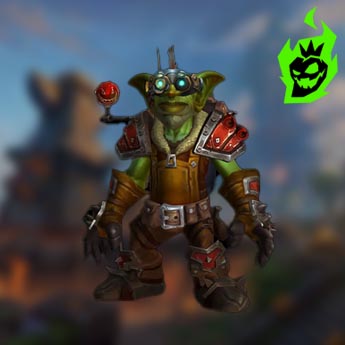
Sprocketmonger Lockenstock is a high-pressure fight in WoW TWW due to overlapping mechanics, belt chaos and positional challenges. Each difficulty level adds more complexity that requires preparation and adaptability.
As the 5th boss of The War Within, Sprocketmonger Lockenstock tests the raid’s coordination. Phase One teaches players how to handle bombs and random ground effects, Phase Two puts them in a short period of extreme danger. With each transition, inventions evolve and the boss’s damage increases. Teams that master Phase One and Phase Two in Normal or Heroic are ready for Mythic where polarities and foot blasters add more complexity. Practice sessions that refine belt movement, bomb running and polarity separation create a more stable environment for the final attempts.
Final Reminders List
- Track the Boss’s Energy: Prepare for Phase Two at 100 energy.
- Assign Mine Activators: In Heroic, 4 players per set of mines.
- Use Warlock Gates: Optimize belt crossing during illusions of safety or polarity swaps.
- Separate by Polarity: In Mythic, keep Positive and Negative apart to reduce collisions.
- Focus on Single-Target Burst: The fight is all about burning Sprocketmonger Lockenstock fast.
Sprocketmonger Lockenstock requires agility, awareness and clear communication. Each phase gets harder but with good planning and timing these obstacles become manageable. Those who adapt to the belt and keep their position win and become legends of WoW TWW raiding.
