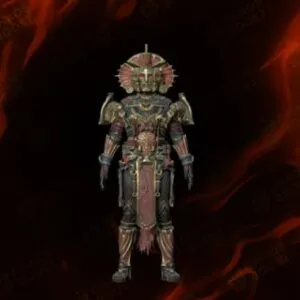
PoE 2: Trialmaster Boss Guide
Path of Exile 2 has many great boss fights and Trialmaster is one of the coolest. He shows up after you’ve completed 3 separate Ultimatum events, each with 10 waves, to collect the required fragments. Many exiles want Ascendancy points from this fight so they’ll face the Trialmaster for a game changing reward. The whole experience is wave based combat, resource management and a final showdown with the boss’s unpredictable attacks and arena mechanics.
The Fight Against the Trialmaster
The Trialmaster fight is a test of raw power and positioning. It’s physical damage bursts, massive arena effects and a series of deadly waves that require strong defensive layers. If you want to get extra Ascendancy points this fight is very appealing but you need to be prepared from the start of the first Ultimatum wave. Many players just burst the boss before running out of Mana but awareness of the movement mechanics is just as important for overall survival.
To illustrate how the fight goes, it helps to see the main stages and threats. Below is a table that summarizes the main parts of the fight, from the initial wave progression to the final showdown with the Trialmaster in his arena:
| Stage | Features | Threat Level | Recommended Response |
|---|---|---|---|
| Ultimatum Waves | Series of 10 waves, including random monsters and mini-bosses | Moderate | Maintain DPS to clear fast and conserve flasks for crucial fights |
| Fragment Assembly | Door mechanism requiring 3 distinct fragments to unlock | Low | Insert each fragment promptly and avoid inventory clutter |
| Initial Boss Phase | Trialmaster emerges, uses physical-based melee swings and slam hits | High | Use strong defenses such as Armor, Evasion, or Energy Shield |
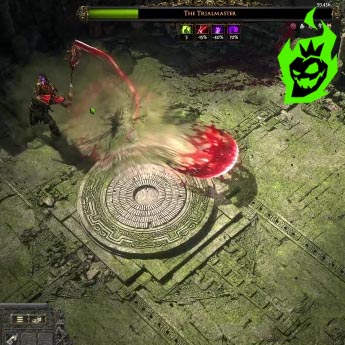
| AOE Expansion | Spear grows a circular zone that spreads across the arena | Very High | Stay outside the red circle and wait for the effect to vanish before engaging |
| Triple Slam | Sequential overhead smashes aimed at different spots on the ground | High | Move carefully when the Trialmaster pauses and shows slam indicators |
| Summoned Blood Orbs | Random elemental or blood-based projectile volleys | Medium | Maintain movement while sustaining elemental resistances and avoiding clusters |
Move while sustaining elemental resistances and avoiding clustersExiles who make it through these steps will find that beating the Trialmaster opens up more build options. Using the environment, timing your damage and waiting for the big hit animations often decides the fight. The whole fight rewards awareness especially during the riskier parts where the arena is covered in damage zones.
Many exiles in Path of Exile 2 are looking for ways to ease the pain of multiple Ultimatum waves and intense final fights. ChaosBoost offers services that address the frustration of failed attempts and lost fragments especially in the most difficult versions of the Trialmaster. Frequent posts in the community suggest that structured help is a valid way to get your 4th Ascendancy without endless restarts. This way respects each exile’s desire to progress at their own pace whether it’s sweeping monster waves or taking on the boss’s big hitting spells.
Key Mechanics of the Trialmaster Encounter

Beating the Trialmaster requires various techniques. Each sequence has strong physical hits and area denial mechanics that require quick feet. Preparation starts by identifying the boss’s moves and learning how to sidestep or mitigate them. Experimenting with different gem links and skill combos is key to maximizing damage while keeping defensive layers.
It’s useful to break down the boss’s most dangerous mechanics step by step. Below is a short list of the moves and defensive strategies:
- Circular Spear Slam — The boss slams his spear into the ground, creating an expanding red circle
- Triple Slam Sequence — A series of overhead smashes with short pauses in between
- Blood Orb Volleys — Arcing projectiles that deal elemental or chaos damage
- Physical Swings — Basic melee hits with moderate damage and knockback
Watching the boss’s animations and reacting properly is the biggest advantage. The triple slam for example pauses the Trialmaster before each hit, giving you time to reposition. The expanding spear zone requires patience because it will eventually disappear and you can attack safely after. Situational awareness prevents unnecessary deaths that force you to clear waves again.
Essential Steps for Fragment Collection
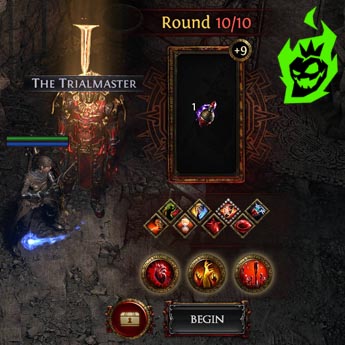
Gathering fragments for the Trialmaster door is a core requirement in Path of Exile 2. Each piece drops after completing a separate 10-wave Ultimatum which puts a lot of emphasis on clearing speed and survival. The main goal is to complete 3 full Ultimatum sets and store each fragment in the device near the boss’s doorway. Many players find wave clearing easier once they are 87-90 and have enough damage to one shot mini-bosses.
Getting the fragments works best when you know the drop sequence and how to slot them into the door. Below is a table that summarizes the fragment assembly:
| Fragment Name | Drop Condition | Door Slot | Notable Wave Difficulty |
|---|---|---|---|
| Victorious Fate | Dropped after the first 10-wave ultimatum | Left Piece | Moderate to High |
| Consecrated Dominion | Dropped after the second 10-wave ultimatum | Center Piece | High |
| Crimson Judgment | Dropped after the third 10-wave ultimatum | Right Piece | High |
Slot each fragment as soon as you get it to avoid confusion later. The device remembers which ones are already slotted so you don’t need to keep all fragments on hand. Leveling up and upgrading gear between wave sets also helps with the path to the boss. Once all three pieces are in place a door will open and you can enter the Trialmaster’s arena.
Gear Preparation: Defensive Layers and Offensive Power
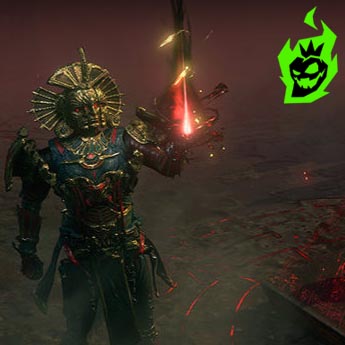
Optimizing your loadout for the Trialmaster can turn a hard fight into a manageable challenge. Exiles usually look at specific defenses like Armor to absorb physical hits, Energy Shield to soak extra hits or Evasion for those who prefer agile builds. Offense should match the level of the wave monsters so use strong skill gems and level them up. Attacks that burst down the boss before the spear based area denial gets too big often gives a big advantage.
Here’s a short list of priorities for exiles to survive and thrive:
- Physical Defense — Strengthen Armor or reduce physical damage taken through unique passives
- Elemental Resistances — Keep them at 75% to handle stray projectile and AOE elemental hits
- Damage Burst — Use skills like Shattering Palm, multi-projectile setups or high-impact spells
- Support Gems — Equip relevant multipliers for melee and caster builds, especially for single target focus
- Life and Mana Flask Balance — Make sure flasks provide recovery and potential immunities (bleed, freeze, etc.)
By following these tips exiles will survive longer when the boss spams heavy attacks. Considering your build’s synergy between damage and survivability is key. Some prefer minion based strategies where summons absorb hits while others rely on raw DPS to blast through the fight. Each way has value as long as you manage Mana and protect against lethal hits.
Mana Management Hints for Trialmaster

Some exiles have reported running out of Mana mid fight and having to wait passively while the boss runs around. Sustaining resource intensive abilities is key especially when facing wave after wave of enemies leading up to the final zone. Extra care is needed if a character lacks Mana Leech or robust Mana Regen passives as frequent bursts of skill usage will deplete resources quickly. Balancing damage and resource consumption is the difference between a long struggle and a steady takedown.
A table of Mana tips explains various approaches, from gear based solutions to passive tree adjustments:
| Mana Strategy | Benefit | Description |
|---|---|---|
| High Regen Passives | Reliable resource flow | Invest in passive tree nodes that boost regeneration rate to sustain repeated casting |
| Hybrid Flask Setup | Dual-purpose flasks for Life and Mana | Alternate consumption for continuous skill usage while maintaining health |
| Mana Leech Gem Links | A steady restoration of resources on hit | Add relevant gems or item mods that restore resources with each successful strike |
| Reduced Mana Cost Gear | Decreases total cost of abilities | Look for rare items or unique gear that cuts down on the cost of high-impact spells/attacks |
| Default Attack Backup | Mitigates zero-resource downtime | Temporarily switch to default attacks if resources reach dangerously low |
Using these tactics ensures exiles keep damage on the boss and leave less time for the Trialmaster to combo. Players who combine a flask strategy with passives that increase regeneration tend to be more active throughout the fight. Minimal downtime means shorter engagement windows and less time for the boss to trap an unprepared exile.
Rewards: Ascendancy Gains and More
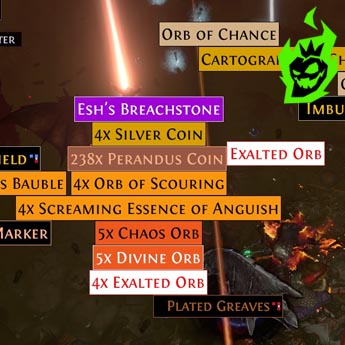
Beating the Trialmaster gives some of the best rewards in Path of Exile 2. Getting extra Ascendancy points is a huge bonus, allowing deeper specialization in chosen classes. These points often result in streamlined or expanded skill trees that affect both offense and defense. The boss also drops unique items that shape powerful builds and gear setups, rewarding those who persevere.
Here’s a short list of what exiles can expect:
- Extra Ascendancy Points — Main reason to fight the Trialmaster in Path of Exile 2
- Unique Gear — Potential drops that change playstyle or offer strong defenses
- Currency Rewards — Chance to get Chaos Orbs or rare crafting materials
- Increased Character Prestige — Proves you can beat an Ultimate boss fight
Getting these rewards not only gives a big power boost to a character but also confidence for future fights in the Atlas. Many exiles see this fight as a stepping stone to other endgame content including more challenging boss arenas. Taking the time to master the spear slams, wave clearing and fragment collection gives a sense of accomplishment beyond the immediate loot.
Closing Notes on the Trialmaster Challenge
The Trialmaster is a central challenge in Path of Exile 2, combining wave based Ultimatum sequences with a physically imposing final boss. Its emphasis on physical and elemental damage forces players to refine gear loadouts, develop synergy between passives and skill gems and plan flask usage. Beating this boss means an exile has gone through tough content but the final fight requires focus to avoid wave resets and lost fragments.
A table of do’s and don’ts for the Trialmaster explains further:
| Do | Don’t |
|---|---|
| Use defensive passives for PDR | Neglect elemental resistances or physical mitigation |
| Prepare a reliable Mana solution | Rush in with heavy cost abilities without regen or leech |
| Watch for triple slam indicators | Stand in the middle of the red expansion zone from the boss’s spear |
| Insert fragments as they drop | Forget to place fragments, risking inventory crowding |
| Adopt movement-based strategies | Assume you are safe to face-tank every hit |
Fighting the Trialmaster is a milestone in an exile’s journey, where wave mastery meets single target strength. Those who venture into this fight should remember the synergy between defense, offense and resource management. Beating this boss opens up Ascendancy and lets your character reach new heights of specialization and forge a path through Path of Exile 2 with confidence.


