Olroth Boss Guide – Mastering the Triskelion Flame in Path of Exile 2
The fight against Olroth, Origin of the Fall in Path of Exile 2 is a brutal mid-to-late game roadblock, with multi-phase mechanics, layered cold damage and pressure from both the boss and his arena’s rotating beacon. As the end boss of the Expedition content, Olroth requires precision, awareness and serious build prep. Players must handle massive Cold and Physical damage, time their movements around beam attacks and stay mobile throughout long, unforgiving patterns.
This guide covers everything about the fight — mechanics, phase transitions, timings, build matchups and even common mistakes so you can dominate the fight with expert-level clarity and minimal confusion.
Tired of getting frozen, wiped out by Starfire or just don’t want to spend hours learning every frame-perfect dodge timing? ChaosBoost’s Olroth Boost service is available for players who want to get boss rewards without the grind. Whether you’re stuck on Tier 4 Expedition logbooks, struggling with mechanics like the sword boomerang or just don’t want to risk losing your loot to a single misstep in Phase 2, ChaosBoost offers a full clear of the Olroth boss, executed by top-tier players using maxed-out accounts. Your loot is protected, your time is saved and your progress moves forward — all without freezing ground, rotating lasers or sudden one-shots. The Olroth Boost is popular for players working through Atlas progress, farming Expedition uniques or just unlocking late-game content without risking portal losses.
Understanding the Arena: Two Enemies, One Fight
Olroth isn’t the only threat in this fight. A second entity, the Triskelion Flame, floats and rotates around the arena firing off beams, AoEs, and frost-based projectiles. Players are constantly forced to track two separate kill zones — Olroth’s direct pressure and the artifact’s environmental control. The following table breaks down the three core threats present in the Olroth encounter and what role each plays in creating layered difficulty:
Arena Threat Overview
| Threat Source | Type | Damage | Behavior |
|---|---|---|---|
| Olroth | Melee, AoE | Cold/Phys | Phases, executes combos |
| Triskelion Flame | Beam, ground effects | Cold | Rotates, targets player |
| Skeleton Adds (T1+) | Melee + AoE | Physical | Spawn from 3 portals |
Olroth uses predictable but deadly mechanics, the artifact adds chaos by randomly firing attacks across the arena. At higher tiers, Runic Gateways activate, spawning Skeletons with Expedition modifiers. These adds may seem minor at first but can easily disrupt focus when timed alongside AoEs or sword throws. To survive, players should stay at mid-range and reposition constantly to avoid becoming cornered between the artifact, Olroth and adds. Awareness of arena layout is key to navigating both vertical and horizontal danger zones.
Phase One: The Opening Assault
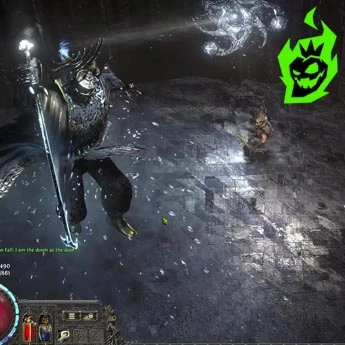
The first phase of the Olroth fight introduces his core skillset — a brutal mixture of wide melee attacks, Cold damage waves, and arena zone denial. This is the part of the fight where players learn how to dodge, track mechanics, and stay one step ahead of both Olroth and the beacon.
Below is a detailed breakdown of the key attacks Olroth uses in Phase One, along with the proper counterplay techniques to mitigate or avoid them:
| Skill | Effect | Counterplay |
|---|---|---|
| Chilling Slam | Ground slam with frost pulses | Move out before pulses expand |
| Boomerang Sword | Sword thrown forward, explodes on return | Stay lateral, dodge both throw and catch |
| Impale Dash | Lines up and dashes, ending in slash | Dodge to the side when windup starts |
| Cold Waves (Frigid Flurry) | Triple wave projectile pattern | Move diagonally, roll through if cornered |
| Frost Carousel | Rotating beams from the beacon | Exit circle early, roll through before contraction |
| Tracking Beam | Single laser tracking ground position | Stay mobile, reposition constantly |
The Boomerang Sword combo is the most deadly opener. Players often dodge the first throw and then stand in place for the return — and get frozen into a death combo. Practice dodging diagonally and always track where Olroth is facing. When he throws, move behind him or to his back-right to avoid both the catch and explosion.
Phase 1 Positioning Tips
Phase 1 is not about burning him down, it’s about managing space under pressure. Olroth’s slams and the Triskelion Flame’s rotation create layered zones of denial. Positioning is your best defense. Small movement adjustments and map awareness is the difference between a clean phase and an early wipe.
Use the following spacing strategies to control the arena and avoid getting cornered or clipped by mechanics:
- Circle the arena clockwise to stay one step ahead of the artifact’s rotation.
- Drag Chilling Slams to the outer ring to keep the center of the arena usable for later phases.
- Keep distance from Runic Gateways once adds begin spawning at Tier 1 and above.
If you position well in Phase 1 you reduce the threat of overlapping frost patches, projectiles and adds. This phase is where you set the pace — play it clean and you’ll head into Phase 2 with room to breathe and flasks topped off.
Phase Two: Starfire Awakens
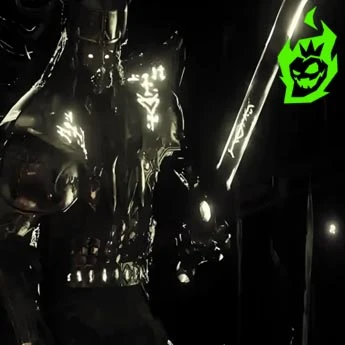
At 30% Olroth falls — but it’s not over. The Triskelion Flame brings him back to life, gives him 70% of his health and new mechanics and speeds up existing ones. Expect overlapping AoEs, arena control and the Starfire beam.
- Starfire Beam – A linear Cold beam across the arena. Leaves Exterminating Chill on the ground for 10+ seconds.
- Ice Tempests – Multiple projectiles from the beacon explode into vortex-style zones that Chill and DoT.
- Faster Combo Cycles – Olroth no longer delays after slams or throws. Moves are chained directly into each other.
- New Add Waves (T3+) – Skeletons spawn even faster, sometimes mid-Starfire cast, forcing you to shift targets rapidly.
These don’t replace Phase 1 mechanics — they stack on top. A common mistake is to relax after seeing familiar moves and get clipped by a Starfire beam or frozen in place by an overlapping Ice Tempest.
The best strategy is to control your space. If you let too many Cold zones overlap the arena becomes a death trap. Shift the fight to fresh ground after every major mechanic.
- Rotate away from ground effects. The Starfire beam splits the arena — don’t cross unless necessary.
- Prioritize safety after the sword throw — the moment he catches the sword is a dead zone.
- If using melee, only stay close when he’s mid-animation or if you can flank behind his shoulder.
- Use Flasks of Heat or Freeze Immunity Charms. One freeze = death in this phase.
- Save burst damage for after a Starfire cast — it’s the longest window for pure damage uptime.
Save burst damage for after a Starfire cast — it’s the longest window for pure damage uptime.
Phase 2 Rotations – What to Watch
Olroth’s second phase speeds up, layering beam attacks, AoEs and add waves in quick succession. Surviving this part of the fight isn’t just about reacting — it’s about anticipating the exact sequence of mechanics so you’re always one step ahead of the next threat. Predictable rotations allow players to prepare movement skills, flask usage and DPS bursts in tight windows.
The table below outlines a common Phase 2 rotation pattern, based on average timings and observed behavior in the closed beta and community tests:
| Time (approx.) | Event | Player Response |
|---|---|---|
| 0s | Resurrection animation | Move to safe position, refresh flasks |
| +5s | First Ice Tempests | Lure to arena edge, rotate around |
| +10s | Sword Throw → Starfire | Dodge diagonally → reposition |
| +20s | Beam ends, orb volley | Regain center control or flank |
| +30s+ | Adds start rushing | AoE clear if safe, burst Olroth if not |
By learning this rotation, players can predict when it’s safe to commit to damage and when to focus on movement. A key pattern is the Starfire + Orb volley combo, which often traps stationary players or punishes greedy positioning. The safest strategy is to reset positioning every 10–12 seconds, using natural downtime between mechanics.
Recommended Builds and Mechanics-Ready Playstyles
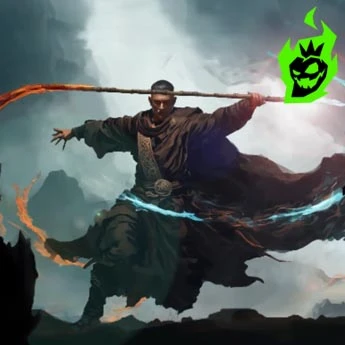
Build selection plays a huge role in how manageable the Olroth boss fight becomes. Certain archetypes naturally dodge his mechanics, while others struggle due to overlapping damage types, lack of uptime, or slow repositioning tools. Olroth is especially harsh on Cold-based builds due to his elemental resistances and melee builds that misread telegraphed attacks. But no build is locked out of victory — as long as the player knows their strengths and plays to them, Olroth is beatable.
The table below outlines the most viable archetypes currently tested against Olroth, showing where each excels and what limitations to account for before entering the arena:
Top Performing Archetypes
| Build Type | Strengths | Weaknesses |
|---|---|---|
| Chaos DoT (e.g., ED/Contagion) | Can damage while dodging, avoids Frost immunity | Requires uptime for full ramp |
| Minion Army | Minions soak adds, apply damage independently | Weak summons can die to AoEs |
| Trap / Totem builds | Burst windows during repositioning | Setup time is tricky between mechanics |
| Ranged Bow builds | High uptime, fast response | Susceptible to Cold/Chill stacking |
| High Evasion Melee | Can hug boss and flank after dodging | Mistimed engagement = one-shot |
Each archetype shines in different situations. Chaos-based DoT builds do well in long fights with heavy repositioning, Minion builds allow players to stay mobile while their summons do the damage, Trap/Totem builds give burst during windows of safety, Bow builds maintain uptime if they avoid Cold hazards. Melee builds demand the most awareness but can punish harder than any other style. Knowing your build’s limitations helps you decide whether to play aggressive or defensive throughout the fight.
Regardless of archetype, certain gear and utility tools are non-negotiable in this fight. Every player entering the arena should bring a core setup of survival tools to neutralize Olroth’s freezing mechanics and his artifact’s slowing effects.
Here’s a checklist of mandatory tools for any build planning to survive both phases of the fight:
- Freeze Immunity (Flask or charm) – Prevents being locked in place by Boomerang Sword, Starfire, or frost patches.
- Armor or Evasion boosting flasks – Helps mitigate melee swings and stray Skeleton hits.
- Instant or semi-instant Life Flask – Necessary to recover between rapid sequences of damage without downtime.
- Movement skill with low cooldown – Allows repositioning between ground effects and during beam tracking.
- Anti-Chill mod or buff (e.g., Silver Charm) – Prevents movement speed slow, which often causes chain-hits.
This isn’t optional — it’s foundational. Without Freeze and Chill mitigation, even the best DPS builds will get snared and deleted by follow-up mechanics. Cold damage stacks fast if you linger in ice zones or mismanage flask timing. Melee players especially benefit from armor scaling flasks, while ranged and DoT users gain more from mobility and uptime. Build for survival first, then scale your damage around those defenses.
Also important: pure Cold builds are at a disadvantage. Olroth has noticeable Cold resistance, so players should consider running Exposure, Penetration or converting damage to Fire or Chaos for this encounter. Simply stacking more Cold won’t break through his defense line — use debuffs and secondary damage layers to punch through his resist wall.
Skeleton Portals and Expedition Mods
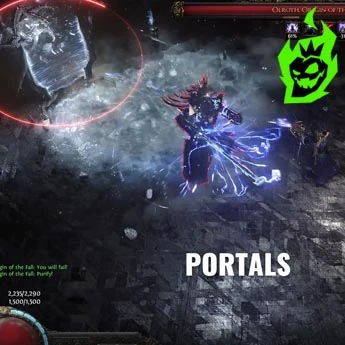
One of the most dangerous mechanics in the Olroth fight isn’t directly tied to the boss or the artifact — it’s the adds that spawn from the Runic Portals. Starting at Tier 1 difficulty and above, three gateways in the arena begin summoning waves of Skeletal Warriors. These minions inherit all the Expedition Remnant modifiers you selected while crafting your logbook, while Olroth himself remains unaffected. Because of this, skeletons can end up far more lethal than expected, especially when paired with mods that increase their offensive stats or give them death effects.
Below is a list of commonly overlooked Expedition mods that can make skeleton adds a serious threat during the fight:
- “Monsters have 100% increased Critical Strike Chance” – Skeletons may land surprise crits that chunk or outright kill if you’re not stacking crit reduction.
- “Exploding on Death” – Adds create chained AoE bursts on kill, especially punishing if killed in clusters near the player.
- “Monsters Poison on Hit” – Introduces chaos DoTs into the mix, which can stack with Cold damage to overwhelm flask recovery.
These mods can easily spiral out of control if left unchecked. Even if you’re focusing Olroth, neglecting to manage portal spawns can result in a flood of buffed adds, forcing you to reposition constantly or die from background chip damage. Minion-heavy fights always favor chaos, and Olroth’s arena is no exception.
If your logbook rolled any high-risk remnants, it’s safer to clear the adds — even during DPS windows. Don’t tunnel on the boss and assume the skeletons are harmless. If you let them pile up, the arena quickly becomes a minefield of crits, death explosions and off-screen hits that clip you during dodges. Make area control a priority, especially in Phase 2 when mobility is already limited by the artifact’s beams and chilling ground effects.
Top Mistakes Players Make
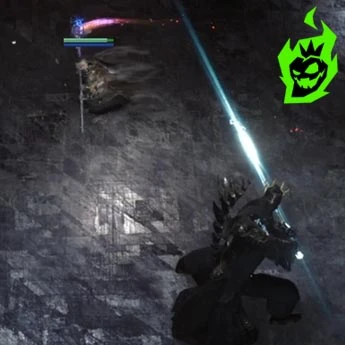
Even experienced players make avoidable mistakes in the Olroth fight. His attack patterns are consistent, but the pressure of rotating hazards, unexpected portal adds and Cold damage layering makes it easy to slip up. The good news is that most deaths are caused by a handful of repeated mistakes — once you recognize these patterns, your success rate rises dramatically.
Below is the list of most common and costly mistakes that cause wipes in this encounter, regardless of build or gear level:
Common Mistakes to Avoid
- Greed DPS during sword throw: Players try to sneak in one more cast or swing and get caught in the return explosion, often followed by a Freeze.
- Crossing the Starfire beam: The lingering Cold DoT isn’t just visual — even brief contact slows you and can kill you mid-dodge.
- Standing in frost zones to finish a cast: Staying in Exterminating Chill areas for one more tick of damage often ends in instant death.
- Not adjusting flasks for Cold: Entering without Freeze Immunity or proper flask suffixes leaves you completely vulnerable to core mechanics.
- Assuming minions are invincible: Summoners lose damage windows when key minions die to AoEs like Ice Tempests or rotating beams.
- Underestimating portal adds: Skeletons carrying deadly mods (e.g., crit or poison) cause deaths from off-screen or during movement phases.
If you’re wiping repeatedly, take time to figure out when and how you’re dying. Sometimes a single change in behavior — like dodging diagonally instead of backing up, or clearing adds during idle boss frames — can turn the whole fight around. Olroth is unforgiving but not unpredictable. Learn from each wipe, make micro-adjustments and you’ll be standing over his loot chest instead of the respawn screen.
Final Thoughts – Control the Arena, Control the Fight
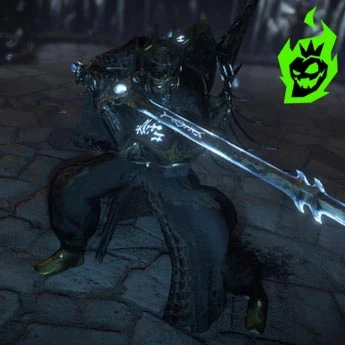
Olroth, Origin of the Fall is more than just a boss. He’s a mechanics test for the Expedition endgame and the fight is exactly what Path of Exile 2 is all about: movement, setup and precision. With the beacon constantly spinning, the boss chaining combos and the floor becoming a hazard zone, survival is a test of composure and pattern recognition.
Whether you do it yourself or take the shortcut with a ChaosBoost Olroth Boost, the rewards are worth it – Expedition uniques, high value logbook loot and Atlas progress await on the other side of victory. So gear up, stay focused and don’t freeze up – literally. You got this, Exile.


