Path of Exile 2 Act 2 Boss Guide: Mastering Every Encounter
Path of Exile 2 has multiple Acts and Act 2 introduces bosses that will test your DPS, defences and map awareness. This part of the campaign takes place in different environments with monsters, warlords and labyrinthine trials. Veterans say Act 2 is where things get real and punishing. On PC or console you’ll find enemies with Fire, Lightning, Chaos and Physical damage so every piece of gear matters.
Prepare to tweak your passive tree, stock up on flasks and be flexible as these bosses are the gatekeepers to The Trail of Corruption, The Trial of the Sekhemas and beyond.
Below is a structured resource that groups Act 2 bosses by their narrative or quest significance. Each section has bolded key words for Path of Exile 2 terminology, tables or lists for clarity and 3-5 sentences for flow. Dive in for solo or group strategies and check out gear or skill gem recommendations. We aim to cover the essentials without confusing new exiles or overwhelming returning players. By the end you should know everything about Act 2 bosses and how to beat every encounter.
Act 2 Bosses Overview and Key Challenges
Act 2 sees a big jump in complexity with area of effect attacks, minion swarms and increased elemental damage. The campaign paths go through deserts, crypts and fortifications and end with Jamanra, the Abomination and the Trial of Sekhemas guardians. Bosses drop quest items like Mastodon Tusks or unique gear that helps with the storyline. Defensive layers like life, energy shield and spell suppression become more important here. Knowing the core mechanics of each fight will make the campaign smoother especially when you have to deal with boss abilities and environment hazards.
| Boss Name | Location | Primary Damage | Quest / Reward |
|---|---|---|---|
| Rathbreaker | Vastiri Outskirts | Physical + Fire Spear Support | Progresses Earning Passage quest |
| Jamanra, the Risen King | Halani Gates | Mixed Fire/Lightning, Sand Attacks | Advances The Trail of Corruption quest |
| Jamanra, the Abomination | Dreadnought Vanguard | Enhanced Fire + Lightning, Scarabs | Completes The Trail of Corruption |
| Rudja, Dread Engineer | Mawdun Mine | Fire + Bomb Mechanic | Uncut Skill Gem, main storyline progression |
| Balbala, The Traitor | Traitor’s Passage | Poison + Hidden Phase Mechanic | Balbala’s Barya for Trial of Sekhemas |
| Kabala, Constrictor Queen | Keth (Lost City) | Chaos + Physical | Book of Specialization (+2 Weapon Set Passives) |
| The Ninth Treasure of Keth | The Lost City | Physical + High HP | Great for Random Jewel and gear farming |
| L’Im, the Impaler | Halani Gates | Bleed + Impale | Rare Items, optional fight |
| Tor Gul, the Defiler | Spires of Deshar | Physical + Fire + Chaos | Unlocks Ascent to Power quest |
| Watchful Twins | Deshar | Variable Mods, Dual Boss Encounter | Quest item Djinn Barya |
| Zalmarath, the Colossus | Titan Grotto | Physical + Fire, Area Sweeps | Flame Ruby for A Crown of Stone quest |
| Azarian, the Forsaken Son | Buried Shrines | Fire + Summons | City of Seven Waters progression |
| Ekbab, Ancient Steed | The Bone Pits | Physical + Fire + Summons | Mastodon Tusks for A Theft of Ivory quest |
| Rattlecage, the Earthbreaker | Trial of Sekhemas (F1) | Physical + Fire, Basic Lab Fight | First Ascendancy point set |
| Terracotta Sentinels | Trial of Sekhemas (F2) | Dual-Element Statues (Fire/Cold) | Second Ascendancy point set |
| Ashar, the Sand Mother | Trial of Sekhemas (F3) | Physical + Chaos, Large Scorpion | Third Ascendancy point set |
Each boss in Table 1 has unique threats that require specific tactics or gear changes. Most drop quest items like Flame Ruby or Balbala’s Barya or open up deeper areas. Knowing their damage types (Physical, Fire, Lightning or Chaos) is key to adjusting flasks and armor. With this overview in mind, you’re better prepared for the varied encounters Act 2 is known for. Mechanics for each boss are expanded upon in later sections where synergy between environment hazards, recommended skill gems and co-op approaches is explained.
ChaosBoost is a Path of Exile 2 service that helps exiles who struggle to progress or repeat boss encounters in Act 2. Many players experience damage spikes or mechanical complexity and end up repeating or losing time. Since Act 2 bosses include the punishing Jamanra, the multi-phase Trial of Sekhemas and many side-bosses, help is available through this service. Whether you play on PC or console, ChaosBoost steps in with a skilled approach to clear or assist with boss fights. Some use it to get quest items, farm currency or speedrun the campaign for alt characters.
Rathbreaker – Warlord of the Vastiri Outskirts
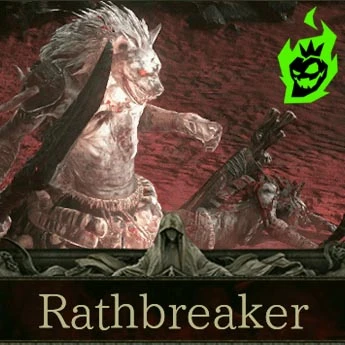
Rathbreaker introduces Act 2 by testing your crowd control and gear readiness. His lair in the Vastiri Outskirts features narrow canyons with spear-throwers and ends in a large open area. Rathbreaker himself deals melee damage but the real chaos comes when he summons hyena-like minions from multiple angles. Fire vulnerability is also present as archers in the surrounding area shoot burning arrows. Careful movement and crowd-thinning is key to survival.
| Rathbreaker Move | Effect | Suggested Counter | Item Drop |
|---|---|---|---|
| Melee Slam | Heavy Physical damage in front of him | Side-step or use movement skill to reposition | Chance for Rare Weapon |
| Summon Hyena Pack | Spawns multiple fast-moving adds | AoE burst, crowd control, do not get pinned in corners | Possible Rare Armor |
| Spear Volley (from outposts) | Ranged projectiles from distant spears | Keep moving unpredictably, watch for incoming lines | Low-level currency items |
The best way to beat Rathbreaker is to methodical AoE the adds before they swarm. Solo players should keep flasks up for life and mana especially if pinned by the hyenas. Group parties can designate one player to handle or kite the adds while others focus on the boss. Once Rathbreaker is dead, the Earning Passage quest continues and more of the Vastiri area opens up.
Rudja, Dread Engineer – Flames and Explosives in Mawdun Mine
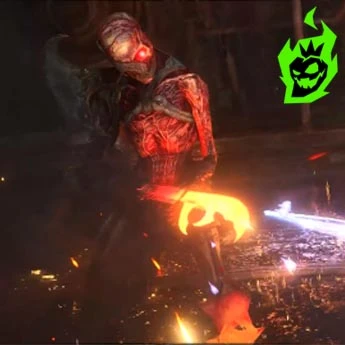
Rudja rules the Mawdun Mine and is a key part of the storyline due to her pyromancy. She uses Fire area attacks and a deadly spinning bomb charge that punishes slow reaction times. Positioning is key here, with frequent repositions needed to dodge bombs and flamethrower bursts. Fire resistance near or at 75% helps reduce damage and a bleed removal flask is good for her flail hits. Stay mobile and watch for her charging stance that signals an incoming explosion.
- Bomb Charge: She winds up and runs towards you. Move away or to the side to avoid the explosion.
- Flamethrower Arc: A wide cone of fire, run behind her or use a dash skill to avoid.
- Burning Ground Bombs: She throws bombs that leave fire on the ground, damage anyone who stands there too long.
Once Rudja’s explosives are survived she drops an Uncut Skill Gem and quest progression items. She teaches the importance of quick footwork and situational awareness. Those who ignore the telegraph of her charge often get hit by the explosion so keep an eye on her movement and hold a Staunching flask for any unexpected bleed.
L’Im, the Impaler – Bleed Duel at the Halani Gates
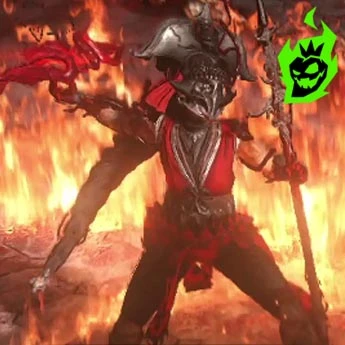
L’Im is in the Forward Command Tent near the Halani Gates. This is an optional fight but many exiles challenge him for high-rarity items. L’Im deals Bleed and Impale damage through fast spears and multi-hit combos. Short bursts of movement, especially lateral dodges, help avoid his direct lunges. Stopping any bleed effect quickly or standing still until it expires is key to survival. There are no arena mechanics so it’s a microcosm of raw skill: avoid hits, remove bleed and outmaneuver his impales.
| Threat | Description | Defensive Tip |
|---|---|---|
| Spear Lunge | Rapid forward thrust, triggers heavy Bleed | Move diagonally and use Bleed removal flask |
| Impale Debuff | Increases subsequent Physical damage taken | Shield block or ranged kiting is advised |
| Quick Feint Attacks | Mini-combos that chain if you stand close | Maintain some distance, watch for patterns |
Fighting L’Im is a dance of evasion and burst damage. Ranged builds can whittle him down, melee exiles can engage for short and then step back before the next spear thrust. Rewards are various rare items but the real takeaway is bleed management and evasion skills that will serve you well in future Acts.
Jamanra, the Risen King – Unleashing Sandstorms in Halani Gates
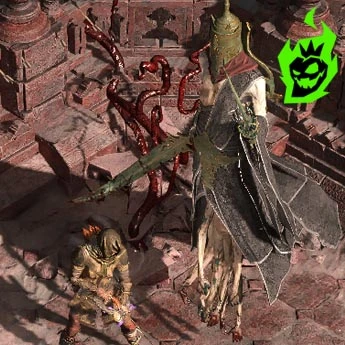
Jamanra, the Risen King appears in Act 2 as part of The Trail of Corruption quest. This first fight tests Fire, Lightning and Sand abilities and ends with a massive Flameblast that hits almost the entire arena. You need to react to his sword throw and dash to the safe zone near the embedded blade. The fight includes a final sandstorm with scarabs that explode on contact. Focus on memorizing the Flameblast cue and clearing scarabs before they corner you.
| Attack | Damage Type | Response |
|---|---|---|
| Flameblast (Sword Throw) | Massive Fire AoE | Sprint to the circle around the blade in the ground |
| Obsidian Storm | Physical/Shard AoE | Keep distance, move away from the forming tornado |
| Lightning Beam | Straight line burst | Sidestep or dash sideways upon his wind-up |
| Sandstorm Phase | Physical and Summons | Keep moving, destroy scarabs or use minions to distract |
This fight ends with Jamanra retreating, hinting at a final fight as the Abomination. Surviving this teaches you to watch the arena floor for safe zones and to move quickly. Stepping away at the right moment often means the difference between victory and a re-run. Once he flees, quest progression continues and you’ll be on your way to find Keth and the other desert secrets.
Balbala, The Traitor – Poison Master of Traitor’s Passage
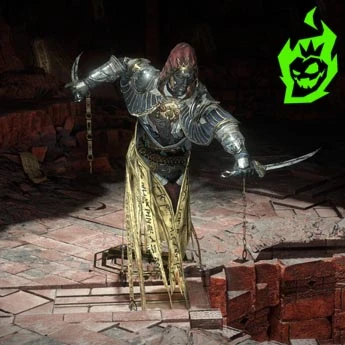
Balbala is in Traitor’s Passage and stands between exiles and the Trial of the Sekhemas. She poisons and illusions, sometimes turns invisible to spread a deadly gas that covers the arena. Act 2 becomes much more interesting after defeating her since Balbala’s Barya is the key to the Ascendancy trial. Expect multiple vanish phases, coin runes that summon adds, and short teleports that keep you guessing.
| Mechanic | Effect on Arena | Recommended Tactic |
|---|---|---|
| Invisible Phase | Poison cloud expands until you find her | Circle the walls, push into her to reveal her and stop the spread |
| Coin Runes | Spawns adds when left unattended | Step on the runes to disarm them or quickly clear spawned enemies |
| Poison Daggers | Ranged assault that stacks poison debuff | Lateral movement, chaos resistance, or a shield block |
Those who defeat Balbala’s illusions get Balbala’s Barya for Act 2’s Ascendancy path. Her fight emphasizes Chaos resistance and methodical search patterns and is the opposite of the previous boss fights. Completing this challenge gives you a direct path to the multi-floor trial deeper in the desert.
Iktab & Ekbab – Fearsome Duo in The Bone Pits
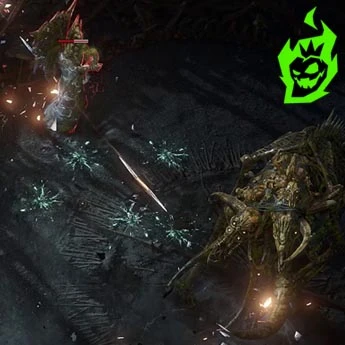
Iktab, the Deathlord and Ekbab, the Ancient Steed are in The Bone Pits and are a puzzle-like fight. Both have a linked life mechanic where killing one empowers the other. Community consensus is to focus down the caster Iktab first and then Ekbab second. This way you avoid an ultra-empowered necromancer. But if Ekbab dies first by accident be prepared to dodge a bunch of advanced bone spells from Iktab. Here is a list of key points for this two-on-one fight:
- Focus Iktab First: The Deathlord’s spells get nasty if left for last.
- Manage Ekbab’s Charges: Watch his direction to avoid head-on collisions.
- Destroy Summoned Orbs: Kill any lightning spheres or random summons that appear when each boss dies.
Finishing this pair rewards Mastodon Tusks which is required for a quest item turn-in. It’s a fun fight due to the synergy between caster and behemoth. Players learn the importance of kill order which will come up again in later multi-boss fights. Once both are dead the path continues through The Bone Pits into deeper Act 2.
Kabala, Constrictor Queen – Serpent Ruler of Keth
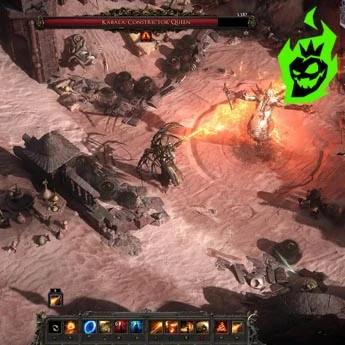
Kabala, the Constrictor Queen is in the Lost City of Keth and sits in a venom pit guarded by bone walls. She does Chaos and Physical damage and leaves large poison zones that limit mobility. Those who dare to challenge her get Book of Specialization which adds two weapon set passive skill points – a big power boost. Master the venom pit mechanics by watching for bone walls that indicate a slam and stepping back when venom illusions appear. Table shows Kabala’s main threats and counters:
| Threat | Consequence | Counter |
|---|---|---|
| Bone Walls (Slam Window) | High-damage slam if trapped inside the pit | Exit through gaps and wait for the slam to finish |
| Venom Projectiles | Explosive orbs that detonate after spreading | Dash or circle around to avoid overlapping explosions |
| Snake Summon Phase | Time-limited chance to deal heavy damage | Unleash your strongest DPS while she channels |
Solo players focus on slow and methodical play: step in to attack, step out during big slams and clear adds. Groups coordinate roles: one person focuses on bone wall spawns, another on the queen and a third on add cleanup if present. Kabala drops not only gear but extra passive points which gives builds more synergy and power. It’s a key moment in Act 2 side content before facing the next wave of desert horrors.
The Ninth Treasure of Keth – Living Hoard in The Lost City
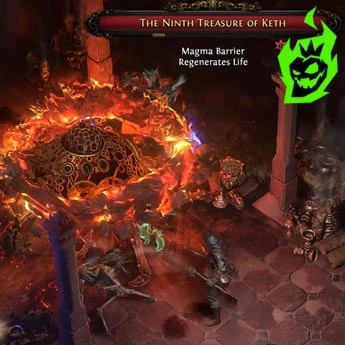
The Ninth Treasure of Keth is an optional but profitable boss in The Lost City. It’s a big chest-like entity that throws projectiles and summons a constant stream of Adorned Beetles. Group strategies involve one or two exiles focusing on the boss while others handle the beetle swarms. Solo exiles should have a strong AoE skill to avoid being overwhelmed. This boss has high item rarity so players farm it for gear. Here is a list of tips for The Ninth Treasure:
- Clear Beetle Swarms: Periodic AoE or minion support is key to not getting overwhelmed.
- Watch for Treasure Projectiles: They may be slow but deal extreme damage if multiple hits stack.
- Use Fire or Cold: Sources say it resists Physical and Lightning so Fire or Cold deals more damage.
Killing this boss rewards a good amount of currency or rare items which is useful for upgrading gear mid-Act 2. Although not required, defeating this hoard helps with movement skills and resource management. Those who do repeated runs refine their approach to cut down swarm phases and get more efficient loot. Once the Ninth Treasure is dead Keth’s secrets become easier to access.
Watchful Twins – Vigil in Deshar
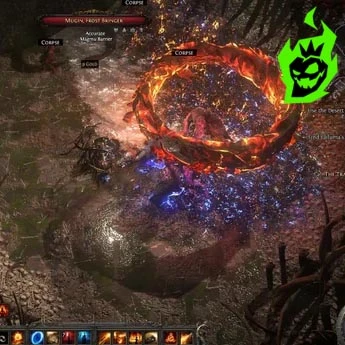
The Watchful Twins are in Deshar and are twin constructs or spirits that share a combined approach to combat. They have random mods so each fight is unique. Each twin casts spells, projectiles or melee hits and a small confined arena makes it intense. You need to split them up: a summoner build puts minions on one twin while you focus the other. Or coordinate with a group to avoid getting flanked by both at the same time. Table shows the Watchful Twins fight:
| Focus Point | Explanation | Advice |
|---|---|---|
| Twin Mods | Fire, Cold, Chaos, or custom mods vary each spawn | Scan their auras or buff icons before engaging |
| Movement Overlap | Small arena and two simultaneous threats | Keep shifting position to avoid combined damage |
| Quick Kill Strategy | Bursting down one twin creates a manageable solo fight | Pool your highest DPS on the more dangerous twin |
Players who succeed get a Djinn Barya (if it drops) or other quest items. The Watchful Twins teaches pacing and focusing down targets methodically. It also sharpens reflexes for double-boss fights in future acts. As soon as the twins die Deshar’s path opens up.
Zalmarath, the Colossus – Guardian in the Titan Grotto
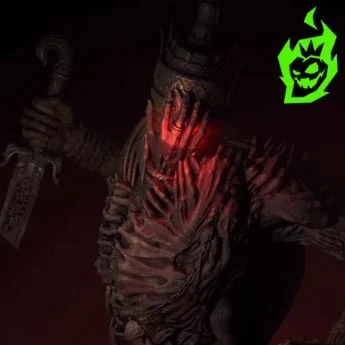
Zalmarath is in the Titan Grotto and is a giant that breaks the ground with physical and fire damage. He’s so tall you have to look up to see his telegraphed slams. Falling debris from the ceiling adds an extra hazard so you need to move fast. Since he’s fire damage element, a Ruby flask helps with big hits. Ranged characters circle-strafe from mid-distance while melee characters attack his sides or back to avoid sweeping arcs.
- Sweeping Arm Slam: Wide frontal arc, run towards his flank or behind him to avoid.
- Falling Rocks: Targeted from above when Zalmarath roars up, so move and look for shadows.
- Phase 2 Decimation Beam: Hide behind his dagger if he plants it in the center, it blocks the big beam.
Killing Zalmarath gives you the Flame Ruby or other quest items and brings you closer to the end of Act 2. This fight shows how boss designs scale up in size and complexity and requires attention to overhead cues. Once Zalmarath falls you get closer to uncovering the final secrets in the deserts and caverns of Act 2.
Tor Gul, the Defiler – Menace of the Spires of Deshar
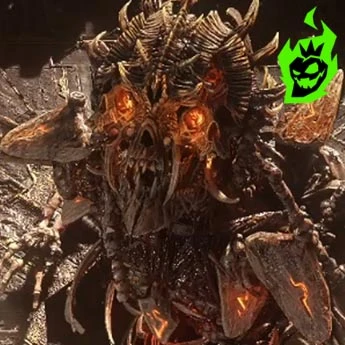
Tor Gul is in the Spires of Deshar and deals Physical, Fire, and Chaos damage with poison-infused minions. He summons skeletons, spews toxic sludge and breathes fire in wide arcs. The environment has pillars to use for cover from direct hits. As the fight progresses Tor Gul enters an enraged mode and spawns additional hazards like flaming skulls or flame runes. People say his multi-element mix punishes those who don’t have balanced resistances. Table shows Tor Gul’s main abilities and counters:
| Ability | Damage Type | Survival Tip |
|---|---|---|
| Toxic Spew (Summon Skeleton) | Chaos + Physical minions | Clear the skeletons quickly to avoid overwhelm |
| Flame Breath | Wide Fire cone | Move to his flank or behind him during the wind-up |
| Flame Runes | Delayed ground explosions | Watch your feet for glowing runes, step away if one appears under you |
| Enrage + Ribcage Barrage | Rapid Fire orbs + Summoned spirits | Focus on dodging or circling, then strike in openings |
This fight tests stamina as long fights allow Tor Gul to do multiple combos. Solo players need to pace themselves, clear adds while damaging him. Groups can split tasks but coordination is key to avoid running into each other’s hazards. Beating Tor Gul opens up the path to the final area of Act 2, a critical checkpoint.
Ashar, the Sand Mother – Third Floor Trial of Sekhemas Boss
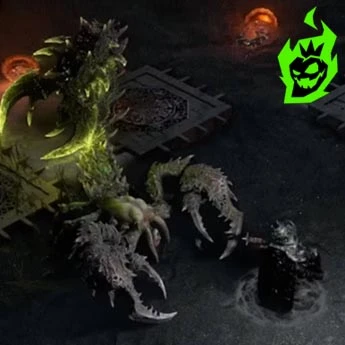
The Trial of Sekhemas is Act 2’s Ascendancy Lab and Ashar, the Sand Mother is on the third floor. This giant scorpion-like creature stings, poisons and has environmental hazards like quicksand patches. The arena has traps or pressure plates that trigger beetle swarms. The key is to position yourself to avoid stepping on these plates while evading Ashar’s lunging tail or spinning claws. Surviving gives you the third set of Ascendancy points for your build’s advanced passive specialization.
- Tail Slam: Heavy overhead hit that hits a large area, signaled by the tail rearing up.
- Quicksand Zones: Movement speed is severely reduced if you step in, so stay on solid ground.
- Pressure Plate Traps: Some release beetles or poison gas. Lure Ashar away from potential triggers.
Team-based approaches allow one player to kite Ashar around while others stay safe from traps and strike when she is mid-attack. Solo exiles often run partial circles around the edge, baiting her to follow. Upon victory the final floor of the trial is clear, granting another Ascendancy bonus that changes your character’s passive tree synergy.
Terracotta Sentinels – Defenders of Sekhemas’ Second Floor
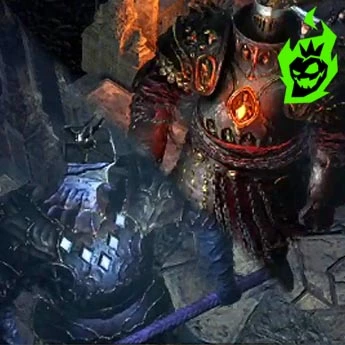
The Terracotta Sentinels, Hadi and Rafiq, are on the second floor of the Trial of Sekhemas. These statue guardians have Fire and Cold elements respectively and when one dies the environment triggers hazards of that element. It’s common to kill Hadi first, then Rafiq second: killing Hadi first prevents dealing with intense slowing fields during a more dangerous phase. Following the correct order minimizes overlapping hazards in the small trial room. Table shows the sentinel encounter:
| Sentinel | Element | Death Hazard | Advice |
|---|---|---|---|
| Hadi (Fire) | Fire Attacks | Brief burst of flames around the arena | Take him down first to avoid ice hazard early |
| Rafiq (Cold) | Frost Attacks | Freezing projectiles, chilling ground | Finish second, then dodge final barrage |
Exiles who win on Floor 2 get their second Ascendancy point set, strengthening class-specific nodes. If grouped, coordination is key to not accidentally kill Rafiq first. This fight is a good example of the synergy between boss elements and environment triggers which gets more complex in higher acts. Exiting the second floor leads to Ashar on Floor 3.
Rattlecage, the Earthbreaker – First Floor Trial Gatekeeper
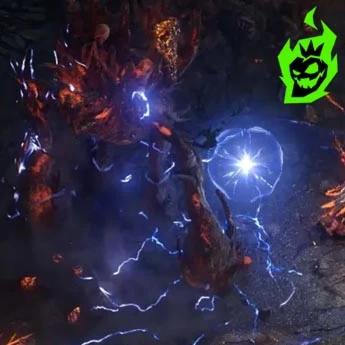
Rattlecage is on the Trial of Sekhemas Floor 1 and introduces exiles to the trial’s punishing environment. Though labeled as an early floor boss, he has big slams and summons falling debris in his final phase. The Honour system (limit on how many times you can fail) in the trial adds to the tension. Everything is telegraphed with slow arm lifts or roars so if you approach with patience you’ll handle his hits better. Table shows Rattlecage’s progression:
| Phase | Mechanic | Advice |
|---|---|---|
| Initial Slams | Straightforward heavy hits | Dodge side to side, watch for ground cracks |
| Mid-Phase Sweeps | Sweeping arcs that might create small debris | Circle him or stay behind to avoid direct hits |
| Final Frenzy | Falling rocks + Magma spouts from floor | Keep moving, remain calm, look for safe tiles |
Winning Rattlecage gives you the first Ascendancy reward in Act 2’s trial. This boss sets the tone for methodical evasion and hazard awareness which gets more intense in the next floors. Groups do well by spreading out, nobody gets pinned by debris. Be cautious, aware of overhead danger and claim your new Ascendancy points when he breaks.
Jamanra, the Abomination – The Finale of Act 2
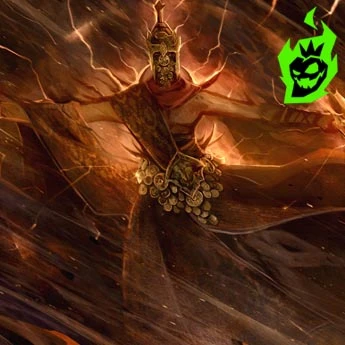
The final showdown is when Jamanra reappears in Abomination form on the Dreadnaught Vanguard. This multi-phase boss has upgraded Fire and Lightning attacks and the dreaded Sandstorm synergy that requires players to hide behind Sekhema Asala’s shield. Scarab minions flood the arena, lightning walls appear to limit movement and a massive area-of-effect hit can happen out of nowhere. Proper flasks, movement skills and situational awareness is key to success or failure. Table breaks down Jamanra, the Abomination’s final attacks:
| Phase / Mechanic | Details | Handling Strategy |
|---|---|---|
| Beacon Toss | Throws lightning beacons that detonate in a frontal pattern | Move behind or past Jamanra quickly to avoid the cone |
| Sandstorm Shield Phase | Arena fills with raging sand, high damage outside Asala’s area | Stay behind Sekhema Asala’s shield, clear adds that rush in |
| Obsidian Wall / Shards | Summons walls or falling shards that track player positions | Monitor the arena, keep a clear path open, watch for dark overhead shapes |
| Final Enrage | Overlapping combos of lightning, fire, and minion spawns | Focus on survival first, then deliver bursts of damage in safe windows |
When Jamanra falls, Act 2 is complete, and Act 3 is unlocked. This is a big milestone in your Path of Exile 2 journey, showing how far your build has come since Act 1. The synergy between elemental attacks, minions and environment hazards is a hallmark of PoE2 design. Exiles who master these multi-layered fights can step into the next Acts with confidence, ready for the trials that await in the next chapters of Wraeclast.
Wrapping up the Act 2 Journey
Act 2 in Path of Exile 2 is more complex, rewarding exiles who optimize their gear, flasks and build synergy. From Rathbreaker to Jamanra, the Abomination, each boss teaches movement, resource management and strategy. Extra fights like The Ninth Treasure of Keth, Kabala or Watchful Twins give unique loot and skill points to boost a character’s power. The Trial of Sekhemas grants Ascendancy points across multiple floors, culminating in a scorpion queen fight.


