Path of Exile 2 Act 1 Bosses – Comprehensive Strategies and Loot Rewards
Path of Exile 2 drops Exiles into a dark and deadly Act 1 journey, full of lore, sweet loot and some of the most atmospheric boss fights in the ARPG genre. From the opening zones in Clearfell all the way to the corrupted halls of Ogham Manor, Act 1 tests new and veteran players alike with a variety of mandatory and optional bosses. These fights vary in difficulty and style, from giant undead monstrosities to cunning spectral nobles, all requiring skill and good build choices.
Each boss not only provides a unique challenge but also unlocks quest progress, special quest items and permanent buffs that can give you a big power boost. Knowing every Act 1 boss is key to smooth progression and a fun experience, so let’s dive into each fight and see how to beat them.
The Act 1 boss lineup in Path of Exile 2 includes story-essential enemies and optional fights hidden in secret lairs or side paths. Every boss has a different mix of damage types, minion summons or environmental hazards and you need to adapt fast. Their rewards are usually key quest items, Uncut Skill Gems, unique currency or permanent character upgrades like extra Maximum Life, Spirit or Weapon Set Passive Skill Points. Navigating these fights requires smart movement, situational awareness and elemental or physical resistances to the boss in question. Below are the main abilities, recommended tactics and the quest or item rewards for each boss. By preparing, anticipating the boss’s attacks and knowing when to reposition, any exile can make it through Act 1 in Path of Exile 2.
The Bloated Miller and Early-Act Strategies
The Bloated Miller is the first real boss most players will face in Act 1 and acts as a introduction to Path of Exile 2’s new combat mechanics and a gatekeeper to Clearfell Encampment. This poor miller’s corpse has bloated with exomite corruption and turned him into a slow but very strong abomination. The fight shows the importance of dodging telegraphed melee hits, controlling adds and using the new dodge roll. By learning to move around the Miller’s big swings, you gain valuable experience for the tougher bosses to come.
He moves slow but deals physical damage. Melee characters should circle around him during his long attack wind-ups to minimize the chance of getting crushed by his overhead slam. Ranged characters can kite and chip down his health, but clear any shambling adds he spawns if they start to overwhelm you. Keeping a safe distance allows quick dodges whenever the Miller telegraphs his lunge. Once the abomination collapses, you can get an Uncut Skill Gem for defeating him, a nice bonus for your build in the early Act 1.
The Bloated Miller fight is the foundation of combat in Path of Exile 2. By mastering movement, spacing and quick reactions to big telegraphed attacks, you’ll be ready for the rest of Act 1. Getting the extra skill gem also sets you up for success, more customization or damage. Approaching this fight carefully will get you into Clearfell Encampment smoothly where more danger and reward await. With the Bloated Miller dead, your Act 1 journey officially begins. Progressing through Act 1’s bosses in Path of Exile 2 may pose a serious obstacle, especially for characters lacking gear or certain defensive layers.
Beira of the Rotten Pack and The Devourer
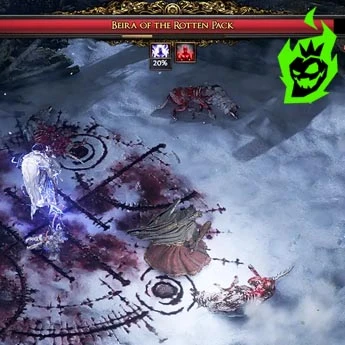
Act 1 doesn’t limit you to linear quest bosses; there are several strong optional targets in side areas. Beira of the Rotten Pack and The Devourer are the most notable ones. Beira rewards an item with +10% Cold Resistance and The Devourer drops an Uncut Support Gem from the “Treacherous Ground” side quest. Both are tough for early characters so let’s look at some strategies and item details to win.
Beira roams Clearfell with her undead wolf pack, dealing Physical and Cold damage with lunges, frost volleys and minion summons. Taking her down quickly is often the best approach, ideally with Fire or AoE spells to capitalize on her vulnerability. The Devourer hides in Mud Burrow, submerging frequently to ambush players with Chaos or Physical damage. The cave is small so positioning and constant movement is key to avoid getting pinned. Upon killing them you’ll get items that improve early survivability and add to your skill repertoire.
| Boss | Location | Key Drops |
|---|---|---|
| Beira, Rotten Pack | Clearfell | Head of the Winter Wolf (+10% Cold Resist) |
| The Devourer | Mud Burrow | Uncut Support Gem (Treacherous Ground Quest) |
Uncut Support Gem (Treacherous Ground Quest)Taking these rewards makes Act 1 more manageable, helps with elemental, crowd control and resource management. Each fight also teaches unique skills that will be useful later: dodging minions with Beira, reacting to burrow ambushes with The Devourer. Tackle them when you feel ready or ask ChaosBoost if you’re short on time or gear. Either way, clearing these optional bosses will increase your overall power level and prepare you for the tougher fights ahead.
Areagne, the Forgotten Witch and The Brambleghast
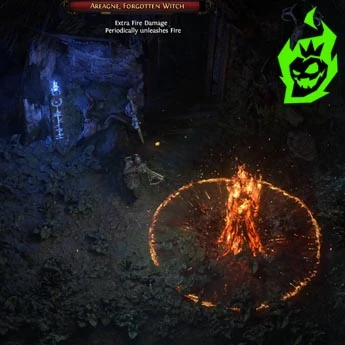
In The Grelwood you’ll find two more optional bosses: Areagne, the Forgotten Witch and The Brambleghast. While each has different looks—an ancient Vaal sorceress in a decaying hut versus a mutated forest horror—they share one common trait: both guard valuable skill gem rewards. Players who find and kill these bosses will get extra flasks, upgraded gem drops and practice with area denial mechanics. It’s not required to do these bosses but the rewards can accelerate your build and give you more damage or crowd control options.
Areagne casts Chaos spells in a small hut, cursing and poisoning those who get too close. Melee fighters trying to shut her down quickly must watch out for spider minions that web and immobilize. Ranged strategies work if you keep distance and let her trap herself with her own summoned adds. The Brambleghast spawns vine attacks, volatile orbs and fungal growths, requiring careful positioning to avoid lethal AoEs. Both fights can be done by alternating aggression and retreat, exploiting each boss’s weakness to Fire or Cold damage as needed.
- Move to dodge area spells and orbs.
- Focus minions when they cluster, clear space for safe attacks.
- Target boss weaknesses, like Fire for Areagne or precise AoE for Brambleghast.
Ending each fight gets you an Uncut Gem, possibly a Support Gem. Looting Areagne’s hut also gives you upgraded flasks and killing The Brambleghast gives you a Level 2 Uncut Skill Gem to level up your build. By killing these optional bosses you’ll develop a better sense of multi-attack patterns and area hazards, skills that will be super useful in the final Act 1 gauntlet. Getting these gems early will greatly amplify your character’s damage and defensive capabilities.
The Rust King and Draven, The Eternal Praetor
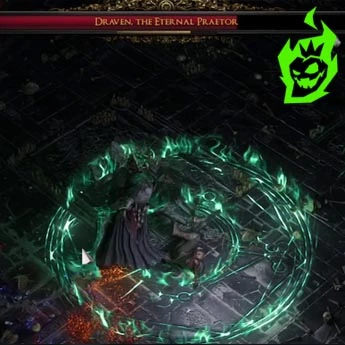
Act 1’s main storyline revolves around the main quest bosses: The Rust King in The Red Vale and Draven, The Eternal Praetor in the Mausoleum. These two are part of major questlines—“Secrets in the Dark” for The Rust King and “Sorrow Among Stones” for Draven—that block further progress. Killing these bosses gives you quest items, usually an Uncut Skill Gem and access to deeper areas. Each boss is a step up in difficulty, with unique elemental attacks and multi-stage fights so be prepared.
The Rust King is a metal automaton with Fire and Physical damage, punishing Fire skill users since he has Fire resistance. Exploit his weakness to Lightning or focus on elemental conversions to chip away at his heavy armor. Draven is an undead Fire caster, mixing ranged fireballs with sword swings. Characters without Fire resistance or crowd control will struggle, especially in the later phases. Both bosses require strategic use of dodge rolls, flasks and timed aggression.
| Boss | Quest | Location | Key Drop |
|---|---|---|---|
| The Rust King | Secrets in the Dark | The Red Vale | Uncut Skill Gem |
| Draven | Sorrow Among Stones | Mausoleum of the Praetor | Draven’s Memorial Key Piece |
By beating these fights Exiles get access to deeper Act 1 areas, quest completions and more gems in their library. If you’re stuck against The Rust King’s blade swarms or Draven’s fireballs consider more Cold or Lightning damage or consult services like ChaosBoost to push through. Beating both bosses shows the importance of balanced defenses and well-rounded offense so you’re ready for Lachlann and other mid-act challenges next.
Lachlann of Endless Lament and Asinia, the Praetor’s Consort
The middle of Act 1 puts you in a series of specter-infested crypts that culminate in fights against Lachlann of Endless Lament and Asinia, the Praetor’s Consort. Lachlann guards an ancient cemetery, summoning undead hordes while Asinia channels cold illusions to trap adventurers in the Tomb of the Consort. Both bosses drop quest items—Count Lachlann’s Ring or memorial key pieces—and are a showcase of Path of Exile 2’s spectral fight design. Success relies on curses, minion control and elemental resistance.
Asinia’s ghostly rapier and teleport attacks require quick reflexes, especially if you’re using spells that root you in place. Her cold attacks encourage stacking Cold Resistance and using flasks that dispel freeze. Lachlann is more of a sustained threat, summoning waves of undead while cursing the player with debuffs that reduce damage or defense. Clearing skeletons or specters quickly stops the battlefield from getting overwhelmed. Both fights require you to pace your attacks between defensive dodges so you never get caught by a lethal combo.
| Boss | Key Drop | Main Mechanic |
|---|---|---|
| Asinia, Praetor Consort | Asinia’s Memorial Key | Cold-based illusions, rapid teleports |
| Lachlann of Lament | Count Lachlann’s Ring | Summoned undead, curse debuffs |
By beating Asinia and Lachlann you progress the story and fortify your defenses for the Ogham challenges ahead. Each win gives you quest completion and possibly Uncut Gems to power up your character for the Act 1 finale. If you’re stuck, re-check your gear for missing resistances, consider different skill gems or use a ChaosBoost for instant results. The knowledge and items you get here will prepare you for the next wave of cryptic horrors in Ogham.
The Crowbell and The King in the Mists
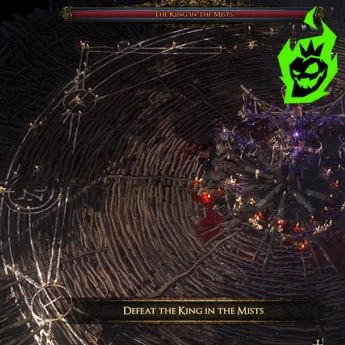
If you want more power in Act 1, hunt down The Crowbell and The King in the Mists, two optional bosses that give permanent buffs for certain builds. The Crowbell is in the Hunting Grounds, offering a Book of Specialisation for +2 Weapon Set Passive Skill Points. The King in the Mists haunts Freythorn, guarding the Gembloom Skull that gives +30 Maximum Spirit. Both are more difficult than regular side bosses and reward skillful play with a lot of character growth.
Fighting The Crowbell involves reading dive-bomb attacks and avoiding a series of bell shockwaves that apply lightning damage. Ranged kiting or frequent dodges help you stay at distance, opening up windows for counterattacks. The King in the Mists is a multi-phase epic with ritual curses (where you must stand still or move constantly based on color), an intermission maze and a second-phase tornado chase. Managing these complex mechanics gives you some of the best pre-Act 1I stat boosts available. Both are prime targets for exiles who want every advantage before the final fights.
| Boss | Location | Key Reward |
|---|---|---|
| The Crowbell | Hunting Grounds | Book of Specialisation (+2 Weapon Set Passives) |
| The King in the Mists | Freythorn | Gembloom Skull (+30 Maximum Spirit) |
Beating The Crowbell or Mist King forces you to go beyond basic boss patterns, dodging wide AoEs and precise timing. With +2 passive points or +30 Spirit you get a lot more build diversity, more powerful combos or faster skill usage. Although it may take time to defeat either boss, the permanent rewards are too good to skip if you want to dominate Act 1’s finale. Along with the other optional buffs, these fights are the foundation of a fully optimized Act 1 character.
Vargir the Feral Mutt and The Executioner
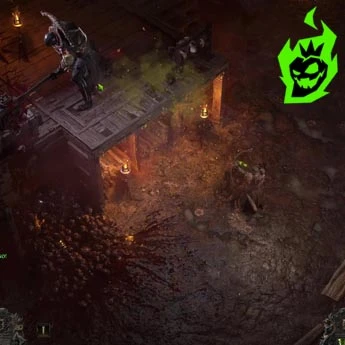
Finally, Vargir the Feral Mutt appears in the Ogham Farmlands as a beast and The Executioner haunts Ogham Village’s center. Each boss has different fight dynamics—a pack ambush for Vargir, a melee decapitation threat for The Executioner. Defeating them clears their areas and gives you Uncut Gems or quest items. Below are the fight guides to help you win fast.
Vargir hits hard but has no fancy spells, just a leap-and-maul combo. Clear his wolf pack adds first and you have free movement to dodge his bites. The Executioner has massive physical hits that can one-shot you if you don’t dodge his telegraphed swings. Armor flasks or well-timed guard skills can reduce damage, but each overhead slam is a one-shot if you’re not careful. Both fights reward active, patient offense that takes advantage of each boss’s recovery frames.
- Vargir: Clear adds fast, kite the big dog, apply bleed or fire for steady damage.
- Executioner: Watch for red telegraph, use dodge roll liberally, punish slow swing recoveries.
Once Vargir and the Executioner are dead, you have one less enemy blocking farm routes or story paths. The Executioner’s death also sets up the final fight with Count Geonor. Both fights show that you can’t face-tank high-damage moves, reinforcing Act 1’s lesson: survival is about movement and reactive defense.
Candlemass, The Living Rite
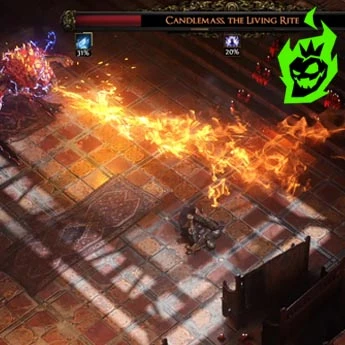
At the end of Act 1, an optional but important fight awaits in a side chapel of Ogham Manor: Candlemass, The Living Rite. This undead bishop casts dark magic with Fire and Cold, summons adds to keep you off-balance during rituals and has a lot of health. Players who win get Candlemass’ Essence which gives permanent maximum Life, a big boost for the final boss fight. Understanding Candlemass’ flaming and freezing phases is key to winning.
Candlemass switches between blue flame patches and cold novas, forcing you to move if you don’t want to get burned or frozen in place. Minion waves try to pin you while he channels a big ritual that can unleash fire-cold blasts if uninterrupted. Applying Holy or Fire damage can shred his undead body quickly, but you need to handle Fire and Cold resistances on your end as well. Failing to dodge or block the big ritual spells can end the fight fast. Once Candlemass dies, consuming his Essence gives +20 Maximum Life and can stack in higher difficulties.
Candlemass is all about environmental hazards, add management and dual-elemental attacks. By balancing your offense against his adds and disrupting his ritual, you get a big Life boost that helps you survive future bosses. With Candlemass cleared, you’re at peak readiness for the Act 1 finale. Whether you do it solo or with friends (or a boosting team), this optional boss is worth the risk for the permanent reward. The extra Life can be the difference between dying to Count Geonor and walking away.
Count Geonor, the Putrid Wolf – Act 1 Finale
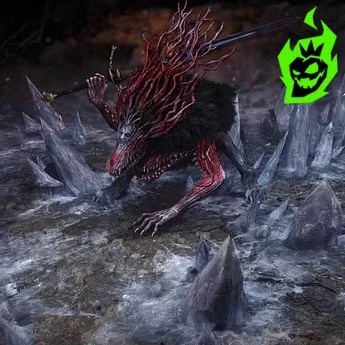
At the end of Act 1, Count Geonor, the Putrid Wolf is the biggest challenge yet. This multi-phase fight combines werewolf savagery, powerful ice spells and unstoppable physical damage into one big battle. You’ll transform between Geonor’s werewolf form, his human Praetor self and a monstrous wolf abomination. While the reward is mostly story progression, beating the Putrid Wolf makes you a survivor of Path of Exile 2’s Act 1.
In the first phase, Geonor swings a massive sword and lunges with cold speed, sometimes firing ice spears that can freeze you. Phase transitions often spawn AoE ice blasts or frost circles, requiring you to reposition fast to avoid taking damage. When he reverts to human form, he slows down but gets new crowd-control abilities like trapping you in ice before slamming you with his sword. Finally, the abomination phase unleashes his most aggressive attacks, including a red-circle leap.


