Mug’Zee Boss Guide: World of Warcraft The War Within
Raiding in World of Warcraft The War Within means epic battles with tough enemies and Mug’Zee is one of them in the Liberation of Undermine raid. This boss has two phases that alternate between high damage and tricky positioning. Every success with Mug’Zee relies on teamwork, precise movement and proper use of abilities, especially during the final burn phase. Below is a breakdown of strategies, mechanics and recommended approaches for Normal, Heroic and Mythic.
Mug’Zee’s Abilities
Mug’Zee has many abilities that test a raid group’s flexibility. Each ability targets a specific role or the whole group, so healers must work hard and damage dealers must kill adds fast. It’s important to learn the boss’s whole toolkit before entering the fight.
In the sections below, those abilities will be listed with the phase they appear in. Some abilities change depending on which side of the arena Mug’Zee is focusing on. Others are up the whole fight. Energy management is also key to not wiping when the boss’s meter reaches 100, so watch that meter. Here is a table of Mug’Zee’s main abilities:
| Ability Name | Effect | Primary Target | Notable Difficulty |
|---|---|---|---|
| Double Whammy Shot | Line attack aimed at a random player, then a short-range explosion around that player | Random DPS or Healer | All Difficulties |
| Molten Gold Knuckles | Frontal punch on the active tank with big damage and a knockback, leaving molten gold trail | Tanks | Heroic & Mythic |
| Crawl Mine Deployment | Summons multiple mines that fixate random players and explode on contact | Random Players | Normal & Heroic |
| Electro Shar Mark II Bots | Spawns robotic adds in set locations with shields that prevent damage until neutralized properly | Entire Raid | Mythic Exclusive |
| Jail Walls | Encases players in rock walls, requiring special methods to break and free them | Random Players | Heroic & Mythic |
| Moxie Energy | Charge mechanic that, when full, causes catastrophic raid-wide damage | Entire Raid | All Difficulties |
All DifficultiesThese abilities overlap so movement and awareness is key to reducing unnecessary raid damage. Understanding Mug’Zee’s abilities is the first step in making a plan and adjusting for each raid comp.
Knowing these abilities allows for smooth transitions between phases. It also helps in assigning players to handle adds or soak key attacks. In the next sections more information is provided on how these abilities are spread across the two phases and how they change in Mythic.
Phase One: Controlling Mug’Zee’s Modes
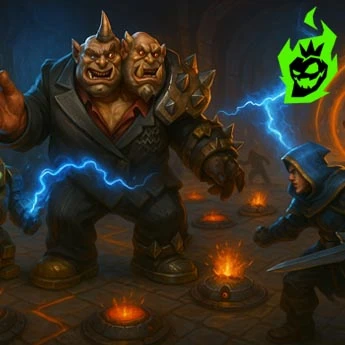
Mug’Zee starts on one side of the room and switches to the other when the raid moves as a group. Phase One is about controlling the boss’s energy and handling the basic mechanics that are in each half of the room. Pay attention to where the boss is and it’s more manageable.
This part has two modes: left side (Z) and right side (Mug). Each mode has different adds and AoE attacks. To not wipe the raid, coordinate the switch around 95 energy so Mug’Zee resets energy and starts the other mode. Switching too much results in raid wide damage so plan these switches carefully.
Here is a list of the main tasks for Phase One:
- Stack on Robot Add (Left Mode Z): Pull the boss near the first robot spawn and kill it fast to reduce raid wide damage. Ranged players target the far robot at the same time.
- Crawl Mines (Left Mode Z): Mines appear, slow at first and then speed up. Any contact triggers high physical and fire damage plus a heal absorb. Spread these mine explosions over time so healers can recover from each wave.
- Volunteer Rocketeer (Left Mode Z): Soak the large swirling circle with at least 5 players, then kill the Rocketeer add to reduce random damage. Use a rotation if debuffs persist.
- Double Whammy Shot (Left Mode Z): A line is aimed at a random player, they should stand still. A tank intercepts the initial hit with a defensive. Then the targeted player steps out to drop the small explosion away from others.
- Lightning Frontal (Right Mode Mug): When switching sides, watch the lightning beam that follows a player. That player holds position while everyone else sidesteps the beam.
Master these steps and you have a foundation for the rest of the raid. Tank, damage dealer and healer synergy is key because one missed soak or mismanaged mine explosion can wipe the raid. Navigating left and right modes is crucial to get Mug’Zee to 40% then the intermission.
Keeping a consistent rhythm in Phase One makes the transition to the more intense mechanics smoother. With practice the group will get more aware and get the boss to the next phase without burning too much resources. Controlling Mug’Zee’s modes sets the stage for the next phases.
Phase Two: Combined Mechanics
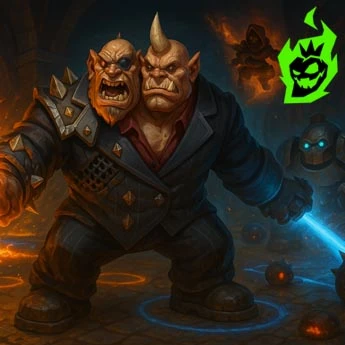
After 40% Mug’Zee starts the intermission with charges towards a marked player and spinning frontal slashes that sweep the room. During this time the boss’s mechanics from both sides combine and it’s a tough environment. This phase requires great coordination because the boss has both left and right side abilities at the same time.
Mug’Zee no longer switches sides to reset energy. Instead the boss goes up to 100 energy and there’s no way to reduce it. Damage dealers use Bloodlust here to maximize raid damage and kill Mug’Zee before a full energy wipe. Healers might run out of mana if the group takes too long and tanks have to prepare for faster and stronger hits because Mug’Zee has more Haste.
Here is a table of Phase Two’s main challenges:
| Challenge | Explanation | Mitigation Strategy |
|---|---|---|
| Combined Add Spawns | Left side bots and right side goons appear together | Assign DPS groups to handle specific spawns in separate zones |
| Increased Boss Haste | Mug’Zee’s attacks and casts occur at a quicker pace | Use external cooldowns on tanks and keep a healing rotation |
| Energy Overflow | Boss reaches 100 energy with no reset available | Use Bloodlust early to defeat Mug’Zee before a full wipe occurs |
| Overlapping AoE Zones | More swirlies, lines, and explosive circles appear at once | Pre-assign safe areas and maintain awareness of personal space |
| Healing Stress | Two-phase DoTs (from each mode) stack simultaneously on the entire raid | Keep the raid topped off and cycle defensive cooldowns |
A coordinated approach to all these overlapping challenges is key. Expect higher damage bursts when the boss is at 20-10% health as the mechanics from the phase intensify. Tanks need to handle Molten Gold Knuckles especially if more than one add spawns at the same time.
Beating Mug’Zee in Phase Two is a big win for the raid group as it shows the synergy between all roles. Winning this phase gets the group progress in Liberation of Undermine and sets up the final bosses of World of Warcraft The War Within. Combined mechanics in Phase Two create some memorable moments and highlight the importance of movement and cooldown usage.
Mythic Modifications: Surviving the Upgrades
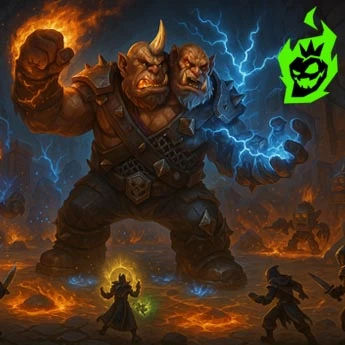
Mythic difficulty is where Mug’Zee is at full power and requires detailed planning and execution. Several upgrades appear in both phases and you need to combine mechanics from one mode with solutions from the other. Coordination is the key as new add types are more deadly and some walls don’t break as easily.
Here’s a brief overview of the Mythic changes. The boss only updates modes if the entire raid moves to one side without stragglers on the other side. This narrows the timing window for each transition and requires discipline in movement. The crawl mines have plating that prevents damage or stuns, so you need to use ice spears or other abilities to trigger them.
Mythic specific tasks:
- Shielded Electro Shar Mark II Bots: Immune to damage initially. Their shields are removed by Double Whammy Shot or other abilities.
- Longer-Lasting Rock Walls: The Jail Walls from the right side don’t break when adds die. Use ice spears from the slipping debuff or crawler mines to shatter them.
- Slipping Debuff Removal via Fire Pools: Stepping in molten pools left by the Goblin Rocket soak removes the Frost Shatter Boots debuff. This is needed to control movement.
- High Physical and Fire Damage Mines: Hitting a mine does 33 million physical and 7 million fire damage, one-shot most players. Immunities or forced collisions with rock walls might be required.
- Transition Timing: Mug’Zee only changes modes if everyone has moved to the new side so watch out for stragglers.
Handling each Mythic upgrade often involves layering abilities from both sides of the arena. For example a crawler mine might be dragged towards rock walls to remove the immediate threat of an explosion in the middle of the raid. Meanwhile Electro Shar Mark II Bots are a persistent presence until a well timed Double Whammy Shot breaks their shields.
Applying these strategies keeps a Mythic group afloat but every missed interrupt or soak can wipe the raid. Good synergy between ranged and melee damage dealers and tank awareness helps each step go smoothly. Surviving the upgrades in Mythic is all about controlling the boss’s special mechanics that require cross-phase coordination.
Raid Composition and Strategy
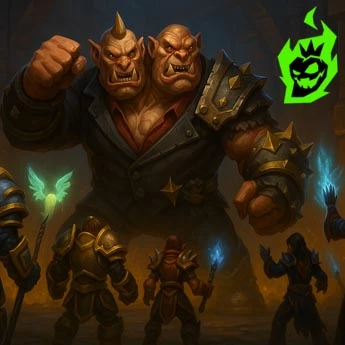
For Mug’Zee you need to pick enough healers to offset the heavy DoTs, a strong tank duo to handle Molten Gold Knuckles and other direct hits and a mix of melee and ranged damage dealers who can adapt to the boss’s movement. Some classes are good at soaking mechanics while others have crowd control or immunity spells.
A typical World of Warcraft The War Within raid size is 20-30 players in flexible modes but Mythic is usually locked at 20. Make sure to have at least 2 tanks, 4-5 healers (depending on average item level and personal performance) and the rest in DPS roles. Extra utility helps with frequent interrupts or add bursts. Here’s a possible composition for a 20-player Mythic setup:
| Role | Recommended Number | Key Responsibilities |
|---|---|---|
| Tanks | 2 | Swap for Molten Gold Knuckles, intercept Double Whammy Shot, position boss |
| Healers | 4-5 | Maintain raid health through overlapping DoTs, manage big explosion soaks |
| Melee DPS | 5-7 | Focus adds quickly, handle interruptions, soak large circle zones |
| Ranged DPS | 6-8 | Kill distant adds, watch for crawler mines, assist with ice spear tactics |
| Utility/Hybrid DPS | 1-2 | Provide off-heals, immunities for mine detonations, extra crowd control |
Off-heals, immunities for mine detonations, extra crowd controlPlan how external tank cooldowns will be used to counter big hits and how healer cooldowns will be used in high-damage phases. Communication is key: calling out mine spawns, warning about upcoming soaks and timing transitions around 95 energy to minimize chaos.
Finishing the fight with a well composed raid shows the group’s discipline and synergy. Assigning roles clearly helps especially in the last phase. Raid composition and strategy is the foundation to beat Mug’Zee and progress further in The War Within.
Loot and Rewards
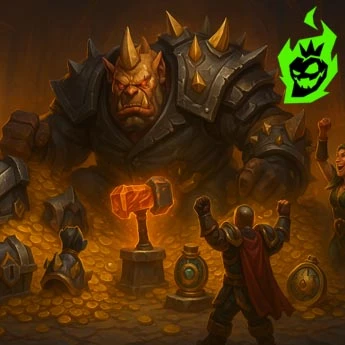
Defeating Mug’Zee gives you gear upgrades to help with later Liberation of Undermine bosses. Each difficulty has different item levels and some trinkets or set pieces are super sought after. Mythic mode loot is especially strong and will propel your team towards the last bosses in the raid. Mug’Zee drops:
- Armor Pieces matching raid tier sets.
- Weapons with mechanical or molten theme.
- Accessory Items that give bonus effects for absorbing or reflecting damage.
- Trinkets with on-use or passive abilities that fit into your rotation.
Many groups prioritize this boss in their weekly raiding schedule because of the item upgrades. The loot method (personal loot or guild loot) determines how items are distributed so plan ahead which classes need which items. Tanks, healers and DPS might have their eyes on certain gear pieces that make the last bosses more doable.
Beating Mug’Zee also marks a big progress point in Liberation of Undermine. Winning shows the group has experience with TWW raid content and are ready for the next, even harder bosses. Loot and rewards from Mug’Zee makes the group stronger and shows they are committed to mastering every mechanic and having the whole raid ready for the next threats in World of Warcraft The War Within.
Final Thoughts on Conquering Mug’Zee
Mug’Zee FinaleMug’Zee is the ultimate test for raiders to master TWW content. Phase 1 and Phase 2 has different demands on positioning, add management and soak coordination for every role in the raid. Mythic mode turns up the heat and requires synergy between the left and right side of the boss to navigate the hazards smoothly.
Tanks have to handle Molten Gold Knuckles and Double Whammy Shot intercepts, constantly repositioning the boss. Healers keep the raid health steady through overlapping DoTs and step up to heal big absorbs from mines or big circle soaks. DPS classes kill adds quickly, manage crawler mines and burn phases once the last part of the fight is done.
In the end, beating Mug’Zee is a proof of well thought out strategy, deep understanding of the mechanics and willingness to learn from mistakes. From controlling the boss’s energy in Phase 1 to unleashing maximum damage in Phase 2, every step requires discipline and focus. Celebrating that final hit on Mug’Zee is one of the best parts of Liberation of Undermine and it pushes the whole raid forward in the story of World of Warcraft The War Within.


