Monster Hunter Wilds Farming Guide: Master the Gathering Loop
Monster Hunter Wilds is all about collecting resources for upgrades, weapon crafting and layered armor creation. With so many materials in this game, hunters are looking for the most efficient ways to gather items like Nightflower pollen, Guild points, Zenny, and monster parts. These materials are part of a big loop where forging, melding and trading all come together. Below are routes, strategies and processes to optimize time in every region of Monster Hunter Wilds.
Each method is a short cycle that gives you recurring rewards so you can get multiple useful items in one go. By following below, a hunter should be able to keep a growing stockpile of essentials while still having fun hunting.
Nightflower Pollen for Gold Melding and Gold Relic Tickets

Hunters often farm Nightflower pollen in Monster Hunter Wilds to trade for Gold Melding and Gold Relic tickets at NPC traders. These tickets give you up to 10 high-rarity decorations or relic weapon parts per redemption, speeding up your progress towards powerful gear sets. The process involves resetting in-game conditions to guarantee pollen flowers bloom, so you can get the items consistently. While minor changes made pollen farming a bit harder than before, it’s still worth it if you want to expand your decoration collection. Rest cycles and partial map hopping will give you the pollen that becomes trade currency for better items.
Here’s a quick rundown of the steps to farm Nightflower pollen:
- Rest for Plenty Environment (Evening): Rest in your tent until the game says it’s evening Plenty Environment.
- Close and Relaunch the Game: Exit the game on your system’s home screen and then launch Monster Hunter Wilds again. This will reset the pollen timers.
- Private or Single-Player Lobbies: Start in an online single-player session or a private lobby to prevent outside interference that might mess with the pollen cycle.
- Collect Pollinating Flowers: Fast travel to Windward PLS or other areas right as the flowers bloom, usually 7-8 minutes after loading into the map.
- Repeat the Process: Go back to the tent, rest again, close the game and relaunch for new Nightflower pollen.
It’s recommended to bundle pollen farming with other activities like fishing, Curio Shell Crabs and mining for other trade items. This way you get more out of your reset time. Nightflower pollen is still a powerhouse for Gold Melding and Gold Relic tickets, keeping your decoration and relic part supplies flowing for the strongest possible loadouts.
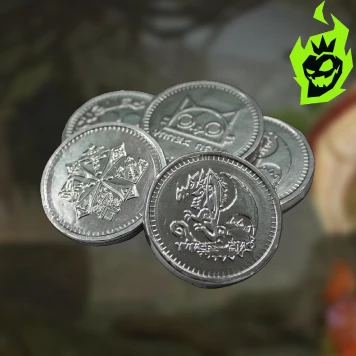
Where to Collect Curio Shell Crabs and Wyvern Coins
Hunters who farm Curio Shell Crabs also tend to get a lot of Ancient Wyvern Coins on these routes. Both items are traded to NPCs for rewards including Gold Melding and Gold Relic tickets. The small crustaceans are found near water sources or hidden cavern pockets, often with fish spawns that give valuable scales. The quick loop of finding these crabs in each map gives you constant coin gains, bridging the gap between standard hunts and farming. Stopping by each crab spot on your Nightflower pollen route amplifies your currency flow without straying far from your main path.
| Map | Area/Camp | Possible Crab Spot | Nearby Collectibles |
|---|---|---|---|
| Scarlet Forest | Underground Lake (Area 12 Camp) | Beside the tent or the lakeside wall | Fish for Platinum Scales, Rare Gather |
| Scarlet Forest | Flowering Rock (Area 6 Camp) | Small puddle behind the tent | Minor fish spawn, Ancient Wyvern Coin |
| Scarlet Forest | Hidden Waterfall (Area 16 Camp) | Inside the cave beside the waterfall | Nearby gather point for trade items |
| Oil Well Basin | Mining Cave (Area 14 Camp) | Right outside the camp near the tunnel | Possible second crab near the Wilted Room |
| Ice Shard Cliffs | Upper Corridor (Area 15 Camp) | Bottom of the spiral staircase | Extra fish spawn in side caverns |
| Ice Shard Cliffs | SinGho (Area 18 Camp) | Cave entrance near the tent | Mining deposits for trade materials |
| Ruins of Wyveria | Zone 8 Camp (Gap in Rubble) | Near the bone pile close to the tent | Hidden chest with small treasure |
| Windward PLS | Valley Hideaway (Area 6 Camp) | Around the large pillar near the tent | Additional fish, potential flower bed |
| Windward PLS | Area 3 South Camp | Waterfall ledge if you jump from your Sacred | Nightflower pollen spawn up high |
Running through these areas gets you fish scales, Wyvern Coins and the occasional crab for trade or personal collections. Hunters can trade these coins at NPCs and get high-value items. For example, a 30-coin trade might get you a Gold Melding ticket, while direct Nightflower pollen trades give you a 1:1 ticket ratio. These Curio Shell Crab stops give you a steady supply of Ancient Wyvern Coins and complete the resource-farming loop in Monster Hunter Wilds.
Zenny and Guild Points Hunting
A good amount of Zenny and Guild points supports many aspects of Monster Hunter Wilds, from forging new gear to upgrading existing sets. Large sums of in-game currency cover forging fees, while Guild points unlock layered outfits and expansions. Some hunters get Zenny from quest rewards, but consistent loops with fish catching methods give you a faster turnaround. Doing this near Curio Shell Crab spawns doubles up on currency and items for future melding. Short travel times and repeated fast traveling keeps the momentum going.
Here’s a breakdown of how to get Zenny and Guild points by focusing on fish and other valuable pickups:
- Catch Platinum Fish: These fish drop scales that give you 2,000 Zenny each. Look in deep water spots in Scarlet Forest and hidden lakes in Windward PLS.
- Rare Gatherables: Many underwater tunnels lead to hidden mineral or insect points that give you Guild points each time.
- Break Monster Parts: Regular hunts also give you raw monster materials that trade at the Smelting Foundry for Guild point increments.
- Feasts: Villages sometimes have feasts that give you additional monster part drops, which give you more trade items or forging funds.
Filling up on Zenny and Guild points is key for advanced armor forging, layering suits and unlocking special decors. The fish loop is not only short but also multiplies the resources from standard hunts. Many players do short cycles at the Scarlet Forest underground lake and Area 6 Flowering Rock pond to get multiple Platinum Fish in a couple of minutes. This also syncs with repeated rests that refresh monster spawns and event cycles for maximum in-game wealth.
Armor Spheres and Aran Weapon Reinforcement

Armor spheres are one of the most important crafting items in Monster Hunter Wilds. They boost armor piece stats and increase defensive capabilities. Aran weapon reinforcement also requires smelting ore which has synergy with armor sphere production through the Smelting Foundry. This synergy often leads players to hunts that give large amounts of monster parts that can be traded into spheres and tempered hunts for direct sphere drops. Among all the monsters, Tempered Arkfeld stands out for dropping multiple armor spheres as quest rewards which are essential for frequent gear upgrades.
Here’s a table comparing monster hunts and their armor sphere drops:
| Monster | Quest Type | Armor Sphere Drops | Additional Notes |
|---|---|---|---|
| Arkfeld | Tempered Investigation | 2–3 Hard Armor Spheres | Highest yield, parts also smelt well |
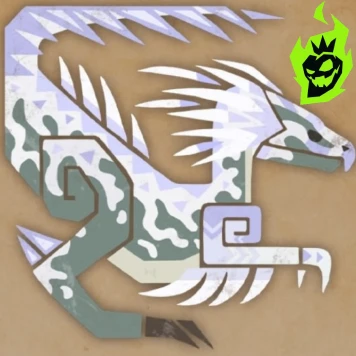
| Gore Magala | Tempered Apex Investigation | 1–2 Hard Armor Spheres | Useful for part breaks, synergy with Aran |
| Rathalos | Standard High-Rank | 1 Hard Armor Sphere | Moderate but consistent drop rate |
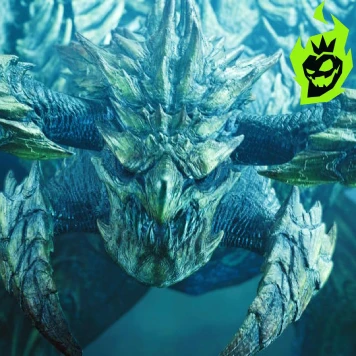
| Guardian Das Shaga | Guardian Quest | Variable, smelt parts for spheres | Typically used for layered sets |
| Kirin | High-Rank Investigation | 1–2 Hard Armor Spheres | Often found in smaller investigations |
A primary method is to chain Tempered Arkfeld hunts. Break as many parts as possible during each hunt, then claim the quest rewards. Each completed quest often gives you multiple Hard Armor Spheres, smelting ore or monster materials that can be traded into spheres at the Foundry. Having a steady supply of Armor spheres increases the defense of gear pieces and makes you a more durable hunter. Combining these hunts with the previous gathering loops gives you an uninterrupted cycle of forging, reinforcing and upgrading.
Nourishing Extracts and Guardian Seikret Quests
Crafting mega demon drug and mega armor skin requires Nourishing extracts. These liquids come from certain Guardian monsters, mainly Das Shaga, Eono Doon and the smaller Guardian Seikret. Only a couple of large Guardians are in the entire bestiary so some players get frustrated when focusing on a single monster for extended fights just to get a limited amount of extracts. Fortunately the Guardian Seikret quest in low rank is a simpler alternative. Hunting 6 of these small monsters in a quick quest gives you 0–4 Nourishing extracts on average multiplied by any available Village Feast bonus. Repeated runs stack up quite well over short intervals.
Here’s why Guardian Seikretruns are good for extract gathering:
- Speed of Completion: A low-rank quest with 6 small targets usually takes under 2 minutes to complete.
- Drop Probability: Each Guardian Seikret target has a moderate chance of giving Nourishing extracts.
- Feast Bonus: Lucky meals or Feasts might give you more target rewards at the results screen.
- Consumable Efficiency: Fewer hunts to gather enough extracts for long-lasting buffs in subsequent large monster battles.
- No Carves Required: A single quest completion triggers the reward screen, no carve RNG for extracts.
Those who need a steady supply of mega demon drug and mega armor skin find this method essential for daily hunts. Repeated runs give you enough extracts to craft dozens of high-tier consumables. Nourishing extracts might seem scarce when looking at large Guardian monsters but Guardian Seikret runs are a quick way to get them for everyone who wants to be top-tier in every hunt. This method suits everyone who wants to maintain top gear and powerful buffs.
Final Thoughts on Monster Hunter Wilds Farming
Many aspects of Monster Hunter Wilds is about resource loops. Nightflower pollen is the foundation for trading into Gold Melding tickets and Gold Relic tickets, Curio Shell Crabs give you Ancient Wyvern Coins and partial synergy with fishing spots. Linking these activities gives you valuable items in one continuous route. Meanwhile Tempered Arkfeld or other apex-level monsters give you armor spheres to keep your defense high.
Zenny and Guild points flow from fish-based farm spots, especially the hidden pools in the Scarlet Forest and the subaqueous tunnels in the Windward PLS. Low-rank Guardian Seikret quests turn extract gathering into a quick series of fights. Each method is a piece of the puzzle, and together they form a balanced approach that rewards short cycles and planned rest resets. Having a steady supply of everything feels like the difference between a basic build and an optimized loadout.
Hunters should try these out to fit their forging, melding or layering goals. Monster Hunter Wilds gives you a lot of freedom to roam, discover and chain methods together. Fishing, shell crab searching, nightflower picking and tempered hunting keeps the game moving and amplifies your resources. Frequent restarts, map changes and short hunts give you repeated item refreshes so you can have a steady path forward when customizing gear or filling out a specialized loadout. This farming guide is here to help you with that, so go gather widely and prepare for every monster that comes in future updates.