Monster Hunter Wilds Endgame Guide: Mastering High-Rank Hunts
Welcome to my in-depth look at the Monster Hunter Wilds endgame, focused on Hunter Rank 41 and above. I have spent countless hours testing tempered monsters, apex hunts and field surveys to refine my strategies for you to master the high-rank challenges. I have hunted the elusive Gore Magala, chased powerful arkfeld threats and used the best decorations to boost damage. This guide covers everything from building a set to doing targeted investigations for the best results. Get ready for in-depth info on how to optimise your gear, gather resources and crush the toughest endgame monsters of Monster Hunter Wilds.
Foundations of the Endgame
Entering the endgame of Monster Hunter Wilds means stepping into a world of tough monsters, rare rewards and endless upgrades. I remember the thrill of crossing Hunter Rank 41, everything changes and new opportunities open up. This part of the game is all about special investigations, advanced field surveys and gear upgrades that revolve around maxing out your performance in hunts. Tempered monsters, apex creatures and the elusive tier 3 monsters are the hallmark of this stage, giving out relics and unique drops that are crucial to your progress. Mastering these basics is the first step to controlling the chaos of high-rank hunts.
| Element | Description | Importance Level |
|---|---|---|
| Tempered Monsters | Strong versions of standard beasts that drop advanced materials | High |
| Apex Hunts | Missions against apex variants with specialized gear rewards | Very High |
| Field Surveys | Random quest offerings that yield targeted monster parts or relics | Moderate |
| Investigations | Custom hunts saved for repeated attempts at monster-specific drops | Very High |
| Relic/Artian Gear | High-rank weapon and armor pieces requiring rare forging materials | Very High |
These elements are the core of Monster Hunter Wilds at higher ranks. They will affect every part of your progression, from forging better gear to upgrading your skills for the toughest endgame hunts. Master each of these and you’ll be ready for everything that comes next in the new, more intense world of top-tier challenges.
Selecting and Forging Your Armor
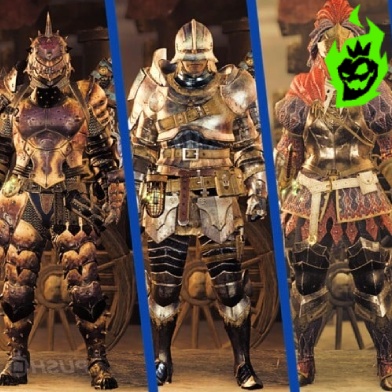
You need good armor to survive high-level hunts in Monster Hunter Wilds. I tested multiple pieces of armor from monsters like Gore Magala, Ebony Odogaron and even Nargacuga to find synergy for elemental attacks and raw damage. Each monster set has unique skills that improve defence, offence or resource gathering. Mixing these sets allows you to have a balanced approach, staying protected while dealing high DPS.
One of my personal favorite is to mix 4 Gore pieces with 1 Guardian Ebony part. This combination works well for elemental focus if you plan to craft an element-heavy weapon. This will require multiple hunts to gather enough monster parts, especially the rarer plates and gems. By doing this you’ll be able to stay on track and get the resources you need to forge a good armor set.
| Notable Armor Skills | Effect on Hunting | Recommended Use |
|---|---|---|
| Quick Switch | Boosts speed of weapon swaps and combos | Ideal for Switch Axes |
| Handicraft | Extends weapon sharpness levels | Vital for melee builds |
| Razor Sharp | Lowers sharpness consumption rate | Excellent for raw DPS |
| Element Boost | Raises damage of elemental attacks | Crucial for elemental |
| Geologist | Increases gathering yield from mining outcrops and bone piles | Helpful for resource runs |
 Wilds Hunter Rank
![]() Endgame Content
Endgame Content
![]() Top Gear
Top Gear
![]() Loot and Zenny
Loot and Zenny
 Monsters Kill
![]() Monster Materials
Monster Materials
![]() Rare Loot
Rare Loot
![]() Achievements Progress
Achievements Progress
 Armor Sets
![]() Full Armor Sets
Full Armor Sets
![]() Loot and Materials
Loot and Materials
![]() Achievements Progress
Achievements Progress
 Weapons
![]() high-tier weapons
high-tier weapons
![]() hunter rank
hunter rank
![]() loot & materials
loot & materials
![]()
![]()
These skills work well with various playstyles in Monster Hunter Wilds. Some improve your survivability while others maximize raw or elemental DPS. Experiment with combinations to see how to build your armor synergy before diving deeper into the endgame.
Building Power with Decorations

Boosting your offence involves hunting for the best decorations, especially those that give higher damage output. My progress really took off when I started targeting advanced offense decorations like Attack Boost, Critical Eye, Weakness Exploit and Handicraft. In Monster Hunter Wilds the highest tier decorations come from tempered hunts and apex hunts where RNG determines item drops in the form of unidentified sword icons.
There is a difference between armor decorations (defensive enhancements) and weapon decorations (damage-centric bonuses). Early on you’ll notice that defensive decorations drop more frequently while offensive ones are a bit rarer. This means repeated hunts or melding at the Wyverian Merchant often required to get the best jewels.
| Decoration Name | Rarity | Effect on Damage | Slots Required |
|---|---|---|---|
| Attack Boost | 7-8 | Increases raw power | 2-3 |
| Critical Eye | 6-8 | Raises affinity rate | 2-3 |
| Weakness Exploit | 7-8 | Amplifies crit chance | 2 |
| Handicraft | 6-8 | Extends weapon sharpness | 2-3 |
| Expert Jewel | 6-8 | Improves critical hits | 1-2 |
Getting these high-rank jewels turns your sets into powerhouses but it takes time. Stock up on relevant decorations to adapt your builds. Some hunts drop multiple unidentified swords so look for those high-yield quests on your map or in investigations.
The Reinforcement Grind for Artian Weapons
Artian weapons rule Monster Hunter Wilds once you start refining their reinforcements. I found the best way is to make multiple copies of the same Artian weapon and re-roll each until you get the desired bonuses. For example a dual blade setup might focus on element and a single sharpness upgrade.
RNG is involved in reinforcements so it might take a lot of tries. But dismantling a reinforced weapon returns 100% of the resources spent minus the initial relic cost. This prevents frustration over wasted rare materials and gives you multiple chances to chase that perfect combo of element and raw damage.
| Resource Type | Purpose in Upgrading | Approx. Quantity Needed per Stage |
|---|---|---|
| Rarity 8 Relics | Base forging materials for Artian gear | 10-20 |
| Wyverian Blood Stones | Melding currency for advanced weapons | ~5 per roll |
| Ore Cells | Required for reinforcement steps | 50 total for full 5 upgrades |
| Monster Parts | Key forging items from highest-tier foes | Varies per monster hunted |
| Gold Melding Tickets | Conversion into relic or decoration sets | 1 ticket yields multiple relics |
These resources look scary in big numbers. But consistent hunts of tier 3 tempered monsters drop most of these. Focus on apex versions of arkfeld, Gore Magala, and other top targets as they drop high amount of relics and rare items.
Field Surveys and Investigations
Hunting high-value monsters in Monster Hunter Wilds often involves field surveys and investigations. Field surveys appear randomly on the map and are valid for one attempt unless saved. Investigations are saved versions of those quests offering multiple attempts with the same rewards.
Here’s a quick checklist for using surveys and investigations:
- Find a monster that drops the parts you need or the relics you want.
- Check the reward details for bonus items and rare material spots.
- Activate the quest and save it as an investigation if it yields high-value rewards.
- Review your investigation list to plan repeated attempts.
- Track your usage count since each investigation has a limited number of runs.
Following these steps will help you get valuable items including G-rank rubies, monster gems and advanced decorations. Whenever you see a field survey, it’s often worth to turn it into a multi-hunt investigation if you have enough investigation slots left.
Rare Monster Drops
Some monsters have extremely rare items like plates, gems and mantles that are needed for high-rank gear. Getting these rare drops is not always direct so I often check quest rewards for guaranteed chances. This method simplifies getting apex-level items.
It’s helpful to prioritize which monsters drop the materials you need most. Generally Gore Magala rubies and arkfeld hearts are top-tier items for forging high-end gear. Also, double hunts that feature multiple monsters at the same time gives you more rewards in one go.
| Monster Name | Rare Drop Example | Use in Forging |
|---|---|---|
| Gore Magala | Gore Ruby | Top-tier armor and weapons |
| Arkfeld (Tempered) | Ark Heart | Apex-level augment upgrades |
| Rathian Variants | Rath Ruby/Gem | Versatile for multiple gear sets |
| Ebony Odogaron | Ebony Plate | Specialty weapons and armor sets |
| Kushala Elder | Elder Steel Gem | High-rank exotic weapons |
These items have low drop rates so hunters focus on investigations or field surveys with extra reward boxes. Breaking specific monster parts also increases the chances so focus on horns, tails or wings where applicable. This tends to yield the best results.
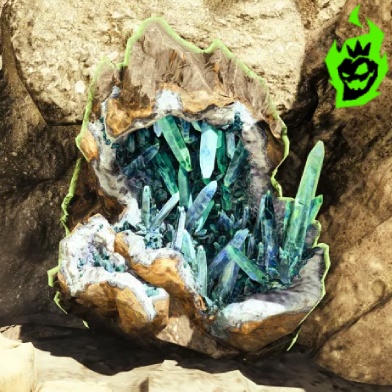
Farming Ore and Points at the Smelting Foundry
The Smelting Foundry in Monster Hunter Wilds is a great way to stockpile reinforcement points. I deposit extra monster parts and refined materials to get Ore Cells. These are needed for weapon reinforcements especially when upgrading multiple Artian weapons.
Each monster part has a point value with apex parts worth more than typical materials. Dumping leftover resources from repeated hunts speeds up the forging process. The Smelting Foundry sometimes has events that increase your conversion rates so keep an eye on the foundry schedule.
| Material Type | Typical Foundry Value (Points) | Approx. Ore Cells Gained |
|---|---|---|
| Arkfeld Apex Part | 90-120 | 3-4 |
| Gore Magala Wing | 60-80 | 2-3 |
| Elder Dragon Remnant | 100 | 3-4 |
| Low-Level Monster Bone | 10-20 | 0-1 |
| Carapace/Hide | 20-40 | 1-2 |
These conversions help get 50 Ore Cells for all 5 reinforcements of a single Artian weapon. Focus on big targets that drop apex parts then feed the foundry with your extras to speed up the process of perfecting your loadout.
Maximizing Melding Through the Wyverian Merchant
The Wyverian Merchant offers melding services that convert lesser decorations or extra items into higher-tier random outcomes. This is especially useful for getting offensive decorations or extra Rarity 8 relics. By sacrificing a few duplicates you can spin the wheel of chance.I found that using gold melding tickets supercharges this whole system.
These tickets, often traded for Night Flower Pollen, allow multiple tries at high-tier melding. Another strategy is to funnel leftover Wyverian Blood Stones from hunts into relic forging. This has given me rare weapons and near perfect offensive jewels several times.
| Strategy | Description | Advantages |
|---|---|---|
| Gold Ticket Melding | Converts gold tickets into random high-tier decorations | Fast path to rarities |
| Silver Ticket Melding | Uses silver tickets from bounties for moderate-tier items | Less resource-heavy |
| Blood Stone Exchange | Funnels tempered monster drops into relic forging | Targets specific weapons |
| Excess Jewels | Sacrifices lower-tier duplicates for a random outcome | Clears inventory space |
| Continuous Rolling | Combines several methods for repeated attempts | High chance of rare gains |
Combining these melding methods optimizes your resource usage. When you see extra items, deposit them into melding to increase your chance at high-value items for more sets in Monster Hunter Wilds.
Managing Great Hunts for Multiple Rewards
Great Hunts feature multiple high-rank monsters on the same quest and give you massive rewards in one run. After I completed a side quest that required defeating two tempered monsters at once I unlocked Great Hunts in each location. These hunts give you a lot of relics, decorations and even multiple apex monster parts.
Check the quest details: Great Hunts might be in your field surveys or as special investigations. If you see a hunt with at least one apex or tier 3 monster, that’s a great opportunity to get the forging materials for multiple armor and weapon sets.
| Location | Monster Pair | Notable Rewards |
|---|---|---|
| Wounded Hollow | Tempered Ebony Odogaron & Rath | High-tier apex materials |
| I Shar Cliffs | Gore Magala & Arkfeld | Numerous Rarity 8 relics |
| Scarlet Forest | Rathian Variant & Kushala Elder | Premium gems and decorations |
| Windwood Plains | Apex Arzuros & Tempered Tobi | Valuable monster hearts |
Multiple monsters have their own challenges as each has its own strengths. My tip is to isolate them in separate areas whenever possible, kill one then move to the next. The rewards are worth the effort as you get so many relics and decorations per run.
Unlocking the Armorcharm and Powercharm
The Armorcharm and Powercharm are items you carry in your pouch for passive defense and offense boosts. These items become available through special quests in Monster Hunter Wilds as you progress in Hunter Rank. One quest is at HR 15 with a double Hami in the arena and the other at HR 20 with two A Jeren in the arena.
A key strategy is to focus on one monster until it’s dead then move to the second to reduce chaos. Once the quest is complete you get the Armorcharm or Powercharm which take up 2 slots in your pouch. It may seem weird to waste bag space for these items but the raw stats are worth it.
Tips for Arena Duos:
- Bring traps to segment or limit the movement of the first target.
- Use Flash Pods to disorient flying or aggressive enemies.
- Eat for defensive or offensive meal perks beforehand.
- Stock up on healing potions in case the second monster arrives early.
These dual hunts are crazy but finishing them gives you these permanent stat-boosting items. Having the Armorcharm or Powercharm in your inventory means a steady surge in survivability and attack power for every hunt.
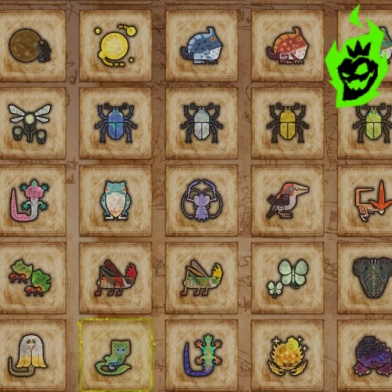
Gathering and Farming Consumables
Gathering runs for items like Might Seeds, Demon Drug ingredients and other consumables are still important to keep your performance high in long hunts. I switch to a set with Geologist and Botany to get extra pickups from resource nodes like mushrooms, seeds and bugs. This is more reliable than waiting for the farm to give me a few items per cycle.
Here’s an example table of top consumables:
| Consumable Name | Typical Gathering Spot | Usage in Hunts |
|---|---|---|
| Might Seed | Forest mushrooms, Cliff nut plants | Boosts raw damage temporarily |
| Adamant Seed | Mountainous shrubs, Hollow cacti | Raises defense temporarily |
| Herbal Medicine | Jungle flowers, Mossy patches | Cures poison effects quickly |
| Honey | Bee hives in wetlands | Creates stronger healing potions |
| Insect Husks | Cracked logs in forest areas | Used in certain crafting recipes |
Spend a short amount of time gathering major items and each hunt starts with a solid loadout. One way is to rest spam at the hub and environment reset then track the new resource points. Another way is to trade with NPCs around the villages and stock up on seeds or pollen in exchange for monster parts.
High-Rank Mastery
Progressing through Monster Hunter Wilds at higher ranks is a cycle of hunts, forging and continuous improvement. By using investigations, melding processes and great hunts you can steer your gear towards perfect and I’ve seen many players gather insane sets, push the Hunter Rank limits and conquer apex monsters in record time.
Being organized and goal oriented is the key to success in the endgame. Looking for optimal decorators, building multiple sets of Artian weapons and defeating tier 3 tempered monsters gives you tangible results. Keep your momentum through each challenge, refine your favorite sets and enjoy the thrill of mastering the toughest hunts in Monster Hunter Wilds.