Fragpunk Guide for Beginners
I tried Fragpunk and it’s become one of my favorite 5v5 shooters to date. There’s a great mix of strategy, raw gunplay and dynamic abilities that feels fresh every match. With Shard Cards, Lancers and different game modes it’s hard to put it down. My goal here is to break down the basics of Fragpunk in a clear way so both newbies and veterans can learn something new. By the end you’ll be jumping into those lobbies with confidence and a deeper understanding of this awesome FPS.
Core Gameplay of Fragpunk
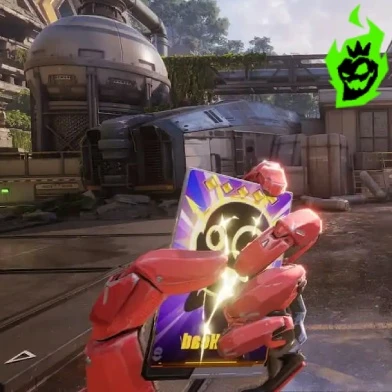
I love shooters that pack depth into simple match formats and Fragpunk does just that with a tight 5v5 environment. The main mode is Shard Clash which is a plant/defuse scenario where you have to plant or prevent the detonation of a blowy-uppy device on one of two sites. One of the unique twists is how each round pulls in random Shard Cards from the collective pool of your team so every match feels different.
Below is a table that outlines the core features and numbers of Fragpunk’s gameplay. It includes game modes, round structure and key stats that affect the match:
| Feature | Description | Notable Numbers / Effects |
|---|---|---|
| Primary Mode: Shard Clash | A classic one-life-per-round plant/defuse scenario. | 5v5 format, attackers plant on one of 2 sites |
| Alternative Modes | TDM, Zombies, Rotating Arena modes (change with seasonal events). | TDM supports respawns, Zombies has survival mechanics |
| Round Economy | Shard Points earned for kills, assists, round wins, and map treasure drops. | More points for winning a round; also found at set map spawn locations |
| Random Shard Cards | Random pool drawn from each teammate’s unlocked cards. | 169 different cards; synergy and bans create unpredictability |
| Tiebreaker | Series of five 1v1 duels after tied rounds. | Each team arranges their chosen combatants to battle one at a time |
| One-shot Weapons | Only a few firearms are able to drop opponents with a single headshot. | Marksman rifle, Deagle clone, and 2 sniper rifles (No AR headshot kills) |
Fragpunk is all about short intense rounds with heavy decision making and teamwork. Knowing the economy, the map and the interactions between Lancers drives the match. Shard Cards and map features ensure no two rounds ever feel the same.
Shard Card System

The Shard Card System is Fragpunk’s most chaotic yet strategic mechanic. At the start of each round teams vote on which cards to use, contributing their Shard Points to fund the chosen buffs, map changes or weapon modifiers. It’s a collective resource allocation challenge where I weigh my personal preference against the team’s needs. When a card doesn’t get enough votes everyone who contributed gets their points back so there’s a fun push-pull dynamic in every selection phase.
Here’s a table with the key details of Shard Cards and their impact on the game:
| Card Type | Icon Symbol | Typical Effects | Point Costs (Approx.) |
|---|---|---|---|
| Map Cards | Map Icon | Alter cover, remove sections, add healing zones, change map layouts | Vary between 1 and 5 Shard Points |
| Lancer Cards | Lancer Icon | Boost or modify Lancers’ abilities (duration, cooldown, or effect power) | Usually 3–5 Shard Points |
| Rule Cards | Rule Icon | Adjust round mechanics like round time, bomb timer, or movement rules | Range between 2 and 5 Shard Points |
| Weapon Cards | Weapon Icon | Change firing modes, recoil, damage, ammo capacity, or bullet velocity | Typically 1–5 Shard Points |
| Variable Cards | Varies | Unique or scaling effects that increase with higher point investment | 18 total cards with flexible costs from 1 to 5 Shard Points |
A big part of Shard Cards is their synergy. Two or more overlapping effects can create crazy and powerful combos—like a floating Birdman effect combined with a charged shotgun recoil, turning your own weapon shots into a form of aerial propulsion. Understanding how these cards work together is a fun puzzle that changes each fight. The meta is always evolving so new strategies emerge each time new cards are added or balanced.
All About Lancers

One of the things I love about Fragpunk is experimenting with Lancers, each with their unique abilities that turn regular firefights into fun showdowns. Every round I get to choose which Lancer to play and that means different playstyles like stealth, mobility or crowd control. I personally choose Lancers that synergize with my chosen Shard Cards so my synergy on the battlefield is as strong as possible.
| Lancer Name | Signature Ability | Major Balance Tweaks | Playstyle Overview |
|---|---|---|---|
| Axon | Scatter Grenade Barrage | Reduced from 12 grenades to 10 total | Aggressive fragger with a shotgun-based slide |
| Zephyr | Midnight Rambler (Invisibility & Speed) | Duration increased from 2 to 3 seconds; partial invis removed | Hit-and-run stealth tactics |
| Jaguar | IE C4 Drone | Reduced usage from 2 down to 1 | Explosive specialist, strong on site retakes |
| Spider | Teleport Grenade | Capable of pulling enemies (not teammates) with increased radius | Flanking disruptor, excels at forcing relocations |
Regardless if I play aggressive or supportive I use these Lancers as the foundation of my team composition. One way is to coordinate with teammates so abilities overlap. Another is to pick a unique Lancer that fills the team’s gaps. Either way the Lancers add to the tactical playground and make me experiment with new setups.
Maps and Movement Tactics

I’ve always believed that good map design is key to great shooter gameplay and Fragpunk has diverse maps with lots of cool features. Some have interactive doors, others have portals or moving platforms. These creative layouts make me plan my route to grab map treasures that award Shard Points, health packs or single use Shard Cards.
Here’s a table with some maps, their features and useful statistics to give you an edge:
| Map Name | Notable Mechanic | Key Spawn Spots for Treasure | Movement Detail |
|---|---|---|---|
| Black Market | Open-and-close bridge with built-in healing | Bridge center, corners of each spawn | Movement speed reduced ~5 m/s since beta to curb jump-and-hide abuse |
| Neon Sprawl | Multiple doors that lock/unlock from inside | Mid-lane courtyard, side alleys | Portals that link corners for rapid repositioning |
| Urban Ruin | Moving partitions near bomb sites | Rooftop vantage points | High vertical play with hidden catwalks |
| Frozen Depot | Slippery ice patches that affect traction | Warehouse interior, spawn lanes | Slide-based mobility is risky but rewards quick rotates |
In addition to map features it’s important to consider that overall movement speed was reduced by 5 m/s since beta. This change addressed jump-peeking strategies that were too strong. Now movement feels balanced where players are agile without firefights becoming dependent on constant corner exploiting. Efficient use of Lancer abilities, map mechanics and Shard Cards linked to movement results in fun engagement around every corner.
Tips for Victory

Fragpunk requires a mix of gun skill, card management and team coordination which I learned through epic comebacks and crushing defeats. Here are the principles I follow to improve round outcomes in Shard Clash, TDM and other modes:
- Manage Shard Points: Don’t blow all points on a single card per round; leftover points in the late game might open up strong combos.
- Try out Lancers: Balance your team so there’s a mix of aggression, utility and stealth. Watch for synergy with your teammates.
- Grab Map Treasures: Memorize where health packs, single use cards and Shard point drops appear. These small extras can tip the round in your favor.
- Communicate Early: Voice or text chat is key to quick suggestions on which card to fund. A united vote means a bigger impact.
- Adapt Weapon Choice: Assault rifles won’t one shot. Snipers and marksman rifles are the true headshot kings.
- Watch for Tiebreakers: Organize who goes first in each 1v1 so the best matchups occur in the deciding fights.
Following these principles has helped me to beat tough opponents in Fragpunk. A well timed card or switching to a sniper for a quick pick can turn the tables. Round by round these principles tighten up teamplay and help with planting and defending bomb sites.
