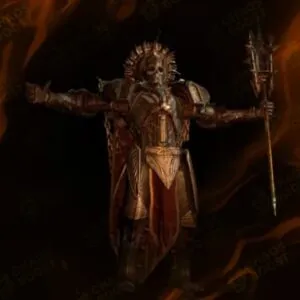
Diablo 4 Grigoire Guide: Mastering the Galvanic Saint in Season 7
Every Diablo 4 player knows the anxiety of stepping into a boss arena, especially one with lightning floors and giant pylons. Grigoire the Galvanic Saint gives you that atmosphere, a challenge for those who want to push through Torment difficulties in Season 7. His mechanics are flashy and deal high damage, so it’s a fun encounter for newbs and veterans alike. This guide covers everything about Grigoire’s abilities, loot table and strategies, so you can handle each phase without losing momentum.
Grigoire the Galvanic Saint: An Overview
Grigoire is unique among Diablo 4’s tormented bosses since he relies heavily on electric mechanics. The interplay of floor tiles, Summoned Knights and lightning beams makes him a nightmare for those who stand still for too long. Knowing his main attacks and which movement skills to use during the fight sets you up for success. Note that his name is sometimes different in different player circles but in official references Grigoire the Galvanic Saint is the accepted name.
| Aspect | Detail |
|---|---|
| Location | Hall of the Penitent |
| Torment Requirement | Unlocked at Torment 1 |
| Signature Mechanic | Electric Floor Tiles & Charged Pylons |
| Summons | Knights Penitent |
| Damage Type | Mostly Lightning |
| Notable Knockback Effect | Mace Swing with Substantial Push |
Grigoire’s electric theme is obvious from the sparks and crackling pylons around him. The environment in his chamber reflects this with floor tiles lighting up and players need to position themselves carefully. By anticipating his multi-phase mechanics, groups and solo players alike reduce the number of sudden deaths and preserve precious potions and revives. Grigoire may seem overwhelming at first but his patterns are predictable once you develop an awareness of timing and positioning.
Requirements for Facing Grigoire in Diablo 4
When fighting Grigoire in Season 7 you need to meet several requirements related to gear, materials and group coordination. These help prepare each hero for the electrifying battle. It’s important to keep defensive and offensive stats balanced especially at higher Torment levels where boss attacks hit harder. Below is a list of what many top players recommend before entering Grigoire’s lair:
- Torment-Appropriate Gear: Weapons and armor with high Lightning Resistance.
- Movement Abilities: Skills like Teleport or Evade Boosts to dodge beams.
- Material Check: Enough Living Steel and other boss-summoning items.
- Ample Healing: Potions or Lifesteal enhancements to counter damage spikes.
- Party Composition: In co-op, at least one player with crowd-control or unstoppable skills.
Preparing effectively involves more than just raw attack power. Having enough gold to repair equipment after multiple attempts becomes crucial if you plan to run Grigoire multiple times in a single play session. No group wants to run out of resources in the middle of a fight, especially if they plan to summon Grigoire multiple times in a single play session. With these necessities in place, the Hall of the Penitent is much more manageable.
Electric Floor Tiles in Torment Fights
The electric floor tiles are one of Grigoire’s signature moves. At the start of the fight he channels lightning energy into different parts of the arena and players need to move quickly. Trying to tank the damage often results in a quick death especially at Torment 4 where these tiles deal massive damage. Recognizing the pattern of the tiles is a big step towards survival.
| Tile Phase | Starting Zone | Safe Zone | Typical Damage |
|---|---|---|---|
| Initial Discharge | Corners of the Arena | Center (briefly) | High (One-shot potential) |
| Secondary Charge | Central Floor Segment | Outer Edges or Corners | Moderate |
| Transition Phase | Rapid Shifts in Tiles | 2 Safe Tiles (random) | Extremely High |
Those who survive Grigoire’s opening volley usually know these tile patterns for the rest of the fight. Engaging him in melee range requires caution as stepping back without looking might mean standing on a charged tile. Ranged characters or summoners have an easier time moving from safe tile to safe tile but melee focused builds need to keep an eye on their cooldowns for gap closers or unstoppable skills. Once you adapt the floor tile mechanic becomes a predictable element rather than a threat that ruins attempts.
Knockback Attacks and Positioning
Knockback attacks from Grigoire’s mace swing disrupt many builds especially those that rely on stationary spells or minions. This mechanic pushes players away from him sometimes into beams or charged tiles. Without planning these forced movements quickly create chaos in the group. Understanding how to position around Grigoire’s knockback helps manage the rest of the fight because the whole team is in control rather than scrambling frantically.
| Knockback Trigger | Damage Type | Push Distance | Recommended Response |
|---|---|---|---|
| Heavy Mace Swing | Physical/Lightning | Medium | Dodge or use unstoppable skills |
| Circular Shockwave | Lightning AoE | Large | Position behind Grigoire if possible |
| Low-HP Frenzy (Sub-Phase) | Physical | Small | Maintain mid-range to avoid collisions |
Keeping a mental note of each knockback’s range helps prevent accidental deaths. Some classes use Teleport or Dash to re-engage Grigoire quickly if knocked away while others stay behind him to limit the push effect. Tanks or heavily armored classes might take some hits without problems but in high Torment levels a single mistake often means a lost attempt. Positioning combined with a movement skill is the key to not letting Grigoire’s knockbacks ruin an entire run.
Summoned Knights and On-Kill Effects
Summoned Knights penitent appear at intervals and act as additional threats during the boss fight. However these Knights also provide opportunities for extra healing, resource generation or on-kill effects. Some players even use these adds to stack certain buffs which allows them to deal more damage to Grigoire. A structured approach to dealing with these summoned mobs is essential.
- Spot Their Spawn: These Knights appear at set intervals usually tied to Grigoire’s health thresholds.
- Focus Them Early: Kill the Knights quickly to open up a window for resource gain or on-kill buffs.
- Coordinate Position: Don’t let them spread around the arena especially near charged beams.
- Keep Defensive Measures: Though weaker than Grigoire’s direct attacks they deal steady damage that can stack with tile damage.
- Finish with AoE Skills: Classes with big area hits can clear Knight groups in seconds and optimize on-kill benefits.
Knights don’t overshadow Grigoire’s main damage sources but add complexity to the fight. Players who clear these adds in a timely manner have a cleaner battlefield which means a safer environment. If a build lacks AoE someone else in the group can handle the Knights before focusing on the boss again.
The Charged Pylon Mechanic and Damage Amplification
Charged pylons around the arena are Grigoire’s way of adding chaos to the fight. They emit beams of electricity that slice across the battlefield dealing significant damage and applying a damage amplification debuff to anyone hit. This debuff increases damage taken by a lot making survivable attacks lethal. Learning how to navigate the pylon layout is arguably the difference between a smooth run and a near-instant wipe.
| Pylon Phase | Beam Count | Damage to Player | Debuff Strength | Duration |
|---|---|---|---|---|
| Early Phase (70% HP) | 2-3 | Moderate-High | +10-25% Damage | 10 Seconds |
| Mid Phase (40% HP) | 3-4 | High | +30% Damage | 15 Seconds |
| Transition Cage Phase | 4+ | Extremely High | +50% Damage | 20 Seconds |
Grigoire summons pylon beams whenever he drops to a new health threshold or after a short cooldown if the fight drags. Staying aware of these triggers helps players avoid standing in the beam path. Teleporting through the beams is possible if the skill is truly instantaneous but many movement abilities that animate the character’s travel will result in damage taken. Watching how Grigoire aligns himself before summoning beams helps with safe positioning and prevents involuntary knockback into a lethal area.
Transition Cage and Final Phase
Once Grigoire reaches his final stretch of life he triggers a transition that restricts movement by drawing pylon energy in a circular formation, creating a cage of electricity. During this phase most floor tiles become lethal. Survivors must move to the 2 safe zones that appear randomly among 9 floor segments. Any mistake at this point means instant death.
| Cage Element | Movement Limit | Damage Zone | Safe Spots | Recommended Action |
|---|---|---|---|---|
| Circular Pylon Barrier | High | Electric Beams | None | Stay inside the arena’s center |
| Electrified Floor Tiles | Extreme | 7 of 9 Tiles Active | 2 Tiles | Observe the glow, then move carefully |
| Knockback Potential | Moderate | Boss Mace | NA | Keep back away from beams when hit |
Surviving the final phase is all about making calm decisions. Panicked players sometimes run into a charged tile or get knocked into a beam while trying to dodge. Defeating Grigoire quickly during this cage phase is often the best approach though that depends on group damage. Good communication in co-op scenarios reduces the chance of stepping into a deadly zone and allows everyone to stay in position until the boss is dead.
Farming Strategies: Hall of the Penitent and Living Steel
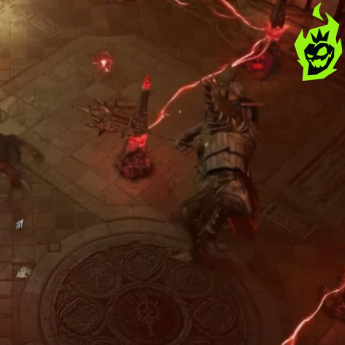
The Hall of the Penitent is south of Kyovashad in Diablo 4’s overworld but the path is a bit winding. Once Torment 1 is unlocked you can fight Grigoire for the first time. Farming this boss for better loot requires specific materials including Living Steel which drops from Hell Tides. Gathering these resources in time saves you from having to run across the map multiple times.
- Hall of the Penitent Path: Follow the western path from Kyovashad then curve southeast to the entrance.
- Hell Tides Farming: Collect enough Cinders (usually 250) to open a Tortured Gift of Mysteries for more Living Steel.
- Group Coordination: Team up with friends who also plan to summon Grigoire for back-to-back kills.
- Torment Difficulty: Torment 3 or 4 often gives better rewards but the damage spikes are severe.
- Repair and Replenish: Have plenty of gold to repair gear after multiple attempts.
Choosing a route for Hell Tides farming usually involves clearing events, picking up extra items for Salvage and then targeting the Tortured Gift of Mysteries chest for maximum resources. Having enough Living Steel means you can do multiple attempts in one farming session and increase the chance to get higher grade gear. Once the group is done, going back to the Hall of the Penitent for more summons is straightforward.
Rewards, Drops, and Mythic Uniques in Season 7
Beating Grigoire in Diablo 4 Season 7 gives you not only the satisfaction of killing an electric titan but also the chance for high tier rewards. Developers have tweaked drop tables across seasons and sometimes shift which items drop more often from specific bosses. Grigoire’s loot pool is class agnostic but some items lean towards lightning based builds.
| Item Type | Drop Rate (Approx.) | Possible Highlights | Notes |
|---|---|---|---|
| Legendary Items | High | Lightning-Aspected Armor, Mace Upgrades | Often enhanced by Magic Find or Torment level |
| Mythic Uniques | Low | Rare Shako Variations, Unique Amulets | Possible but never guaranteed |
| Crafting Materials | Medium | Living Steel, Enchanted Dust | Useful for boss summons and re-rolls |
| Gold & Gems | High | Rubies, Emeralds, Large Sums of Gold | Varies based on World Tier and party size |
| Season 7 Exclusives | Low | Seasonal Crafting Resources | Tied to active seasonal features |
Repeating Grigoire at higher Torment levels pays off. Some players chase Mythic Uniques for their incredibly strong affixes that can change entire builds. Regardless of rarity each kill adds to your inventory of gear that will help you in future Diablo 4 play. Check a reliable source like Maxroll.gg to see if Blizzard changes the drop rates mid-season.
