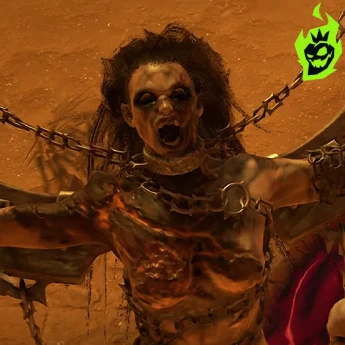
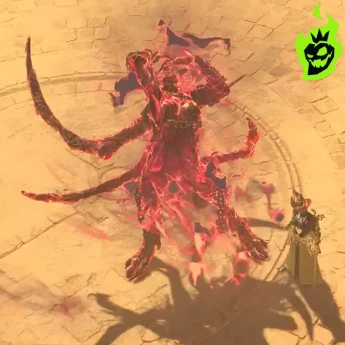
Diablo 4 Andariel Guide for Season 7
The Sanctified Realms of Diablo 4 are full of ancient enemies and epic battles in Season 7. Fighting through Nightmare Dungeons and taking on high level Tormented Bosses is like no other. Among these tough enemies Andariel stands out with her poison abilities and unpredictable movement. Her connection to Diablo lore has always been a hot topic in the community and Season 7 introduces new phases and mechanics that make her even more deadly.
This guide will go over Andariel’s abilities, phase transitions and Diablo 4 strategies for those looking to get her loot including Uniques and Uber Uniques that help with endgame progress.
Overview of Andariel in Diablo 4 Season 7

Andariel’s roots in the Diablo 4 universe go back to some of the earliest expansions of Sanctuary’s lore. In Season 7 her presence is felt through increased aggression and new Tormented Debuffs that will punish unsuspecting players. If you want to kill Andariel you need to study her arsenal as her Poison Nova and ground based Circle Attacks require quick reflexes. Watching her phase transitions will reward you with a deeper understanding of her environment. Killing her will give you a chance at rare drops which are super valuable for endgame builds.
| Aspect | Notable Features | Impact on Gameplay |
|---|---|---|
| Health Pool | Scales up to Torment Tier 200 | Prolonged battles, requiring stamina and continuous damage |
| Poison Nova Mechanic | Legacy attack from classic Diablo | Forces players to master dodging patterns to avoid stacks |
| Debuff System | Tormented Stacks ramp up if strikes land | Increases incoming damage, leading to swift defeats if mismanaged |
| Intermissions | Three phases with Anguish Figures and beams | Necessitates crowd control and high burst DPS |
| Main Loot Rewards | Uniques, Uber Uniques, gold, and obols | High-tier gear that strengthens future runs and upgrades |
Shifting difficulty layers, scaling health and her poison attacks combine into one of the most iconic boss fights of the season. Knowing her abilities and environment is a solid foundation to victory. Turning that knowledge into action will help you succeed especially on higher Torment levels. With the right info Andariel’s defeat will give you nice upgrades for Season 7.
Tormented Boss Debuff Mechanics Explained

One of the highlights of Season 7 is the Tormented Boss Debuff system designed to pressure players in longer fights. Every hit from these elite bosses applies a stacking debuff that increases damage taken. Survivability is a dance of dodging area attacks and resisting the curse that eats away at health. Good movement and timing reduces the risk of repeated hits. Awareness of these debuffs is key to success against Andariel.
| Debuff Stack Level | Damage Increase to Player | Notable Effects on Survival |
|---|---|---|
| 1 | +10% | Manageable, but caution is advised |
| 2 | +20% | Avoid repeated hits or risk quick defeat |
| 3 | +30% | Requires strong defensive cooldowns |
| 4 | +40% | Severe danger, minimal margin for error |
| 5+ | 50% or higher | Nearly insurmountable without immunity skills |
Knowing these Tormented Boss Debuff Mechanics means knowing when to attack and when to retreat. Each stack multiplies damage taken, even small mistakes will kill you. Spread out hits with good movement is advised to avoid catastrophic scaling. Shields, potions and immunities help with the debuff but don’t remove the importance of positioning. Andariel will punish any lack of caution by stacking debuffs to deadly levels.
Abilities of Andariel

Andariel employs an array of Key Abilities that highlight her reputation as a dangerous foe. Poison is her main theme, but she also wields melee swipes, ground-based traps, and conjured projectiles that swarm the arena. Many of these attacks require precise positioning to avoid massive damage spikes. Certain abilities impose additional Tormented Stacks if they connect. Detailed awareness of her moves leads to smoother progression during the encounter.
List of Andariel’s Key Abilities (with brief descriptions):
- Poison Nova – Releases multiple poison projectiles in a circular pattern.
- Ground Circles – Summons large and small green zones that inflict heavy poison damage.
- Melee Slashes – Deals moderate physical damage and triggers small projectiles on impact.
- Charge and Knockback – Jumps toward or away from players, then initiates a follow-up strike.
- Summoned Minions – Occasionally calls lesser demons to distract or swarm the player.
These Key Abilities of Andariel require awareness in every phase. Poison Nova alone will punish positions close to the boss, Ground Circles limit safe zones and restrict movement. Melee Slashes are less deadly if handled carefully but repeated hits feed into the Tormented Debuff system. Adapting to these attacks means switching between defensive stances and quick bursts of damage. Knowing the timing for each ability gives you a big advantage in longer fights.
Phase One: Initial Attacks and Movement
When you enter Andariel’s domain, Phase One introduces her basic attack patterns. She alternates between ranged poison bursts and direct contact attacks, pressure players right from the start. Positioning around her at this stage often determines how many debuffs you get early on. Those who keep distance have a better chance to survive. Melee builds might need short windows of aggression followed by timely retreats.
| Attack or Action | Recommended Response | Rationale for Success |
|---|---|---|
| Poison Projectiles | Sidestep or circle around | Reduce risk of stacking Tormented Debuffs |
| Melee Slash | Block or dodge backward | Avoid lethal combos and maintain distance |
| Charge and Knockback | Move diagonally to evade | Preserve health and maintain offensive rhythm |
| Quick Jump Away | Advance cautiously | Sets up next ability, watch for Poison Nova |
Being composed in Phase One: Initial Attacks and Movement sets you up for the fight. Seeing the boss’s telegraph allows you to reduce Tormented Stacks. Those who can dodge her Poison Projectiles have less stress later. Good footwork around Andariel’s leaps means minimal chip damage. The better you do in Phase One the more endurance you have for later phases.
Intermission Phases and Anguish Figures
Mid fight Andariel will retreat and Anguish Figures will spawn across the arena. Three of these statues will spawn and will have Suppressor effects that block ranged. Clear them quickly so you can focus on Andariel again. Movement is still important since rotating beams will sweep the arena during these intervals. Clearing these threats quickly shortens the intermission.
| Intermission Phase | Anguish Figures Spawn Count | Additional Hazards | Survival Tip |
|---|---|---|---|
| 1st Intermission | 3 | Occasional rotating beam | Eliminate each statue swiftly |
| 2nd Intermission | 3 | New ground effects + rotating orbs | Group statues for AoE damage |
| 3rd Intermission | 3 | Dual beams + lingering ground flames | Save burst cooldowns if possible |
Managing these Intermission Phases and Anguish Figures requires decisiveness and crowd control. Failing to clear the statues quickly gives Andariel more time to set up lethal ground effects. Proper management of the rotating beams gives you pockets of safety to kill each figure. Stay vigilant through each intermission and you’ll preserve health and resources. Once the statues are down prepare for Andariel’s next attack.
Strategies to Manage Rotating Beams
Andariel’s most annoying obstacle are the rotating beams that sweep the arena during and after intermissions. They limit your movement and force you to be aware of your surroundings. The beams deal massive damage and will stack Tormented Debuffs in seconds. Survival depends on mapping out a path between these beams. Dexterity and timing shines in these moments especially for classes that rely on short range abilities.
Useful Tips for Rotating Beams:
- Stick to One Side – Standing near the beam’s trailing edge preserves open space.
- Know the Beam Direction – Most beams rotate clockwise so anticipate safe zones ahead of time.
- Immunity Skills – Blood Mist or Flame Shield can save you in a pinch.
- Big Beam – Larger beams appear in later phases, be even more cautious.
- Perimeter Defense – Minimize random movement to reduce mistakes.
These Strategies to Manage Rotating Beams are all about learning their pattern and reacting before they cut off your path. Standing near the beam’s origin point gives you more room to error if the boss ability coincides with the beam sweep. Defensive spells or potions will keep you alive during close calls, but using them too much will drain your resources. Knowing the beam’s rotation helps you make better decisions as Andariel’s other attacks unfold. Calm movement means the beams won’t be your downfall.
Surviving Phase Three with Limited Space
Phase Three is where Andariel gets really aggressive with overlapping hazards that will test even the most experienced teams. Two beams might cross, leaving little room to breathe, and new ground effects will stack. At this point Andariel will cycle through her poison moves with no pause. Survival often depends on advanced knowledge of her patterns. Phase Three will drain your potions and push your defensive cooldowns to the limit.
| Key Hazard | Description | Recommended Action |
|---|---|---|
| Dual Rotating Beams | Two beams opposite each other, minimal gaps | Follow one beam’s path, keep mobility high |
| Intensified Poison | Rapid Poison Novas + ground circles | Watch boss movement cues, dodge swiftly |
| Terrain Flames | Burning lines remain on the floor | Plan movement to avoid repeated contact |
| Minion Reinforcements | Lesser demons appear as a distraction | Quickly dispatch or corral them away from boss |
Staying focused in Phase Three with Limited Space is key. Multiple hazards will overwhelm those without a plan. Reducing debuffs is still important as the stacked Tormented damage can get out of hand. Rotating healing resources, immunities and burst damage windows relieves the pressure. Winning this phase is a badge of honor in Season 7.
Andariel Builds and Stats

Andariel forces players to look at their builds, gearing and skill setups. Defensive layers are more important when poison is involved, but raw damage is also important. Balancing output and survivability makes the fight smoother from start to finish. Many look for synergy between skill trees and gear with high poison resistance. This synergy helps you withstand Andariel’s poison swarm.
| Build Type | Core Skills & Stats | Strengths in Andariel Fight |
|---|---|---|
| Barbarian Whirlwind | High Armor, Life on Hit | Sustained DPS and crowd control for minions |
| Sorcerer Blizzard | Chilled or Frozen targets | Slows Andariel’s movement, easing the dodging of Poison Nova |
| Necromancer Minions | Summons distract the boss | Draws attention away from the player, reducing direct hits |
| Rogue Rapid Fire | Critical Chance, Dodge Rate | Swift ranged damage, easier time avoiding ground effects |
| Druid Storm Focus | High Spirit regen, Resistances | Large AoE coverage, helpful for clearing Anguish Figures |
Choosing Andariel Builds and Stats is not just about damage. Poison Resist, health sustain and well timed crowd control abilities makes the fight better. Each class has its own way to approach Andariel’s mechanics, whether through minions or mobility. Investing in stats that reduce or negate poison effects is an advantage, especially in the last phase. Combining a good build with consistent practice is the way to beat her in Season 7.
Final Tips for Andariel Season 7

Andariel in Season 7 is the epitome of Diablo 4’s difficulty curve, where you learn from each wipe. Preparation goes beyond gear and skill points—knowing the environment hazards helps you survive the worst. Each run teaches you something new about Tormented Debuffs and boss transitions. Patience is key when adapting to her leaps, Poison Nova and intermission spawns. Fine tuning your strategy pays off with top tier loot.
Practical Advice for Season 7 Success:
- Stack Poison Resistance – Offset Andariel’s main damage type.
- Keep Potions Upgraded – Extra healing during intense phases.
- Use a Reliable Mobility Skill – Dodge rotating beams to reduce Tormented Debuffs.
- Save Burst Cooldowns – Hit Anguish Figures fast to shorten intermissions.
- Be Flexible – Switch between offense and defense when hazards overlap.
These Final Tips for Season 7 makes the journey to beating Andariel on higher Torment levels smoother. Poison resistance, healing and a balanced approach to movement and damage is key. Rotating beams and stacked debuffs creates tension but composure and preparation turns the tables in your favor. Holding onto a crucial burst cooldown or immunity skill might be the difference between winning and a final blow from Andariel’s claws. By refining these and being relentless, beating her becomes a badge of honor in Diablo 4 Season 7.