Chrome King Gallywix Boss Guide – Last Boss in LoU
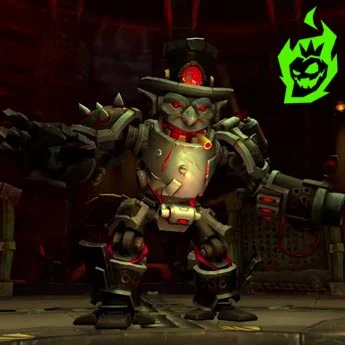
World of Warcraft The War Within has encounters that require thoughtful positioning, raid synergy and precise handling of big boss abilities. One of the biggest of these is Chrome King Gallywix, a mechanical menace with explosives. The fight has multiple phases, each with its own strategy and heavy raid damage to deal with. This guide will show you the most practical way to do every phase, manage soaking and time your cooldowns. Together these will get you through WoW TWW.
Phase One: Mech Shell Tactics in WoW TWW
Phase One: Mech Shell Tactics in WoW TWW requires a tight formation and quick reaction to bomb placement. The fight starts with the group splitting into two teams, each soaking blasts from Scatter Blast Canisters. As soon as these frontals appear, players need to position themselves in a quarter of the arena to soak the damage and not let any unsoaked frontal run wild. The big bombs on the field require awareness because they detonate and create random circles that can mess up the group. Group coordination in this first phase sets the tone for the rest of the fight against Chrome King Gallywix.
Positioning, timing and healing throughput are key in Phase One. The new healing absorb from Mech Engineer’s Canisters requires a lot of healing on heroic. Keeping the right soak assignments is crucial to not die from frontal and awareness of bomb placement to not overlap. Below is a quick table with recommended roles, movement patterns and damage values. It will show you the most common mechanics in the first phase of Chrome King Gallywix in WoW TWW.
| Mechanic | Effect | Timing |
|---|---|---|
| Scatter Blast Canisters | Tank-targeted frontal that splits damage among players in the zone | Occurs every 15 seconds |
| Big Bad Bunch of Bombs | Large circles that explode, leaving behind lingering bombs | Triggered twice in the first minute |
| Suppression Circles | Random ground swirls that must be dodged | Cast frequently |
| Venting Heat | Pulses group damage with each stack increasing duration by 1 second | Happens intermittently, ramping over time |
Intermittent, ramps up over timeCareful management of these abilities makes Phase One more controlled. Tanks who alternate soaks make sure the healing team is not overwhelmed by the Mech Engineer’s Canisters. Melee and ranged assignments often revolve around staying in safe zones and moving bombs away from the group. Positioning must be flexible because of threat zones. Success in Phase One: Mech Shell Tactics in WoW TWW sets you up for the rest of the fight.
Overall Phase One: Mech Shell Tactics in WoW TWW is a test of spatial awareness and group discipline. Every raid member benefits from methodical movement and shared bomb soak knowledge. Once these tasks are done consistently the boss will transition into the next phase without leaving the raid in chaos. By exceling in this first phase you set yourself up for a smoother ride to defeating Chrome King Gallywix. Entering Phase Two with stable positioning and a well coordinated raid sets the tone for the rest of the fight.
Phase Two: Giga Coils and Bomb Disposal

Phase Two: Giga Coils and Bomb Disposal in World of Warcraft The War Within requires consistent interrupt coordination and quick add control. Once the boss gets into this phase around 2 minutes or once a set of health thresholds are met, the team must handle technicians, sentries and other adds. Each add type has its own threat, like Sentry’s Shock Barrage and Technician’s Juiced cast which need to be interrupted. During this chaos Chrome King Gallywix will channel Giga Coils, a pulsing attack that increases raid wide pressure. The priority is to kill adds fast and use bombs to disable the Giga Controls around the room.
Good add management in Phase Two often determines if the raid stays stable or loses control. Besides direct damage there are also bombs dropped by technicians which need to be carried to the Giga Controls at the edge of the room. Each deposit destroys one set of controls and stops Giga Coils for a short time. Below is a table with the main add types, their notable casts and damage range. A well informed team will stay more composed during this messy phase of the fight.
| Add Type | Notable Cast | Damage Range |
|---|---|---|
| Technician | Juiced (group-wide damage), Bomb Drop (creates an explosive) | ~15k per tick |
| Sentry | Shock Barrage (channeled at random players) | ~10k per second |
| Wrench Monger | Basic melee hits with stacking tank debuff | Varies based on synergy with Gallywix’s attacks |
Clearing these threats before they overwhelm the raid is key to long term success. Each technician bomb is active on the ground for about 15 seconds and a player must pick it up and detonate it at the correct set of Giga Controls. Deposit timing stops the Giga Coils pulses and reduces overall raid stress. By keeping an eye on bomb timers and add spawns those present can limit the damage spike. Once the last set of adds is cleared Phase Two: Giga Coils and Bomb Disposal is over when the boss is at around 50%.
In summary Phase Two: Giga Coils and Bomb Disposal is all about add control and bomb placement. Movement around the pillars where Giga Controls are should be coordinated to leave enough safe quadrants for future phases. Healers must be aware of the Giga Coils damage and the lethal bombs. A disciplined approach to clearing each wave of adds keeps the momentum going and makes the intermission more manageable. When Gallywix gets to 50% health the fight will transition into the next phase.
Intermission: Overcharged Destruction

Intermission: Overcharged Destruction is triggered at 50% health where Chrome King Gallywix jumps into a giant mech and starts channeling Total Destruction. This beam deals increasing group wide damage for 30 seconds and the raid must race against a newly formed absorb shield. The shield must be burned down before the raid’s healing resources run out. Interrupting Total Destruction once the shield is broken stops the exponential damage. This phase rewards high burst damage and is a small but dramatic break between Phase Two and Phase Three.
During this intermission the raid will face rotating lines of electricity around the boss. Melee players must dodge these lines to avoid being stunned, ranged can stay at a safe distance if spaced correctly. The whole experience is a short window of intense DPS and movement but certain tactics make it more manageable. Below are a few tips and reminders to help you get through this. Focus on these and you’ll get Gallywix to break his channel in time.
- DPS Cooldowns: Coordinate major CDs to break the absorb shield fast.
- Rotate Beams: Move to avoid stuns and stay in range for healing.
- Hold Interrupt: If damage output is high enough, delay interrupting Total Destruction to get extra boss damage.
- Conserve Healer Resources: Healers should ration healing spells to cover the constant ticking damage from the channel.
These steps help the group get through the transition to Phase Three. Once the shield drops the boss is vulnerable to all damage and players can chip away at his health some more. Keeping an eye on the rotating beams makes sure no one gets caught and stunned during high damage moments. By balancing aggressive offense with cautious movement the group can mitigate the last ticks of Total Destruction. Proper execution in Intermission: Overcharged Destruction is key to setting up the final fight.
This intermission tests a raid’s ability to do burst damage while avoiding lethal hazards. Failing to break Gallywix’s absorb shield in time means wipe scenarios are unavoidable due to raid damage. But a disciplined approach to the beams and a well planned DPS cooldowns keeps the group alive. Surviving this interlude sets the group up for the final phase. From here the fight with Chrome King Gallywix gets even more intense.
Phase Three: Final Mech Madness

Once Chrome King Gallywix gets back to the center of the arena in his mech the fight transitions into Phase Three: Final Mech Madness. Bomb circles get more aggressive, a bigger bomb ability appears and Gallywix starts to Giga Coils again. The bigger bomb is centered on the active tank and they must move away from the raid. Venting Heat and other group wide pulses increase and healers are stretched thin. Master these heavier hits and a more chaotic battlefield to finish off this boss.
Positioning is key in Phase Three with the layering of circle based attacks and high raid damage pulses. The frequency of some abilities like Overloaded Rockets increases dramatically and there’s little room for error. Here’s a summary table of the major threats in this final phase. It includes approximate damage, recommended movement and roles for tanks, healers and DPS. Pay attention to these and you’ll have a stable environment for the last part of the fight.
| Threat | Approx. Damage | Guidance |
|---|---|---|
| Bigger Batter Bomb | ~35k explosion if unmitigated | Active tank moves out, group stacks behind boss |
| Overloaded Rockets | ~20k if struck | Players with debuff move away, then stand still so others dodge |
| Tick Tock Canisters | ~15k soak per circle | Assign 2-3 players for each circle to share the hit |
| Ego Check (Heroic) | Varies based on unmitigated portion | Tanks rotate defensive CDs to reduce physical DOT effect |
Managing these in real time requires raid discipline. Tanks coordinate bomb soaks and healers prepare to dispel or heal heavy debuffs from rockets. A rotation around the arena keeps fresh Giga Controls available to disable any subsequent Giga Coils. Patience and movement are key as overlapping abilities create punishing moments if mishandled. By respecting each threat in Phase Three: Final Mech Madness the raid sets up for a good finish.
As the last bombs and Venting Heat come to a head the whole raid needs to be on the same page. Phase Three: Final Mech Madness is the highest sustained damage of the fight, testing cooldowns, healing throughput and personal mitigation. Every DPS, healer and tank has a role that ties together in these last moments. When those roles are met Chrome King Gallywix will drop in a big way and leave behind loot worthy of a mythic inventor. Finishing the last phase with good teamwork and rotations is the mark of a well coordinated raid.
Important Tank Observations and Extra Tips

Tanks are the foundation of the group in Chrome King Gallywix fights, taking direct hits from scatter blasts and soaking bombs. In heroic difficulty more bombs, higher damage bursts and new tank busters enter the mix. Positioning, timing and cooldowns are key to neutralizing each wave of threats. Master these core elements and you have a stable front line and the rest of the raid can focus on mechanics. Below are some tank notes.
Tanks rotate roles and respond to new bomb spawns throughout the entire fight. Knowing the boss’s ability timeline prevents harmful overlaps. By adapting to these triggers tanks keep the raid safe from frontal hits and sudden explosions. Here are a few key observations and actions to keep the group safe.
- Gatling Cannon: The farther away you are from Gallywix the more damage this does; always stay close to him during cast.
- Bomb Timing: On heroic two bombs can spawn at the same time; coordinate which tank absorbs each bomb’s debuff so they don’t explode at the same time.
- Ego Check: This new physical hit requires immediate defensive use to reduce the stacking DOT that follows if not mitigated.
- Taunt Swaps: Align tank swaps around frontal soaks, bigger batter bombs or any big mechanic that coincides with existing debuffs.
These considerations keep the tank pair in sync with the overall raid strategy. Minimizing distance driven damage from Gatling Cannon is key to survival. Bomb coordination can get chaotic if multiple bombs trigger in quick succession so good communication leads to better outcomes. Knowing the timing of each big hit prevents tanks from burning through defensive CDs too early. With these defensive tasks in order progress becomes easier to sustain.
Overall Important Tank Notes and Extra Tips puts the focus on the tank synergy. Managing overlapping debuffs, channelling defensive abilities and escorting bombs away from the group is their role in this dynamic fight. The difference between a stable fight and a wipe often comes down to tank action. By applying these notes each phase of Chrome King Gallywix flows better and you get a good end to the World of Warcraft The War Within boss. Tanks who master these will be the foundation of success in this mechanical gauntlet.


