WoW TWW Season 2 Dungeons Tier List
I’ve run Mythic+ in The War Within (TWW) Season 2 with the goal of optimizing routes, managing relentless trash mobs and studying each boss mechanic in detail. The new season brings familiar dungeons with fresh twists and updated creature abilities that force interesting group compositions. Here I’ll share my impressions on each instance, my personal experience as a tank and a tier list from S-tier to D-tier.
This post covers new health scaling, illusions of possible skip paths and class synergy for interrupt, burst or soaking damage.
Below you’ll find numbers on survival thresholds, the item level (ilvl) that feels comfortable for each difficulty and the approximate time to clear each dungeon. High-level characters above ilvl 670 can push through large trash pulls more easily, while players around ilvl 650 take more damage and need to coordinate interrupts more often. Season 2 gear goes up to ilvl 678 which feels very strong in Mythic+. This guide references how each dungeon affects group DPS, healing and kiting for tanks.
Overview of the Patch 11.1 Dungeons Tier List
This tier list ranks dungeons from best to worst based on my personal preference around boss design, trash density and overall fun. I focused on pulling strategies, skip possibilities and mechanical depth when deciding each tier. Here’s a quick overview of every dungeon’s tier, average completion time and estimated trash count for a standard Mythic+ run.
| Dungeon | Tier | Avg. Timer (Minutes) | Estimated Trash Count |
|---|---|---|---|
| Mechagon Workshop | S | 28-32 | 90-100 |
| Operation Floodgate | A | 30-33 | 85-95 |
| Theater of Pain | A | 32-35 | 75-85 |
| Dark Flame Cleft | A | 33-36 | 90-100 |
| Motherlode | B | 33-35 | 80-90 |
| Rookery | B | 29-31 | 70-80 |
| Cinder Brew | C | 35-38 | 90-100 |
| Priory of the Sacred Flame | D | 38-40 | 95-105 |
The table summarizes the main points for each dungeon. Avg. Timer is the average time to complete a clean run. Estimated Trash Count is the number of mobs that count towards the completion goal. Some groups might skip certain packs or use class utility like Mind Soothe, Invisibility or Ring of Peace to bypass trouble spots. But many dungeons in TWW Season 2 have strict trash requirements and you need to pull fairly large groups to stay on pace.
I’ve assigned letter tiers based on my experience in the PTR. S-tier means top-notch encounters, varied boss mechanics and minimal frustration points. A-tier is still fun with a few minor issues, B-tier is acceptable but with less interesting boss fights or awkward trash pulls. C-tier feels overshadowed by other dungeons and D-tier is the bottom of the barrel with designs that leave groups feeling drained at the end.
S-Tier Dungeons: Mechagon Workshop
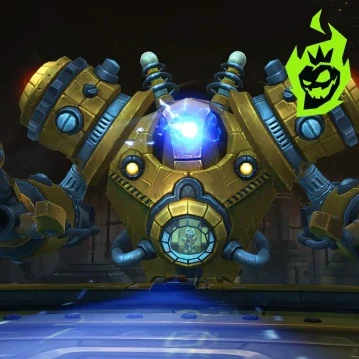
The Mechagon Workshop is back in TWW Season 2 as a mechanical playground for groups that love big pulls, interesting boss synergy and many ways to optimize damage. This dungeon has seen some changes, new trash mobs, reworked skip strategies and updated visuals on some abilities. I’m interested in this dungeon because of the dynamic environment where you roam from assembly lines to hidden corners with mechanical contraptions.
Mechagon Workshop Mob and Boss Adjustments
| Aspect | Notes |
|---|---|
| Trash Reworks | Mobs like Corrosive Gunk are less punishing, while Drills hit harder. Mechanics revolve around big AoE damage. |
| Boss Tweaks | Platinum Pummeler shares the stage with a smaller add that demands splitting DPS. Kujo has shorter downtime during venting. |
| Visual Updates | Electric arcs and rotating lasers on the path to the final boss are much easier to see. |
| Skip Removals | Old mind control strategies with Tinkerers no longer happen, so groups must rely on direct engagement. |
I like Mechagon Workshop because it features multi-target phases that favor classes with high AoE burst. Tanks can pull large packs before the second boss and use their cooldowns for survival. Healers have some breathing room on some intervals but need to manage high group damage near the final boss King Mechagon where timed interrupts on cast sequences are crucial. This layout encourages dynamic gameplay and synergy between high-damage builds and support classes with extra CC.
The overall impression is very positive. Mechagon Workshop is a prime example of good boss design with minimal downtime. Groups that want variety in trash packs and unique boss transitions often put this run at the top of their Mythic+ rotation. My own runs have been stable and I finish around 29-32 minutes even with moderate gear and damage dealers love the big pulls for epic parse logs.
A-Tier Dungeons: Operation Floodgate, Theater of Pain, Dark Flame Cleft
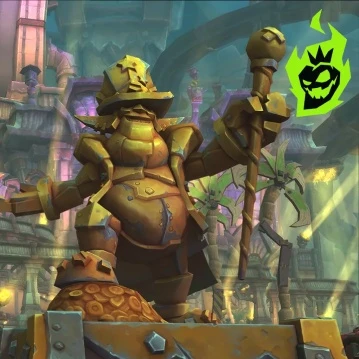
These three dungeons are very close in quality and fun, each with different aspects of group synergy. Operation Floodgate goes for mechanical illusions, LOS tactics and moderate trash pulls. Theater of Pain has large boss wings in an arena zone with unique mini-bosses and intense final fights. Dark Flame Cleft has candlelit corridors, scary shadows and Kobold mischief.
Notable Factors in A-Tier Dungeons
| Dungeon | Key Points |
|---|---|
| Operation Floodgate | Heavy mechanical mobs with abilities like Spin-Up. Healers must prepare for large hits, especially on Swamp Face. |
| Theater of Pain | Five-boss format with optional skip strategies, such as ignoring the first trash pack. High reliance on CD usage and interrupts. |
| Dark Flame Cleft | Kobold lore with tough starting trash and interesting boss transitions. Candle mechanics on the second fight shift group damage patterns. |
My personal favorite parts in Operation Floodgate are the early big pulls. Pull multiple Windup mobs, then coordinate stuns or CC to keep them from killing the whole group. Swamp Face is a boss that forces the healer to pace their cooldowns, Gizel Gigap punishes sloppy movement and missed interrupts. Tanks who manage to position themselves around the threats survive.
In Theater of Pain I like the multi-path layout. Players can go straight to Zav the Unfallen or pivot to Gorechop’s wing first. Big interruptions are key and skipping the initial trash with something like Mind Soothe or Ring of Peace sets the tone. The downside is extra travel segments but overall it’s quite fun. Each boss wing has unique trash packs, from carrion worms to powerful skeletons so it never feels repetitive.
Dark Flame Cleft is the biggest surprise among the dungeons. The Kobold fortress is slow moving minecart ride that picks up or loses speed based on combat states. Some people find it fun because it allows for big pulls and DPS windows while others feel uneasy about the length. Once you get deeper in the halls the boss fights revolve around controlling candle flames to keep the shadows at bay. Tanks often stand still to make sure the boss doesn’t chase random players which can feel relaxed for the tank but requires constant movement from everyone else. Despite some dull moments I find this place fun to play and always love the final boss’ shadow illusions.
B-Tier Dungeons: Motherlode, Rookery
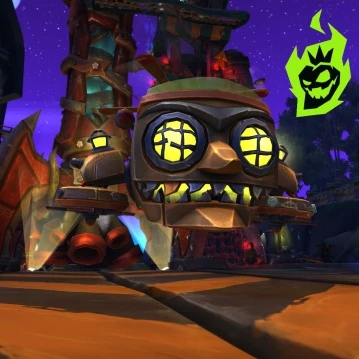
Motherlode and Rookery land in B-tier because of some flaws but still have enough interesting parts to warrant repeated runs. Motherlode returns from a previous expansion with some trash pack reworks and a shorter timer than the old standard. Rookery has only three bosses but can wipe and put you back to the start with long run-backs.
Core Strengths and Weaknesses
- Motherlode
- Timer around 33-35 minutes and fewer random trash mobs than before.
- Mechanized Peacekeepers punish groups with high group damage and pacification zones.
- Final boss has faster Gatling Gun ability that requires constant movement for healers and casters.
- Rookery
- Only three bosses so groups can min-max boss phases if DPS is high enough.
- Notable run-back distances for wipes or mistakes.
- Final boss has crystal mechanics that require movement speed to break and reduce overall group damage.
Motherlode feels nostalgic. First half is packed with big pulls including Peacekeepers that have ground effects. Tanks can stack up multiple packs if cooldowns are well Timed. Second half near the final boss Mogul Razdunk has frequent knocks and swirlies that makes targeting for DPS tricky. After the boss changes, the final encounter is a faster reactive movement to avoid high damage intervals.
Rookery feels fast if no mistakes happen. Each boss has direct paths but the big drawback is the long run-back that eats up timer minutes after mistakes. Healers need to manage unpredictable group damage in certain trash clusters especially before the last boss. I come back to this instance because the three boss format is appealing for groups that want a shorter challenge but the success rate drops if people fail to coordinate interrupts or positioning.
C-Tier Dungeons: Cinder Brew
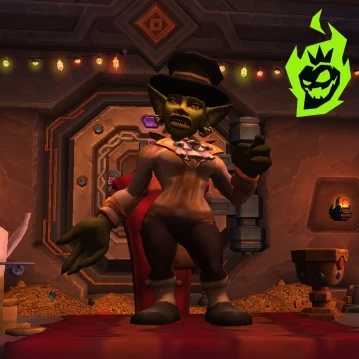
Cinder Brew is C-tier because it’s a place where DPS enthusiasts can get big AoE action. The instance is full of wide pulls but also has high group damage and many partial immunities. Healers get stressed intervals and tanks are at the mercy of random fixate abilities.
Detailed Notes on Cinder Brew
| Feature | Observation |
|---|---|
| First Area | Huge multi-pulls with minimal kicking requirements for DPS, but fixates and heavy auto-attacks. |
| Second Boss | Known as IPA, spawns multiple adds that gain speed once they enrage, leading to intense bursts. |
| Final Boss | Baron Bottom, extremely high HP and AoE intervals that press the healer’s resource management. |
Cinder Brew feels like a busy brewhouse overrun by ogres and spirits. Early trash has huge packs that don’t cast many spells but have fixate mechanics that require movement. Tanks will get pounded if group crowd control is not used. IPA is interesting for a well-coordinated group because the smaller adds spawn randomly. The goal is to keep them away from the boss or damage skyrockets. On PTR, the final boss Baron Bottom was a healing gauntlet where many attempts ended in timeouts once group resources were depleted.
Despite the drawbacks Cinder Brew sometimes rewards classes with AoE or consistent multi-target throughput. If you like big packs and constant action you might enjoy it. But this instance requires high situational awareness from healers who need to watch for stacked debuffs and random jumps that can cause chaos with uncoordinated groups. Ultimately Cinder Brew ranks below most others because of its wild design and punishing boss transitions.
D-Tier Dungeons: Priory of the Sacred Flame
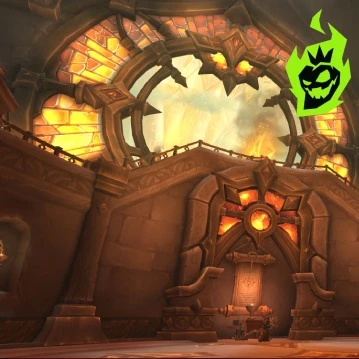
Priory of the Sacred Flame is at the bottom of this tier list because of trash group design, forced mini-boss sequences and a timer that feels unforgiving. Many caster mobs randomly target players and drop traps and move across the battlefield. Tanks spend time chasing archers or sharpshooters to keep them grouped only to see them jump away again.
One of the biggest problems is accumulating the correct trash percentage before entering the cathedral area. Some groups end up short on trash if they rush too fast and have to backtrack for minutes. Mini-bosses spawn illusions that wander the corridors and each one links to the first boss’ creation phase. That’s fun in theory but each of these mobs has high health and group damage, so it’s slow paced early on.
Priory of the Sacred Flame has some cool boss visuals but the annoyance from multiple disengaging sharpshooters and overall route inconvenience puts it in D-tier. My times here are 38-40 minutes because the group has to adapt all the time and deal with mechanics that punish any misinterrupted or mispositioned. I run it once for loot or rating and then avoid it unless absolutely necessary. Despite the design flaws it’s still unique for those who want something off the beaten path.
My Opinion on The War Within Season 2 Dungeons

I hope this tier list gives you a straight up view on how TWW Season 2 dungeons are. Mechagon Workshop is at the top, middle range has Motherlode and Rookery and Priory of the Sacred Flame is last for many reasons. Each dungeon can become more or less popular once the official release comes and balance changes are rolled out. Until then I’ll be refining routes, adjusting crowd control and looking for updates that might change this ranking. If you want a sweaty run with lots of pulling my suggestion is Mechagon Workshop but if you like a dynamic multi-wing layout Theater of Pain is where you should queue next. Good luck in your M+ and enjoy TWW Season 2!
