Genshin Impact Healer Characters Tier List 2025: Ultimate Guide
Since Mondstadt’s auto-attacks and Barbara’s HP regen, healing has become a fundamental part of team composition. New regions like Fontaine and Natlan introduce elemental corrosion, AOE burst damage and status effects that punish an unprepared team. After hundreds of hours of Abyss runs, world boss attempts and co-op exploration I’ve tested every healer’s Elemental Skill, Skill uptime and Healing Bonus.
This tier list, updated for April 2025, ranks each support based on raw healing, secondary utility and team synergy.
There’s no shame in seeking outside help when survival thresholds feel impossible. ChaosBoost boosting services step in precisely at those frustrating moments—whether it’s Abyss 12 or Fontaine domains without remaking your entire team. While I usually prefer solo mastery, knowing expert assistance exists gives me real peace of mind during critical content.
The Crowned S-Tier Healers
At the top of the Genshin Impact support roles, S-Tier healers give massive HP recovery, shielding and reaction triggers. These units will keep you sustained on high level Spiral Abyss floors, world boss battles and late game events.
| Character | Vision/Weapon | Healing Output | Secondary Benefits |
|---|---|---|---|
| Baizhu | Dendro Catalyst | Burst and Skill heal scaling off max HP. Continuous healing ticks. | Generates Dendro shields; enabler for Bloom/Quicken reactions; DMG reduction. |
| Kokomi | Hydro Catalyst | Bake-Kurage regen per auto-attack plus Skill regen ticks when on field. | Stable Hydro application; Ocean-Hued Clam synergy forming DMG bubbles; interruption-proof. |
| Sigewinne | Hydro Bow | Low-cooldown AoE heal on Skill and Burst; rapid healing frequency. | Fontaine Ousia support; cleanses status; constant emergency healing rounds. |
| Xianyun | Anemo Catalyst | Burst AoE heal scaling on ATK; Skill provides minor regen over time. | Anemo swirl debuff on enemies; plunge buffs; crowd-control pull with Skill. |
I’ve used Baizhu in hyper-aggressive Bloom teams where his shields absorb over 12k DMG and heal 20% team HP every second. Kokomi is still essential in Freeze and Hyperbloom setups, surviving multi-hit boss patterns without flinching. Sigewinne revolutionized Hydro support by refreshing healing fields every 8 seconds so my DPS units can go full throttle. Xianyun, with her burst-linked Anemo swirl, not only heals but also guarantees reaction procs and minor crowd control.
| Character | Vision/Weapon | Healing Output | Secondary Benefits |
|---|---|---|---|
| Jean | Anemo Sword | ATK-based Burst instant full-party heal; passive heal on normals. | Swirl shred for Viridescent Venerer; cleansing burns/freeze; multi-particle generation. |
| Yaoyao | Dendro Polearm | Skill radishes heal periodically; Burst delivers rapid AoE healing. | Dendro application for Bloom; mobile off-field support; minor cleanse on skills. |
Jean’s Dandelion Breeze Burst heals up to 18k HP and then any further normals heal nearby allies making her clutch during intense boss AOE phases. Yaoyao excels in Bloom comps—her passive radish bunnies follow my characters and heal up to 15% max HP each tick while applying Dendro. Together S-Tier healers form an elite group that guarantees survivability under the harshest conditions.
Reliable A-Tier Healers

A-Tier supports provide strong sustain but require specific builds or rotation awareness. They do well in most domains and Abyss floors when managed correctly.
| Character | Vision/Weapon | Healing Style | Drawback |
|---|---|---|---|
| Qiqi | Cryo Sword | Healing talismans on hits; Burst heals entire party based on ATK. | Low energy particle generation; no offensive buffs. |
| Furina | Hydro Sword | Pneuma skill heals active character based on HP thresholds. | Healing linked to HP swings; no burst AoE heal. |
| Charlotte | Cryo Catalyst | Burst yields AoE healing field; Skill grants instant minor heals. | High ER% requirement for frequent Burst uptime. |
| Diona | Cryo Bow | Shield via Skill; Burst heals over time in an AoE zone. | Healing ticks modest; dependent on proper placement of shield and field. |
Qiqi’s talismans remain legendary for single-target emergencies—hitting for 8k HP every 0.5s. I typically pair her with an Electro battery to maintain Burst uptime. Furina introduces an innovative playstyle, where healing emerges through Pneuma toggling and offers team buffs based on HP loss; mastering her timing yields consistent survival plus damage boosts. Charlotte requires an Energy Recharge-focused artifact build—once that threshold is met, her Cryo field keeps everyone topped off through multi-wave enemy encounters. Diona doubles as a shielder and healer, often stopping a wipe by mitigating burst hits before her field outheals residual damage.
Situational B-Tier and Niche Picks

B-Tier healers operate under restrictive conditions or require constellation investment to match higher tiers. They’re worth considering when built specifically for certain team archetypes or exploration content.
- Barbara (Hydro Catalyst): Raw Burst heal up to 20k HP but Wet status risks Freezes.
- Sayu (Anemo Claymore): Skill rolls for heals based on attack triggers; RNG-based Burst healing.
- Mika (Cryo Polearm): Post-Burst state adds minor heal on hits; primary value as Physical DPS buffer.
- Dori (Electro Claymore): Tethered healing and energy regen; limited by proximity to lamp.
- Chevreuse (Pyro Polearm): Party-wide healing only after C6; pre-C6 heals just active character.
- Noelle (Geo Claymore): Healing tied to DEF and active field hits; inconsistent unless shield is always up.
- Xingqiu (Hydro Sword): Passive heal when Rain Swords expire; trivial amounts.
- Zhongli (Geo Polearm, C6): Shield absorb heals active character; requires max constellation.
Barbara is a beginner staple—her free-to-play viability is undeniable—but later content often punishes her self-apply Wet status. Sayu’s swift roll heals aid exploration, yet her AoE healing lacks consistency under high-pressure boss DPS. Mika and Dori shine in specialized comps—Mika in Physical teams like Razor/Eula, Dori in Electro infusion scenarios—but neither replaces an S-Tier healer for boss recovery. B-Tier Conclusion: These characters may fill gaps early or in niche squads, but their limitations become apparent when faced with enduring Abyss bursts or Natlan’s brutal mechanics.
Recommended Artifact Sets for Healers

Maximizing Healing Bonus, Energy Recharge, and HP% is key to unlocking a healer’s full potential. The right artifact four-piece synergy amplifies both regen and occasional support DMG.
| Artifact Set | 2-Piece Bonus | 4-Piece Bonus | Top Users |
|---|---|---|---|
| Ocean-Hued Clam | Healing Bonus +15% | Creates DMG bubble equal to 100% of healing amount every 3s | Kokomi, Sigewinne, Baizhu |
| Maiden Beloved | Healing Bonus +15% | After Skill/Burst, party healing received +20% for 10s | Jean, Barbara, Charlotte |
| Noblesse Oblige | Burst DMG +20% | Using Burst increases party ATK by 20% for 12s | Jean (burst healing focus) |
| Vourukasha’s Glow | HP +20% | After HP changes, Skill/Burst DMG +12% for 10s | Furina, Baizhu |
Out of all sets, Ocean-Hued Clam stands out by combining pure healing with burst DMG output—my Kokomi build’s DMG bubbles hit 35k each, clearing Abyss trash waves while granting continuous regen. Maiden Beloved is a straightforward choice when maximizing Healing Bonus for pure support builds. Artifact Conclusion: Prioritize Healing Bonus% and ER% in sub-stats to keep your healer’s Skill and Burst uptime high, and HP% main stats for large raw heals.
Top Healer Builds: Weapons, Stats, and Talents

Weapon, Talents, and sub-stats define a healer’s usability in every situation. Below are the meta builds for the top S-Tier supports.
| Character | Best Weapon | Artifact Main Stats | Talent Priority |
|---|---|---|---|
| Baizhu | Calamity Queller (5★) | HP% / Healing Bonus% / ER% | Burst > Skill > Normals |
| Kokomi | Everlasting Moonglow (5★) | HP% / Healing Bonus% / ER% | Skill > Burst > Normals |
| Sigewinne | Aquatic Harmony (4★) | ER% / HP% / Healing Bonus% | Burst > Skill > Normals |
| Xianyun | Favor of the West Wind (4★) | ATK% / ER% / Healing Bonus% | Burst > Skill > Normals |
| Jean | Skyward Blade (5★) | ATK% / ER% / Healing Bonus% | Burst > Normals > Skill |
| Yaoyao | Staff of Homa (5★) | HP% / Dendro DMG Bonus% / ER% | Skill > Burst > Normals |
My personal Baizhu build reaches over 36k HP and 180% Healing Bonus, topping allies with 12k HP every 2s in Bloom comps. Kokomi with 280% Healing Bonus and 60% ER% transforms into a damage-soaking frontline, never interrupting her regen cycle. Sigewinne at C1 uses a 4★ Aquatic Harmony to refresh her healing field every 6s, making her uptime feel nearly infinite. Healer Builds Conclusion: Ensuring high Healing Bonus%, sufficient Energy Recharge, and maximizing primary stats for each weapon slot is essential to wield true healing power in endgame content.
Optimal Spiral Abyss Healer Team Compositions
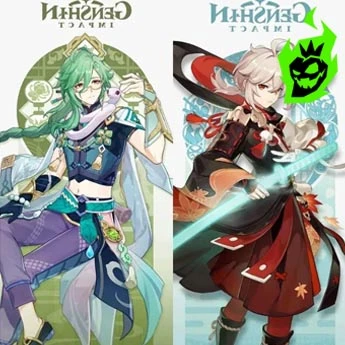
Building an Abyss team is more than just picking a healer; it requires synergy among reaction enablers, energy batteries, and healing cycles. Below are top healer-centric Abyss comps for 2025 endgame.
- Baizhu + Nahida + Tighnari + Candace
Baizhu shields and heals, Nahida triggers Spread/Burgeon, Tighnari deals ranged Dendro DMG, Candace provides Pyro resonance and off-field heals. - Sigewinne + Furina + Wanderer + Raiden Shogun
Sigewinne’s healing field overlaps with Furina’s Pneuma buffs, Wanderer’s Anemo swirl amplifies all, Raiden provides energy and burst DMG. - Kokomi + Eula + Dori + Bennett
Kokomi keeps Eula alive through heavy physical bursts, Dori’s tether adds backup regen, Bennett’s Field delivers HP ticks and huge ATK buff. - Jean + Hu Tao + Zhongli + Xingqiu
Jean burst heals and swirls Cryo, Hu Tao delivers high single-target DMG, Zhongli shields against overloads, Xingqiu supplies minor heals and Hydro application.
Each comp has staggered healing windows—Skill to trigger field, Burst to reset HP, and passive regen between rotations. I’ve gotten 9-star clears by timing healer bursts on enemy enrage timers and using shields to absorb multi-hit combos.
Choosing Your Healer: Key Factors to Keep in Mind

Choosing a healer goes beyond raw numbers; it’s about team synergy, rotation complexity, and survivability margins. These factors guide your decision when planning for Abyss, world bosses, or co-op.
- Healing Output vs. Cooldown
Compare total HP per second against skill cooldown duration. Higher burst heals may excel in instant recovery, while continuous regen aids sustained fights. - Elemental Synergy
Match healer Vision with team reactions—Hydro for Freeze/Bloom, Dendro for Quicken/Burgeon, Anemo for swirl-stacking. - Energy Requirements
Estimate particle generation and ER% sub-stats needed. Characters with low particle yield benefit from a dedicated battery support. - Secondary Utility
Prioritize shields, debuffs, or buffs alongside healing. A healer who shields or triggers reaction debuffs improves overall team resilience. - Field Time Demands
Healers requiring constant on-field presence risk losing DPS uptime. Off-field healers often integrate more smoothly into high-pressure rotations.
Consider these factors against your current roster and artifact pool to choose the best healer for your goals. Review team logs or combat replays to spot healing cooldown gaps or energy shortfalls.
Final Reflection on Healers in 2025

Healers have become the linchpin of high-end content, combining HP recovery with elemental reaction control, buff generation and shielding. From Baizhu’s layered Dendro shields to Kokomi’s uninterrupted Hydro regen, modern healers do more than just fill up HP bars. Their designs require skill timing, rotation knowledge and thoughtful artifact builds.
If you’re tackling Spiral Abyss 12-3 or Fontaine events, you need at least one S-Tier healer. But A-Tier and niche supports fill unique roles, especially in specialty or hybrid teams. My advice: try out field showcases in the Serenitea Pot or training domains to practice rotation and healing overlap before diving into endgame content. With this tier list, you’re ready to choose, build and master the perfect healer for your next Genshin Impact adventure. May your HP bars stay green and your primogems be ever plentiful!


